We are reader supported. When you purchase through links on our site, we may earn an affiliate commission. Also, as an Amazon affiliate, we earn from qualifying purchases.
Great wings are evenly coated, taste bright, and stay crisp. The secret is not only the sauce recipe but how you toss. This guide shows you the tools, setup, and methods that keep the skin crunchy while locking in flavor. Follow the steps and you will toss cleanly, coat evenly, and avoid soggy wings and sticky counters.
Introduction
Tossing wings in sauce is simple once you understand heat, timing, and surface moisture. Warm sauce grips. Dry skin stays crisp. Room inside the bowl matters. Use the right ratio and a clean workflow. You can do this in a small kitchen with basic tools. Start with a clear setup, then apply one of the methods below and finish with smart cleanup.
What You Need
Tools
Use a large stainless steel or glass mixing bowl with high sides. Have tongs for control. A lidded container helps if you want a shake method with less mess. Keep a wire rack set over a sheet pan for resting. Paper towels or clean kitchen towels handle moisture. A small saucepan warms or reduces sauce. Heatproof gloves help when tossing hot wings.
Sauce
Any sauce works if it clings. Butter based hot sauces, sticky glazes like honey garlic, and soy or gochujang blends perform well. Thick sauces may need thinning with a splash of water or stock. Thin sauces may need a short simmer to reduce. Salt, acid, and a little fat improve flavor and grip on the skin.
Wings
Baked, air fried, smoked, or fried wings all toss well. The critical point is a dry surface and hot meat. If the skin is wet or the wings are cold, the sauce slides off and the skin softens. For baked or air fried wings, finish until the skin is golden and feels dry to the touch before tossing.
Prep For Perfect Toss
Dry The Wings
Pat cooked wings with paper towels if needed. Rest them for 2 to 3 minutes on a wire rack. Moisture on the surface is your enemy. A dry surface grips sauce and resists sogginess. If you baked or air fried, keep them on the rack for airflow while you heat the sauce.
Warm The Sauce
Warm sauce clings; cold sauce shocks the skin and dulls flavor. Heat the sauce until warm and fluid, about 60 to 70 C or 140 to 160 F. Do not boil unless you are reducing to thicken. If the sauce separates, whisk or blend it smooth. Keep it warm while you prepare to toss.
Choose The Right Vessel
Pick a bowl at least twice the volume of your wings. High sides give you room to flip without spills. If you prefer a lid and shake method, use a sturdy container with a tight lid. Avoid thin plastic bags for very hot sauce, and avoid flimsy bowls that flex when you flip.
Set Up A Tossing Station
Place a sheet pan with a rack next to your bowl. Set folded towels nearby. Keep a small ladle or spoon for portioning sauce. Clear the counter so you have a clean toss lane. This simple setup keeps your kitchen tidy and makes fast work of big batches.
Core Tossing Methods
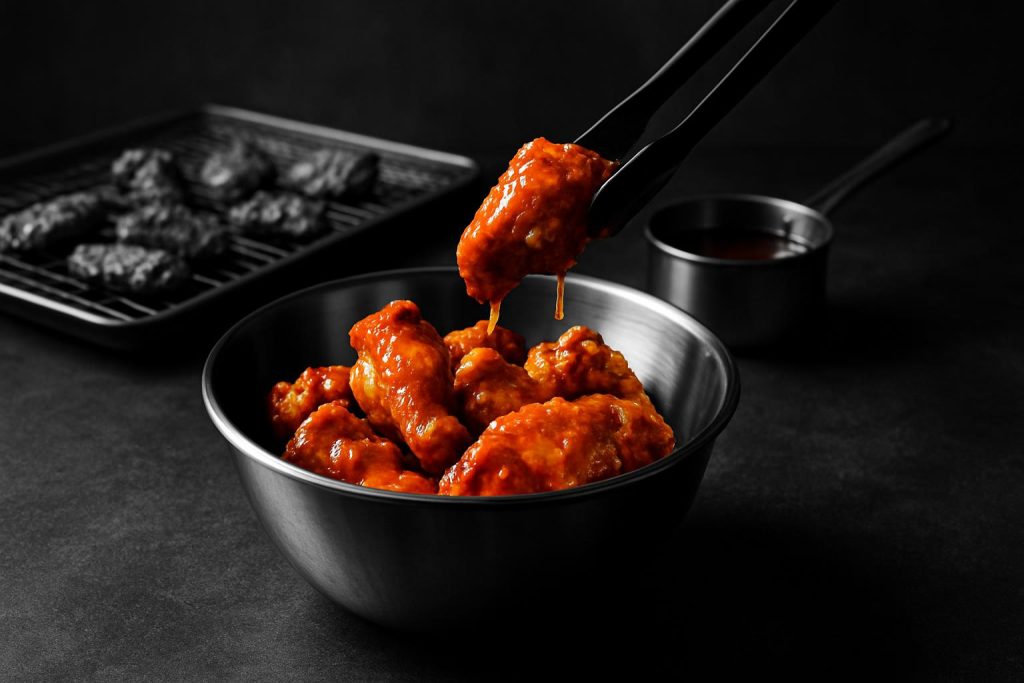
Classic Bowl Flip
Add warm wings to the bowl. Spoon in a measured amount of warm sauce. Hold the bowl with both hands at a slight angle. Use a forward and up wrist motion to lift the wings so they slide up the far side and fall back through the sauce. Repeat 5 to 8 flips until coated. Add a touch more sauce only if needed. Transfer to the rack to set the coat for 1 to 2 minutes.
Lid And Shake
Place wings and sauce in a sturdy container. Seal the lid. Hold with both hands and shake in short, controlled motions for 10 to 15 seconds. Open and check coverage. Add a small splash of sauce if needed and shake again. Vent the lid away from your face to release steam. Move wings to a rack to rest.
Bag Toss
Use a heavy duty food bag. Add wings and a small amount of sauce. Seal with some air inside. Gently roll and tumble to coat, then shake lightly. This works well for small portions. Check for leaks before you start and avoid piping hot wings if the bag is thin. Transfer to a rack right away.
Pan Glaze Toss
For sticky glazes, reduce the sauce in a skillet until it thickly coats a spoon. Add hot wings to the skillet. Toss with tongs to coat, keeping the heat low to avoid burning sugar. Once coated, move to a rack so the glaze sets and stays glossy.
Step By Step Ratios And Timing
Sauce To Wing Ratios
For most sauces, start with 60 to 90 milliliters per 450 grams of wings, or 4 to 6 tablespoons per pound. Thin sauces need a bit less. Thick or chunky sauces may need more to coat evenly. Always add sauce in stages. You can add more, but you cannot take it back.
Tossing Sequence
Stage one is a light coat. Add half your target sauce amount, toss, and let the wings sit on a rack for 60 seconds. This first coat bonds to the skin. Stage two adds just enough sauce to shine, then a brief rest again. This two stage approach builds flavor and keeps texture.
Keep Them Crisp
Start with hot wings. Warm sauce. Dry surface. Toss fast. Rest on a rack. If the wings soften, return them to a hot oven at 220 C or 425 F for 2 to 4 minutes to re crisp, then apply a quick final drizzle in the bowl for shine. Do not trap wings under foil, since steam ruins skin.
For Sticky Glazes
Reduce glaze until it bubbles slowly and looks syrupy. Turn off the heat. Add wings and toss, letting residual heat coat them. Thickening the sauce before tossing prevents puddles and gives that lacquered finish. If it gets too thick, loosen with a small splash of hot water and toss again.
Troubleshooting
Sauce Slides Off
Check moisture and temperature. Pat the wings dry. Warm the sauce. If the wings are greasy, the sauce may repel; blot with towels and use a sauce with some acid to cut the fat. If using a very thin vinegar sauce, reduce slightly or add a little butter to help cling.
Wings Get Soggy
You likely used too much sauce or trapped steam. Use the two stage coat. Rest on a rack, not a plate. Keep batches small so the sauce does not pool. Re crisp in a hot oven if needed, then finish with a light toss.
Uneven Coating
Your bowl is too small or you added sauce too fast. Upgrade to a larger bowl. Add sauce in portions and toss between additions. For chunky sauces, chop or blend chunky bits smaller so they distribute better.
Sauce Too Thick Or Thin
If too thick, warm and thin with water, stock, or a splash of vinegar for brightness. If too thin, simmer to reduce until it lightly coats a spoon. Taste and adjust seasoning after reducing, since salt and heat concentrate.
Flavor Boosters And Variations
Finishing Touches
After tossing, add micro adjustments. A squeeze of lemon or lime wakes up heavy sauces. Fresh herbs like chives, parsley, or cilantro add freshness. Toasted sesame seeds or crushed peanuts add texture. Scallions brighten savory sauces. A dash of chili flakes or black pepper adds heat without extra sauce.
Dry Rub Plus Sauce
Season wings with a light dry rub before cooking. After cooking, toss with a restrained amount of sauce. The rub builds a base layer of flavor and texture so you can use less sauce and keep the skin crisp.
Heat Management
To tame heat, blend in melted butter, honey, or a touch of mayonnaise into the sauce before tossing. To raise heat, add a concentrated chili paste or cayenne. Adjust in small increments, toss, taste, and repeat.
Batch Cooking And Serving
Scaling Up
Toss in small batches for control, then combine on the rack. Keep tossed wings warm on a rack in a 95 C or 200 F oven while you finish the rest. This prevents steam build up and keeps the coat intact.
Party Flow Setup
Plan a simple sauce lineup. Keep sauces warm in small saucepans or insulated containers. Set a large bowl for tossing and a second bowl for final drizzles. Place a labeled rack and pan for each sauce to prevent mixing. Keep rolls of paper towels and a small trash bin near the station.
Plating Without Mess
Let wings rest on the rack for 1 to 2 minutes after tossing. Transfer to a warm platter. Garnish lightly and serve with dips on the side, not on the wings, to protect the coat. Refresh with a quick extra drizzle only if the wings look dull.
Cleaning And Organizing Tips
Prevent Sticky Cleanup
Line sheet pans with foil or parchment before cooking or resting wings. Lightly oil the rack so glaze does not weld to it. After tossing, fill the mixing bowl with hot water right away to loosen sauce. Wipe counters while sauce is still warm and easy to remove.
Degreasing Steps
For stubborn sauce, soak tools in hot water with a drop of dish soap for 10 minutes. Sprinkle baking soda on greasy spots, then scrub with a soft brush. For caramelized sugar, pour hot water into the pan and bring to a quick simmer to lift residue, then wash. Avoid harsh pads that scratch nonstick surfaces.
Storing Leftovers And Sauce
Cool wings on a rack, then store in a shallow container. Keep leftover sauce separate. Most cooked wings keep 3 to 4 days in the fridge. Reheat wings on a rack in a hot oven until crisp, then toss with warm sauce just before serving. This two step reheat keeps skin from turning limp.
Kitchen Workflow
Before you cook, gather sauce, bowl, rack, and towels. Clear a landing zone for hot wings. Keep trash and towels on your dominant side. When you finish tossing, transfer wings, then at once fill the bowl with hot water to soak. This sequence keeps the counter clean and speeds cleanup.
Simple Wing Tossing Playbook
Cook wings until the skin is golden and dry. Warm the sauce until fluid. Set a large bowl and a rack over a sheet pan. Add wings to the bowl and pour in half the sauce. Toss with the classic bowl flip until coated. Rest on the rack for one minute. Add a small amount of sauce and toss again. Rest briefly, then serve. If the coat softens, re crisp in a hot oven and finish with a light final toss.
Frequently Asked Questions
Should I toss before or after cooking
Always toss after cooking for crisp skin. Tossing before cooking traps moisture and burns sugars.
Can I toss frozen wings
Cook from frozen only if your method allows, then dry the surface in a hot oven and toss with warm sauce. Never toss icy wings since water thins the sauce.
What if I have no large bowl
Use a clean pot with high sides. You can also do a pan glaze toss by reducing sauce and coating wings in the skillet.
How do I keep mild and hot batches separate
Use separate bowls and racks. Color code towels or place sauces on different sides of the stove to avoid mixing.
Conclusion
Successful wing tossing comes down to four rules. Keep wings hot and dry. Warm the sauce. Use the right vessel with room to move. Add sauce in stages and rest on a rack. With these basics, any sauce style works and cleanup stays easy. Set up your station, pick a method, and run the simple two stage toss. Your wings will come out evenly coated, bold in flavor, and satisfyingly crisp, every time.