We are reader supported. When you purchase through links on our site, we may earn an affiliate commission. Also, as an Amazon affiliate, we earn from qualifying purchases.
Hot Pockets are fast and satisfying, but the default microwave method can leave them soggy outside and cold inside. With a few simple tweaks, you can get a crisp crust, a gooey center, and better flavor every time. This guide gives beginner friendly steps you can use today, with clear reasons behind each tip so you can pick the best method for your kitchen.
Start With the Right Heating Method
Microwave Done Right
The microwave is the fastest route, but uneven heating is common. Lower power and better airflow fix most issues. Use 50 to 70 percent power so heat penetrates to the center without drying the edges. Add 30 to 60 seconds to the time compared to full power and let it rest 2 to 3 minutes before eating. Resting allows heat to redistribute and the crust to firm up.
Elevate the Hot Pocket on an inverted small bowl or a microwave safe rack. Air under the crust reduces sogginess. Place a mug of water in the microwave alongside it. The steam buffers harsh microwave energy and helps prevent tough edges.
Rotate the Hot Pocket halfway through. If your microwave does not rotate, turn the plate 180 degrees. Flip the Hot Pocket once to even the bottom and top heat. Use the crisping sleeve in the microwave only, never in the oven or air fryer.
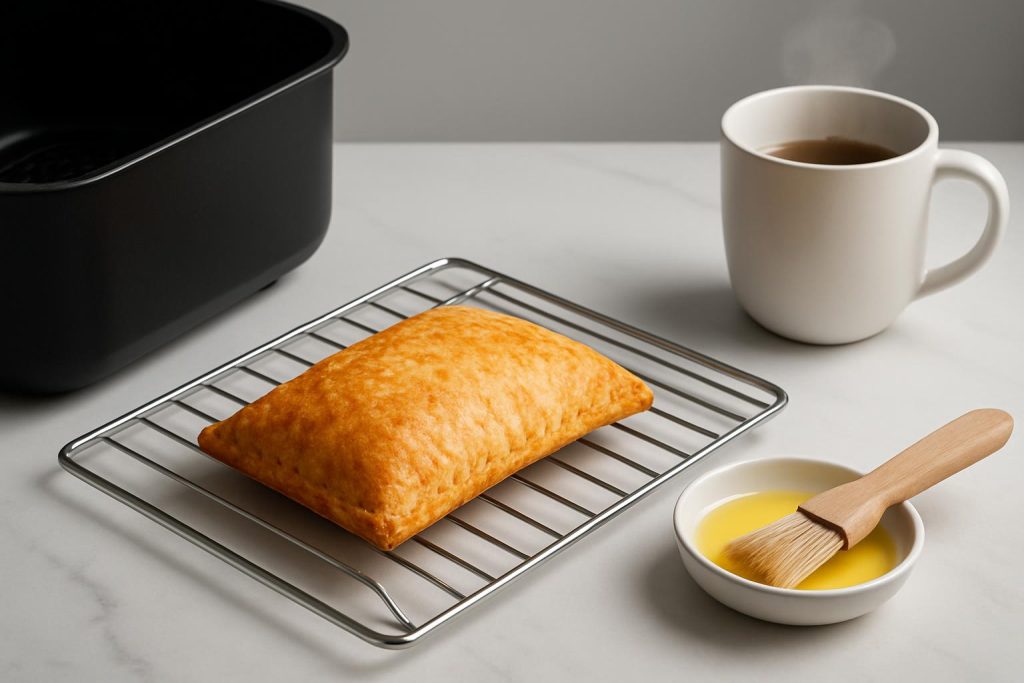
Air Fryer For Crisp
The air fryer produces a firm, golden crust with less fuss. Preheat to 360 to 380 F. Do not use the sleeve. Arrange the Hot Pocket with space around it for airflow. From frozen, cook 8 to 10 minutes, flipping at the halfway mark. If the center lags, reduce to 320 F and cook 2 to 3 minutes more. For extra color, brush the crust with a tiny amount of oil before cooking.
Check for doneness by pressing the center gently. It should feel hot and soft. Let it rest 2 minutes to finish carryover heating and avoid molten filling burns.
Oven and Toaster Oven
If you want bakery style texture, the oven or toaster oven gives the most even results. Preheat to 400 F with a sheet pan already inside so the surface is hot. Place the Hot Pocket directly on the hot pan or on a small wire rack set over the pan. Skip the sleeve. Bake 22 to 28 minutes from frozen, depending on your oven and the filling density. For extra crunch, turn on broil for 60 to 90 seconds at the end. Watch closely to prevent scorching.
For toaster ovens, use the rack position that centers the Hot Pocket in the heating zone. A piece of parchment under it makes cleanup simple and prevents sticking, but leave the edges exposed for airflow.
Skillet or Panini Press
A skillet or press browns the crust and adds a slight toast flavor. Start from partly thawed for even heating. Rest the frozen Hot Pocket on the counter 10 to 15 minutes or defrost in the microwave at 30 percent power for 2 to 3 minutes until pliable but still cold. Preheat a nonstick skillet on low medium with a small dab of butter or a light spray of oil. Place the Hot Pocket seam side up, cover with a lid to trap heat, and cook 4 to 6 minutes per side. Press gently with a spatula or use a panini press to flatten slightly for uniform contact. If the crust browns before the center is hot, lower the heat and cover for another few minutes.
Fix Soggy or Dry Problems Fast
Avoid a Soggy Bottom
Soggy crust comes from trapped steam. Elevate the Hot Pocket on a rack or inverted bowl in the microwave. In the oven or air fryer, cook on a wire rack set over a pan so moisture can escape. If using only the microwave, place a folded paper towel under the sleeve to wick moisture. Leave a small gap at one end of the sleeve so steam can vent.
End the Cold Center
Cold centers happen when the outside heats too fast. Reduce microwave power to 50 to 70 percent and extend cook time slightly. Let it sit 2 to 3 minutes after cooking. Lightly pierce the top with two small vent holes using a toothpick before cooking. Heat can reach the center faster and pressure will not build unevenly.
Prevent Dry Edges
Edges dry out from overexposure. Brush the crust lightly with milk, water, or oil before oven or air fryer cooking. In the microwave, use a mug of water to humidify the cavity. If the crust edges brown early in the oven, tent them loosely with a small strip of foil for the last few minutes.
Quick Flavor Upgrades Before Heating
Season the Crust
A light brush with melted butter and a pinch of garlic powder gives a savory finish. Italian seasoning or oregano adds aroma that matches pizza flavors. For breakfast versions, use a maple butter brush with a crack of black pepper. Sprinkle a tiny pinch of kosher salt on top if your variety tastes bland, but be careful with high sodium fillings.
Cheese Toppers
Grate Parmesan or low moisture mozzarella on top for the last 2 to 3 minutes in the oven or air fryer. The cheese will melt and brown lightly, adding both flavor and texture. In a microwave only setup, cheese will not brown, so save it for a quick skillet or broiler finish.
Crunch Additions
Dust the outside with fine cornmeal before oven or skillet cooking. It gives a light, pizzeria style grit. Everything bagel seasoning works well on ham and cheese or turkey varieties. Press it gently into a thin butter layer so it adheres.
Simple Add Ins After Heating
Freshness Boost
Slice the Hot Pocket open along the seam and add a handful of baby spinach, chopped basil, or sliced green onion. The heat wilts greens slightly and adds freshness that cuts through richness.
Extra Filling, Minimal Mess
Slide in a thin slice of provolone or pepper jack and close it for 30 seconds so it melts from residual heat. Add pickled jalapeños for acid and heat. Spoon in a tablespoon of leftover cooked chicken, bacon bits, or sautéed mushrooms. Do not overfill; press the edges together gently to keep the shape.
Dips and Sauces That Always Work
Classic Pairings
Warm marinara for pizza flavors. Mix ranch with a little hot sauce for creamy heat. Honey mustard brightens chicken and ham varieties. Salsa or pico de gallo pairs with beef or southwest styles.
Simple Homemade Sauces
Stir pesto with a spoon of Greek yogurt for a thicker dip. Mix mayonnaise with sriracha and a squeeze of lime for a quick spicy mayo. Combine plain yogurt, lemon juice, pinch of salt, and dried dill for a light dip that balances heavy fillings.
Texture Boosters in One Minute
Finish Under Heat
After microwaving, transfer to a preheated skillet for 60 to 90 seconds per side to crisp the exterior without drying the center. Or use an air fryer at 380 F for 2 minutes to finish. A very short broil in the oven also adds color fast.
Final Seasoning
Sprinkle grated Parmesan and a pinch of red pepper flakes. Drizzle a tiny amount of hot honey on pepperoni styles. Add a few drops of good olive oil on cheese or veggie varieties.
Batch Cooking and Serving for Groups
Plan the Flow
For multiple servings, the oven or air fryer keeps quality consistent. Stagger start times so each batch finishes within a few minutes of serving. Hold cooked Hot Pockets on a wire rack in a warm oven at 170 F for up to 15 minutes so the bottoms do not steam.
Label Flavors
Use a piece of parchment under each flavor and write the name with a food safe marker. That avoids cutting them open to check. Place sauces in small bowls with labels. People can grab and dip without crowding the counter.
Smarter Freezer Storage and Prep
Organize for Faster Meals
Store boxes upright in a bin so flavors are visible. Rotate older stock forward and place new purchases behind. Keep them in a sealed container or zip bag to reduce freezer odors sneaking into the crust. If you plan to cook one tomorrow, move it to the fridge to thaw overnight. Thawed Hot Pockets heat more evenly and get crisp with less time.
Avoid Ice Crystals
Excess frost leads to sogginess. Do not leave the freezer door open. Keep Hot Pockets away from the auto defrost vent if your freezer warms cycles. If a unit has visible crystals, brush them off before cooking.
Cleaning and Maintenance After Cooking
Microwave Cleanup
Splatter happens. Right after cooking, place a cup with equal parts water and white vinegar in the microwave and run it for 2 minutes. Steam loosens residue. Wipe the walls and door with a microfiber cloth. For stubborn spots, a paste of baking soda and water lifts debris without scratching. Use a vented microwave cover next time to prevent splatter.
Air Fryer and Toaster Oven Care
While still warm, wipe the air fryer basket with a damp paper towel, then wash with mild soap. Avoid abrasive pads. Check the heating coil area monthly and brush off crumbs when unplugged and cool. For toaster ovens, pull the crumb tray and wash it. Line the tray with a piece of foil under, not on, the heating elements to catch drips safely.
Healthier Tweaks Without Losing Comfort
Balance the Plate
Serve Hot Pockets with a simple side: chopped salad, sliced cucumbers with lemon, or roasted frozen broccoli tossed with olive oil, salt, and pepper. The added fiber helps keep you full and balances sodium.
Small Nutrition Wins
Choose a lower sodium or lean protein variety when possible. Split a large serving and add a protein rich side like Greek yogurt or cottage cheese. Add fresh vegetables inside after heating for volume without heavy calories. Drink water with citrus slices to reset the palate and reduce the urge to overeat.
Troubleshooting Cheat Sheet
If It Is Soggy
Cook on a rack, not a flat plate. Reduce moisture by elevating it in the microwave and leaving a sleeve gap for steam. Finish in a skillet or air fryer for 1 to 2 minutes.
If It Is Dry
Lower microwave power and add a mug of water. Brush edges with oil before oven or air fryer cooking. Reduce total cook time slightly and add a covered rest.
If the Center Is Cold
Defrost briefly at low power. Pierce two small vents on top. Extend cook time with lower power or lower temperature and longer time in the air fryer or oven.
If the Crust Is Floppy
Preheat pans and racks. Use a short broil or skillet finish. Do not overcrowd the air fryer basket, and avoid the sleeve outside the microwave.
If Cheese Leaks Out
Cook seam side up so filling has more space. Lower the temperature slightly and extend time. Let it rest to settle before cutting.
Step by Step Best All Around Method
Hybrid Microwave Plus Skillet or Air Fryer
This method is fast and gives the best balance of hot center and crisp exterior. Place a mug of water in the microwave. Put the Hot Pocket in its sleeve on an inverted small bowl or microwave safe rack. Microwave at 60 percent power until the crust is hot but still pale. For most units, this is about 2 to 3 minutes, but go by feel.
Transfer to a preheated skillet with a small dab of butter or to a 380 F air fryer. Brown each side 60 to 90 seconds, then let it rest 2 minutes. Season the top with a pinch of Parmesan or herbs, and serve with a warm dipping sauce.
Safety First
Heat Thoroughly
Hot Pockets should reach 165 F in the center. If you do not use a thermometer, check by inserting a knife into the center and touching the blade carefully to ensure it is fully hot. Do not leave cooked Hot Pockets at room temperature for more than 2 hours. Be careful when opening after cooking. Steam burns quickly, so let it rest.
Pro Flavor Combos to Try
Quick Pairings
Pepperoni with Parmesan, red pepper flakes, and warm marinara. Ham and cheese with Dijon butter brush and dill pickle chips on the side. Chicken bacon ranch with garlic butter brush and a sprinkle of chives. Philly cheese style with sautéed onions and peppers added after heating. Breakfast versions with maple butter and hot sauce.
Common Mistakes to Avoid
Skipping Preheat and Rest
A cold oven or air fryer leads to dry time in the heat with little browning. Always preheat. Always rest 2 to 3 minutes after cooking for even heat distribution.
Overcrowding
Too many Hot Pockets at once reduce airflow and cause soggy results. Leave space in the air fryer and on oven racks. Cook in batches for better texture.
Using the Sleeve in the Wrong Appliance
The sleeve is for the microwave only. Do not use it in the oven, toaster oven, or air fryer. It can burn or block airflow.
Budget and Time Savers
Cook Once, Finish Fast
If you need to feed a few people fast, microwave each at lower power until hot but pale, then finish all together in the air fryer or under the broiler for 1 to 2 minutes. Everyone gets a crisp crust at the same time, and you save total minutes.
Use Pantry Seasonings
Garlic powder, onion powder, oregano, smoked paprika, and black pepper can transform a plain Hot Pocket. Start with a small pinch on the crust before cooking, then adjust to taste after.
Conclusion
Make Every Bite Count
Better Hot Pockets come down to even heat, smart airflow, and simple flavor upgrades. Lower microwave power and elevate for less sogginess. Use the air fryer, oven, skillet, or a quick hybrid finish for a crisp exterior. Add a brush of butter, a pinch of seasoning, or a fast sauce to unlock big flavor with almost no effort. Keep your microwave and air fryer clean, organize your freezer for easy access, and rest the Hot Pocket before you bite. With these steps, you turn a quick snack into a satisfying, reliable meal any day of the week.