We are reader supported. When you purchase through links on our site, we may earn an affiliate commission. Also, as an Amazon affiliate, we earn from qualifying purchases.
A home coffee station turns morning chaos into a simple routine. It saves counter space, cuts clutter, and makes brewing faster. You do not need a big kitchen or a big budget. You need a clear plan, a good layout, and a few smart storage moves. Use the ideas below to build a station that fits your space and your beans, then keep reading for layouts, builds, styling, and maintenance you can follow today.
What A DIY Coffee Station Does For You
It gathers brewing gear in one spot so you stop hunting for filters or mugs. It protects surfaces from heat and spills. It creates a clear workflow from beans to cup. It can even add light, personality, and resale appeal. Start small and scale when your habits are set.
Plan Your Spot
Pick The Location
Choose a place near your daily path. A kitchen corner, a dining room nook, a hallway landing, or a bar cart all work. If mornings are busy, keep the station out of the main cooking zone so people move freely. If you host often, place it near where guests gather.
Measure And Leave Safe Clearances
Plan at least 24 to 30 inches of width for a compact setup. Depth of 16 inches fits most drip machines and grinders without overhang. Leave 18 inches of vertical clearance above a kettle spout or espresso machine for steam and refilling. Keep 4 inches of space behind machines for cords and airflow. Maintain a 36 inch walkway in front so people can pass without jostling hot drinks.
Power And Water Basics
Use a grounded outlet rated for kitchen loads. A GFCI outlet is best near sinks. Avoid sharing the same outlet with high draw appliances like microwaves. Do not run a high watt kettle on a light duty extension cord. If water is far, keep a refill jug at the station so you do not drip across the floor. Place a silicone mat under machines to catch spills.
Pick A Station Type
Countertop Corner Station
Fast to set up and renter friendly. Use a tray to define the zone, anchor the look, and make cleaning easier. Add one shelf above for mugs and canisters to free counter space. This is the easiest place to start if you want results today.
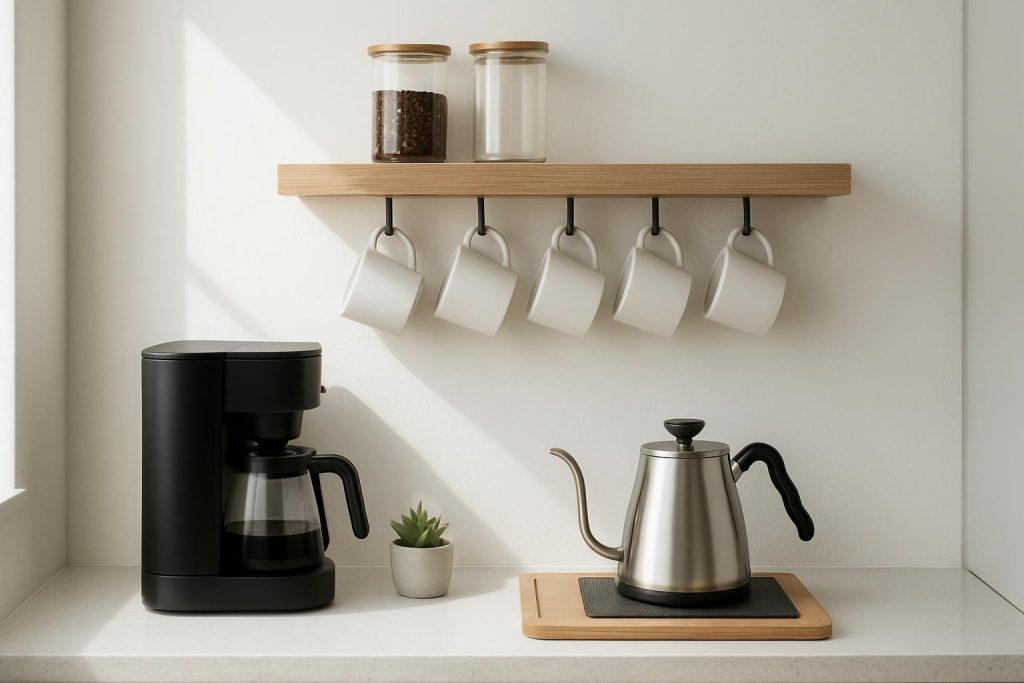
Wall Mounted Shelf Station
Perfect for small kitchens. Install two to three sturdy shelves with L brackets or a rail system. Top shelf holds beans and syrups, middle shelf holds mugs and filters, counter holds the brewer. Keep heavier items lower so the station feels stable.
Bar Cart On Wheels
Great when outlets are limited or you host often. Choose a cart with a solid top, a rail to prevent mug slips, and lockable casters. The top holds the brewer and kettle. The middle shelf stores beans and tools. The bottom shelf stores extra water and serving pieces.
Built In Cabinet Or Hutch
For a polished look. Convert a spare cabinet or a thrifted hutch. Cut cable pass through holes, add a power strip with surge protection, and line the base with a heat resistant mat. Install puck lights under the upper cabinet for visibility.
Tiny Nook Or Studio Solution
Use a fold down wall shelf or a slim console table 10 to 12 inches deep. Keep the brewer on a pull out tray inside a cabinet if you need to hide the setup. Store the grinder and beans in a drawer with dividers to keep the top clear.
Surfaces And Materials That Can Handle Heat
Choose easy to wipe and water resistant surfaces. Laminate with a square edge is budget friendly and resilient. Butcher block looks warm; seal it with food safe oil or water based poly and place a silicone mat under machines. Stone is durable but can etch with acids; use a tray. For a wall backdrop, use washable paint in satin or semi gloss, peel and stick tile, or an acrylic sheet you can wipe in seconds.
Storage That Works Every Morning
Go Vertical
Add a shelf or two above the station. Space them at 12 to 14 inches apart so mugs fit. Use a rail with S hooks under a shelf for measuring spoons and a milk frother. Mount a narrow peg rail for towels and a brush.
Divide Drawers And Bins
Use shallow bins for filters, pods, and tea. A small grid tray keeps scoops, clips, and thermometers from getting lost. Store tall bottles like syrups upright in a bin with a wipeable base.
Keep Beans Fresh
Use airtight containers with one way valve lids if you grind fresh. Label roast date and bean type. Store in a cool, dark spot; not next to the oven or a sunny window. Keep only what you will use in two to three weeks at the station and stash the rest in a pantry.
Right Size Your Mug Storage
Limit the number of mugs at the station to your daily use plus two. Hang a few under shelf hooks if space is tight. Store extras in a cabinet elsewhere to avoid clutter creep.
Add A Waste And Cleaning Zone
Place a small bin for spent pods or grounds. Keep a brush for the grinder, descaler for the machine, and microfiber cloths in a caddy. Wipe spills as they happen to protect surfaces and reduce staining.
Layout That Flows
Set Three Simple Zones
Brew zone for machine and kettle. Prep zone for grinder, beans, filters, and tools. Serve zone for mugs, milk, sugar, and syrups. Arrange left to right or right to left to match your dominant hand. Keep the most used item closest to the front edge for quick grabs.
Make Restocking Easy
Keep a backup pack of filters and beans in the lowest shelf or drawer so you never run out mid pour. Decant syrups into clear bottles with pumps and mark levels weekly. Place a water jug or pitcher within reach if you do not have a sink nearby.
Style On Any Budget
Free And Low Cost Moves
Shop your home first. Use a cutting board or a tray you already own to define the station. Repurpose clean jars for beans and sugar. Use a basket to corral cleaning cloths and filters. Move a table lamp or a clip light for instant task lighting.
Smart Mid Range Upgrades
Add two sturdy shelves and a rail with hooks. Install plug in puck lights under a cabinet. Use matching airtight canisters and simple labels. Add a small framed print or a backsplash panel to finish the wall without a full remodel.
When To Splurge
Invest in a built in if you brew daily and want a seamless look. Consider a dedicated espresso setup if milk drinks are your habit. Upgrade surfaces that take heat and moisture first; a better countertop and a wipeable backsplash give the biggest daily payoff.
Lighting And Backdrop
Task Lighting You Can Add Today
Use plug in sconces, puck lights, or LED strips under cabinets. Place lights toward the front edge so you do not cast shadows while pouring. Choose warm to neutral white for a calm morning vibe.
Simple Backdrops That Clean Fast
Paint the wall with scrubbable satin or semi gloss. Add peel and stick tile for pattern and easy wipes. Attach an acrylic sheet with removable strips for a clear splash guard. Keep grout lines minimal to cut cleaning time.
Build It Yourself: Quick Plans
Floating Shelf Coffee Station
Find wall studs and mark two shelf heights. Mount heavy duty brackets into studs and attach shelves at 12 to 14 inch spacing. Add a shallow counter shelf at about 40 inches from the floor if you need extra prep space. Drill a discreet cable pass through hole behind the brewer and route the cord to a nearby outlet. Place a silicone mat on the lower shelf to protect the wood. Add a rail under the middle shelf for mugs and tools.
Slim Console Station For Tight Halls
Choose a 10 to 12 inch deep console table. Secure it to the wall with brackets so it does not tip. Place the brewer on a tray, store beans in a narrow drawer, and mount a small shelf above for mugs. Hide cables with adhesive clips along the back leg and route to the outlet. Add a narrow bin under the console for recycling or grounds.
Upgrade A Bar Cart
Line the top with a heat safe mat. Add a power strip with surge protection mounted under the top shelf so cords stay tidy. Install a towel bar on the side for cloths. Use bottle bins for syrups and a lidded bin for filters. Lock the casters when brewing so the cart stays stable.
Convert A Cabinet Or Hutch
Remove the back panel or cut a neat opening for cable management and ventilation. Add an interior outlet if possible or route to a nearby outlet with a cord grommet. Install magnetic catches to keep doors closed. Line the base with a waterproof liner. Add under shelf lights and a small motion sensor light inside for early mornings.
Small Space Playbook
Studio Apartment
Keep the station quiet and compact. Use a manual grinder to cut noise. Pick a single serve brewer or a compact pour over stand. Store everything on a tray that slides into a cabinet when not in use. Use a fold down shelf if you cannot spare permanent counter space.
Family Kitchen
Prioritize safety. Keep hot zones out of kid reach by setting machines back from the edge and using cable clips. Store decaf and pods on a high shelf if you want to control access. Place mugs for kids on a lower shelf away from the hot zone to reduce traffic near the brewer.
Renter Friendly Setup
Use removable strips and adhesive hooks for rails and lights. Avoid drilling by using a freestanding shelf unit or a cart. Add peel and stick backsplash panels you can take down later. Leave the wall and cabinets intact.
Upgrade Your Brew And Save Time
Use a burr grinder for consistent taste. Pre dose beans into small jars for busy mornings. Keep filtered water on hand to protect machines from scale. Mark a descaling date on a calendar so you never forget maintenance and lose performance.
Maintenance And Safety
Daily wipe the tray, handles, and splash zones. Empty the waste bin. Rinse the milk frother and wipe the steam wand if you use espresso. Weekly backflush espresso machines as directed and brush the grinder burrs. Monthly descale per manufacturer guidance and inspect cords and plugs. Keep paper goods away from steam vents. Never cover vents or crowd a machine against a wall without airflow.
Troubleshooting Common Problems
Clutter returns when items have no home. Fix it by labeling bins and limiting mugs at the station. Spills stain wood when mats are missing. Fix it by adding a silicone mat and sealing wood. Early morning noise wakes others. Fix it by grinding beans the night before or switching to a manual grinder. Machines overheat when airflow is blocked. Fix it by leaving space at the back and sides and cleaning vents.
Seasonal And Guest Ready Tweaks
In summer, add glass tumblers, cold brew concentrate, and reusable straws. In winter, add cocoa, cinnamon, and a larger mug set. For guests, add a small card that explains the station layout so they can serve themselves. Refill the water and set cups in a neat row before people arrive.
Step By Step Setup In One Afternoon
Clear a spot and measure. Place a tray and your brewer. Add one shelf above and a rail with hooks. Decant beans and label. Corral filters and tools in a shallow bin. Add a small light. Test the workflow from grinder to mug and shift items until your hands move in one smooth path. Take a photo so you can reset it fast after cleaning.
Conclusion
A good coffee station follows simple rules. Keep hot work stable and safe. Store only what you use daily within reach. Protect surfaces and cords. Light the area well. Start with a tray, one shelf, and a few bins. Add pieces as your habits settle. The payoff is calm mornings, faster brewing, and a space that looks purposeful every day.
FAQ
Q: How much space do I need for a compact coffee station
A: Plan at least 24 to 30 inches of width, about 16 inches of depth, and 18 inches of vertical clearance above the brewer.
Q: What surface protects best against heat and spills
A: Use a silicone mat on top of laminate, sealed butcher block, or stone, and choose a wipeable backsplash like peel and stick tile or an acrylic sheet.
Q: How should I arrange the station for a smooth workflow
A: Set three zones for brew, prep, and serve, then arrange left to right or right to left to match your dominant hand.
Q: What is the easiest renter friendly setup
A: Use a tray on the counter, add removable hooks and puck lights, and store beans and tools in bins without drilling.
Q: How do I keep the station clutter free
A: Limit mugs to daily use plus two, label bins, and keep backup filters and beans in a lower shelf or drawer for quick restocking.