We are reader supported. When you purchase through links on our site, we may earn an affiliate commission. Also, as an Amazon affiliate, we earn from qualifying purchases.
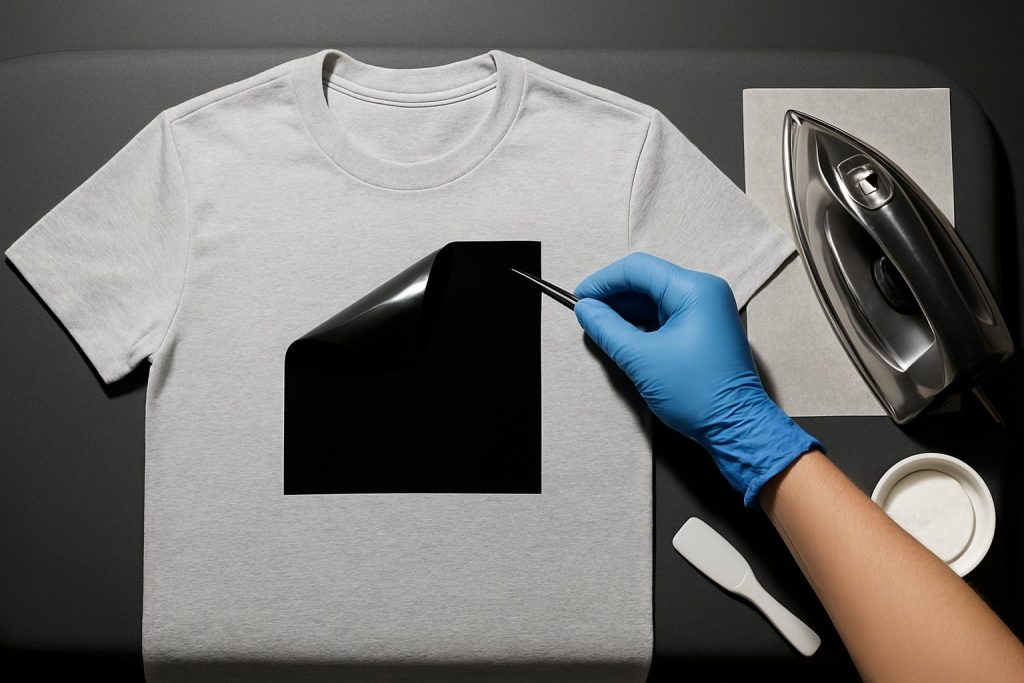
Vinyl prints can crack, peel, or simply go out of style. You can remove heat transfer vinyl from a T shirt at home with common tools and a calm step by step plan. This guide walks you through methods that work, how to protect the fabric, and how to clean up any residue so the shirt looks good again.
Introduction
Removing vinyl sounds tricky because the adhesive bonds under heat and pressure. The good news is that the same heat, plus the right solvent and technique, can reverse the bond. You will learn how to choose a safe method based on fabric type, what to do first, and how to fix the common hiccups that happen along the way.
Know Your Vinyl and Fabric
What kind of print is on your shirt
Most DIY and store bought designs are heat transfer vinyl, also called iron on. It feels slightly raised, has clean edges, and sits on top of the fabric. Some styles include standard smooth HTV, stretch HTV, glitter, and flock. Screen prints soak into fabric and are harder to remove. This guide focuses on vinyl, not screen print ink.
Why fabric matters
Cotton can handle more heat and some solvents. Polyester needs lower heat and reacts to strong solvents and high temperatures, which can cause shine marks, color shift, or melting. Blends fall in the middle. Spandex and athletic knits are sensitive to heat and chemicals. Always adapt the method to the most delicate fiber in the mix.
Safety and workspace
Work in good ventilation. Wear nitrile gloves and safety glasses when using solvents. Keep heat tools off flammable surfaces. Never mix chemicals. Rinse the garment well before switching from solvents to laundry products.
Tools and Supplies
Gather a household iron or hair dryer, parchment or baking paper, tweezers, a blunt plastic scraper or an old credit card, cotton swabs, cotton pads, a small bowl, mild dish soap, and a clean white cloth. Optional but helpful items include a garment steamer, heat resistant Teflon sheet, rubbing alcohol, 100 percent acetone or acetone based nail polish remover, a citrus adhesive remover, and a commercial vinyl remover like VLR. Use what suits your fabric and comfort level.
Before You Start
Test patch
Turn the shirt inside out. Pick a hidden seam allowance or hem. Test your planned heat level and any solvent on that spot. Look for color transfer, shine, or fabric damage. If anything changes, lower the heat or choose a milder method.
Set up the shirt
Place the shirt on a firm ironing board or a folded towel. Slide a thick cardstock or a piece of cardboard inside the shirt under the print. This blocks transfer to the back and adds support when you lift the vinyl.
Start with the least aggressive method
Heat and peel is safest. If it fails, move to controlled steam, then to mild solvents like rubbing alcohol or citrus remover, and only then to stronger solvents like acetone or a dedicated vinyl remover. This order protects your fabric and color.
Method 1: Reheat and Peel with an Iron
Use this first on cotton and cotton rich blends with standard HTV. It also works on many polyester shirts if you keep the heat moderate.
Step 1: Set the iron to medium to high for cotton, or low to medium for polyester. Turn off steam.
Step 2: Place parchment paper on top of the vinyl to protect the iron and the shirt. You can also press from the inside of the shirt with the iron while you peel the vinyl from the outside.
Step 3: Heat a small section for 10 to 15 seconds. Do not overheat. Aim for softening, not melting.
Step 4: Quickly lift a corner with tweezers while the adhesive is warm. Work the edge up carefully.
Step 5: Peel slowly at a low angle while gently stretching the fabric away from the vinyl. Reheat as needed. Short pulses of heat plus slow peeling are better than one long blast.
Step 6: Keep a plastic scraper handy for flat areas. Use light pressure to avoid scuffing the knit.
Step 7: Repeat in small sections until the vinyl is off. Do not rush. Steady progress prevents scorch marks.
Tips for stubborn corners
Lift a tiny corner and insert the tweezers under the film. Rewarm the spot for 5 seconds. Peel just a few millimeters at a time. If the film tears, switch to a fresh corner and return later.
When to stop and change tactics
If the vinyl smears, turns glossy, or fuses into fibers, reduce heat or switch to Method 3 or Method 5 to loosen the adhesive with steam or solvent before peeling again.
Method 2: Warm Up with a Hair Dryer or Controlled Heat Gun
This approach gives even heating and more control on delicate fabrics. A hair dryer on high is safer than a heat gun. If you use a heat gun, use the lowest setting and hold it farther away.
Step 1: Hold the dryer 5 to 7 inches from the print and warm one edge for 20 to 30 seconds.
Step 2: Lift the softened edge with tweezers and peel at a low angle. Apply more warm air as you go.
Step 3: For a heat gun, start at 10 to 12 inches away and move in small circles. Keep the tool moving to avoid a hot spot. Check the fabric often.
Preventing scorch marks
Place parchment over the print during heating if you see shine. If polyester looks glossy, you are too hot. Back off the heat and time.
Method 3: Steam to Soften Adhesive
Steam helps loosen the adhesive layer on thick HTV, flock, and glitter vinyls without high dry heat.
Step 1: Preheat a garment steamer or set an iron to steam. Keep a towel under the shirt.
Step 2: Apply steam to the back of the print for 15 to 30 seconds to warm the adhesive through the fabric.
Step 3: Flip the shirt and lift an edge from the front with tweezers. Peel slowly while continuing to steam the back in short bursts.
Step 4: Use a plastic scraper to help slide off residue while the area is damp and warm.
Why steam works
Moist heat softens the bond at lower temperatures, which is safer for polyester and dark colors. It also prevents shine.
Method 4: Acetone for Stubborn Adhesive and Film
Acetone dissolves the adhesive that holds HTV. Use on white or light colored cotton first. On polyester, test very carefully. Some dyes bleed or the fabric surface can dull. If your test shows any change, skip acetone and try rubbing alcohol or a commercial vinyl remover made for synthetics.
Step 1: Turn the shirt inside out. Place cardboard behind the print area.
Step 2: Dampen a cotton pad with 100 percent acetone or acetone based nail polish remover. Do not soak.
Step 3: Dab the back of the print area. Let it sit for 30 to 45 seconds.
Step 4: Flip the shirt right side out and lift the vinyl edge with tweezers. The film should release more easily. Reapply to the back as needed.
Step 5: Blot any loosened adhesive with a clean cloth. Work in small sections to avoid spreading.
Step 6: After removal, rinse the area thoroughly with cool water to stop solvent action.
Acetone safety
Ventilate well. Keep away from flames. Do not use near elastic or spandex heavy areas. Do not mix with bleach. Wash the shirt after a clear water rinse.
Method 5: Rubbing Alcohol or Citrus Adhesive Remover
Isopropyl alcohol and citrus based removers are milder and suitable for many colors and poly blends. They take longer but often save the fabric finish.
Step 1: With the shirt inside out, wet a cotton swab with rubbing alcohol or a small amount of citrus remover and dab along the back side of the print.
Step 2: Wait 1 to 2 minutes for penetration. Do not let it dry completely.
Step 3: Flip the shirt, lift an edge, and peel. Alternate between applying from the back and peeling from the front.
Step 4: Wipe any tacky residue with more alcohol or a drop of citrus remover, then follow with a small amount of dish soap to cut the oil. Rinse well.
When to choose this method
Use it on athletic polyester, dark shirts, and when acetone fails a patch test. It is also good for glitter and flock where the surface grips more.
Method 6: Commercial Vinyl Remover VLR
If the print refuses to budge, use a dedicated vinyl remover product. These are designed to break down HTV adhesive quickly. They have strong fumes and can affect dyes, so follow directions exactly and test first.
Step 1: Work outdoors or with a fan. Wear gloves and eye protection.
Step 2: Turn the shirt inside out. Apply a small amount of remover to the back of the print with a cotton pad. Do not flood the fabric.
Step 3: Wait per label timing, usually 30 seconds to 1 minute.
Step 4: Turn the shirt right side out and lift the vinyl. It should release in sheets. Reapply sparingly if needed.
Step 5: Rinse the area with cool water. Air out the garment before laundering.
Method 7: Layer by Layer Removal
Layered designs or old, cracked prints may need a mix of methods and patience.
Step 1: Use heat from Method 1 or 2 to lift the topmost layer only. Peel carefully.
Step 2: For the base layer, switch to steam or a solvent dabbed from the back to avoid grinding adhesive into the knit.
Step 3: For tiny pieces inside letters, use tweezers and a small pointed cotton swab to apply solvent precisely. Work slowly to avoid snags.
Clean Up Sticky Residue
After vinyl comes off, a thin adhesive film or shine can remain. Clean this before washing the full garment.
Step 1: Rub a drop of mild dish soap into the area with a damp cloth to cut any oily remover.
Step 2: If tacky, dab with rubbing alcohol and wipe. Repeat until the surface feels dry and smooth.
Step 3: Rinse under cool running water from the back of the fabric to push residue out, not deeper in.
Step 4: If the area still grips, apply a small amount of baby powder or baking soda, let sit 5 minutes, brush off, then wash. This grabs the last traces of adhesive.
Wash and Restore the Fabric
Machine wash the shirt alone or with like colors on cool. Use regular detergent. Add a rinse cycle if you used solvents. Air dry the first time so you can check the fabric without heat setting any subtle marks.
If the surface looks shiny, steam it lightly from the wrong side to relax fibers. For cotton, a warm iron through a damp pressing cloth helps remove press marks.
Troubleshooting
Vinyl smeared and fused into fibers
Stop heating. Let the area cool. Apply rubbing alcohol from the back, wait 1 minute, then gently scrape with a plastic edge. Repeat. Avoid direct high heat until the smear lifts.
Ghost outline remains after removal
This is compressed pile or a thin adhesive haze. Work dish soap into the area, rinse, then steam from the back. For cotton, lightly brush the nap with a soft toothbrush to raise fibers.
Shine marks on polyester
Shine comes from flattened fibers due to heat. Steam from the wrong side with a pressing cloth to rehydrate. Avoid further high heat. If color shifted, stop and accept the best possible finish.
Color bleeding on dark shirts
You used a solvent too strong for the dye. Rinse immediately with cool water. Wash alone in cold water with detergent and color catcher sheets if available. In future, use alcohol or steam instead of acetone.
Tiny vinyl bits stuck in seams or texture
Warm gently with a hair dryer and pick out with tweezers. Use a dab of citrus remover on a swab, then wipe with dish soap and water.
What Not to Do
Do not yank cold vinyl. It can tear the knit. Do not hold a heat gun in one spot. Do not soak the shirt in acetone. Do not mix any solvent with bleach. Do not iron directly on solvent damp fabric. Let it dry or rinse first.
Decide Fast Which Method to Use
If the shirt is 100 percent cotton
Start with dry heat and peel. Move to acetone from the back if needed. Finish with dish soap and a cool rinse.
If the shirt is polyester or a blend
Start with a hair dryer or steam. If needed, use rubbing alcohol or a commercial vinyl remover tested on a hidden spot. Avoid high heat and avoid acetone unless a test patch is perfect.
If the vinyl is glitter, flock, or very thick
Use steam from the back and peel slowly. A citrus remover or rubbing alcohol helps loosen the base. Work in smaller sections.
Time and Effort Estimates
Simple single color HTV on cotton often comes off in 10 to 20 minutes. Thick glitter on polyester can take 30 to 60 minutes with breaks. Expect extra time for layered designs and fragile fabrics. Patience prevents damage.
Prepare the Shirt for a New Design
After removal and washing, inspect the fabric. If the area is smooth and clean, you can apply a new design. Pre press the shirt for 5 to 10 seconds to drive out moisture, place the new transfer, and apply at the manufacturer temperature for the correct time. If the fabric shows shine or thinning, position the new design slightly offset to cover any marks, or keep the shirt as a plain tee.
Quick FAQs
Can I put the shirt in the freezer to pop off vinyl
Freezing does little for HTV. The adhesive remains flexible. Use heat or a solvent instead.
Can a washing machine remove vinyl
No. Washers and dryers may soften the adhesive but will not release the film cleanly. Use targeted methods.
Is nail polish remover safe
Acetone based remover works like acetone but may contain conditioners and fragrance. Test first. Pure acetone acts faster but is harsher.
Will this work on screen prints
No. Screen print ink binds differently. Removing it usually damages the fabric. Focus these methods on vinyl only.
Conclusion
Vinyl removal is about controlled heat, careful peeling, and smart cleanup. Start with the gentlest approach that fits your fabric, switch to steam or mild solvents if needed, and use stronger products only after a successful patch test. Work in small sections, protect the fibers, and rinse well. With patience and the right method, you can take off old HTV and give your T shirt a fresh start without ruining the garment.