We are reader supported. When you purchase through links on our site, we may earn an affiliate commission. Also, as an Amazon affiliate, we earn from qualifying purchases.
A photo wall can change a room fast. It adds story, color, and focus. You do not need a big budget or rare tools. You need a plan, a clear theme, and a layout that fits your space. This guide gives you simple steps and 25 ideas you can copy or tweak. Each idea is beginner friendly. You will see what works, why it works, and how to hang it with clean lines and safe spacing.
Plan Your Photo Wall
Measure and map
Measure wall width and height. Note any furniture nearby. Leave at least 20 to 30 cm between the top of furniture and the bottom of frames. Plan to place the visual center of your grouping at about 150 cm from the floor. If ceilings are very tall or most viewers are much taller or shorter, adjust within 145 to 155 cm. Keep a consistent gap between frames. For most layouts, 5 to 8 cm feels balanced. For small prints, 3 to 5 cm is better. For large prints, 8 to 10 cm gives them room to breathe.
Choose a theme and palette
Pick a simple theme so the wall reads as one. Family moments, travel, pets, nature, or abstract are all easy. Limit frame colors to one or two so the eye rests. Black frames read modern. Wood frames add warmth. White frames feel light. Use photo mats to unify mixed prints and to create breathing space around images.
Pick sizes and orientation
Start with easy sizes you can print and frame fast. Common frame sizes that mix well are 13 by 18 cm, 20 by 25 cm, 28 by 36 cm, and 40 by 50 cm. Mix portrait and landscape. If you want a strong anchor, add one larger frame such as 50 by 70 cm. Use mats to make small prints feel important and to align edges across mixed sizes.
Tools and prep
Gather a tape measure, level, pencil, painter tape, hammer, nails or hooks, and wall anchors if the wall is drywall or plaster. For rental walls, choose picture hanging strips and keep frames light. Plan layouts on the floor first. Make paper templates the size of each frame. Tape them to the wall to test spacing. Stand back, take a photo, and adjust before you make holes.
25 Photo Wall Arrangement Ideas
1. Clean grid
Use equal frames in a tight grid. Four, six, or nine frames work well. Keep gaps at 5 to 6 cm. Align top and side edges with a level. Choose one frame color and one mat size. This layout suits modern rooms and keeps busy photos under control.
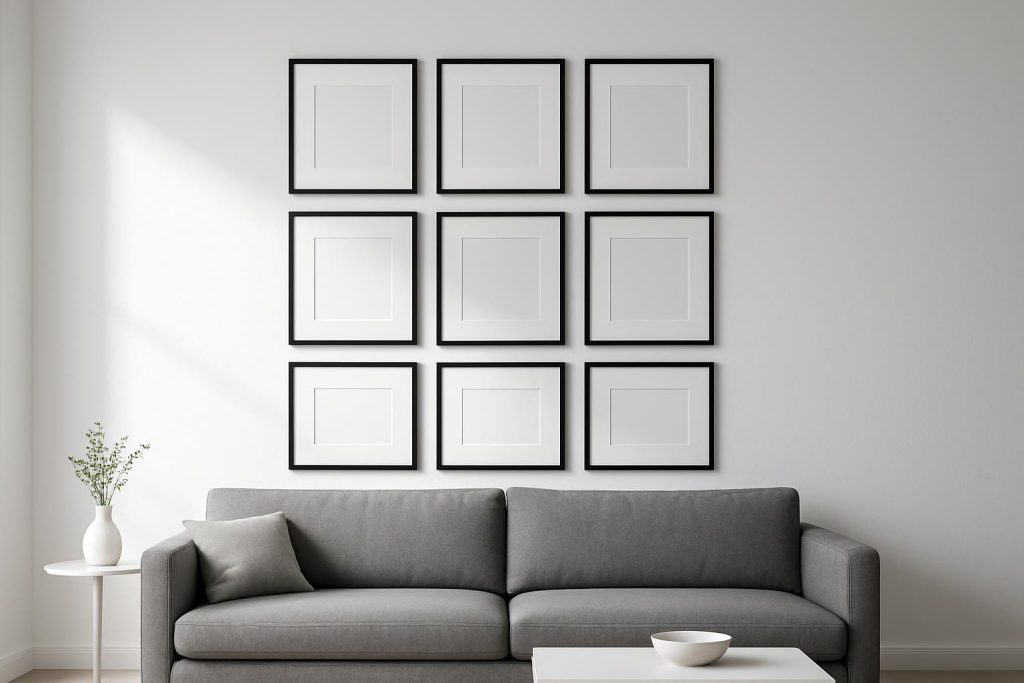
2. Symmetrical nine square
Make a three by three square with nine matching frames. Center the middle frame at 150 cm. Keep 5 to 6 cm gaps. Use the same photo tone across all prints for unity. Black and white looks sharp here. This layout fills space over a sofa or buffet.
3. Classic row of three
Hang three frames in a straight line. Keep the center frame at eye level. Space at 6 to 8 cm. Pick three related photos such as a family, a place in three views, or a set of botanical prints. This is quick to hang and easy to align for beginners.
4. Triptych panorama
Split one wide photo into three equal panels. Frame each panel the same. Leave 3 to 5 cm between panels so the image reads as one. Works well over a bed or sofa. Use a level and two hooks per frame to avoid tilt.
5. Column stack
Stack four to six frames in a single vertical line. Keep 5 to 6 cm gaps. Center the column on a narrow wall or between windows. Use matching frames to keep it sleek. This adds height and fills small wall sections fast.
6. Big anchor with small accents
Pick one large frame as the anchor. Add smaller frames around it on at least two sides. Keep a 6 to 8 cm gap. Use the same frame color for all pieces or match mats to tie it all together. Place the anchor center at 150 cm and build outward.
7. Staircase rise
Follow the slope of the stairs. Start with a frame at the base landing, then climb. Keep the bottom edge of each frame roughly parallel to the stair rise. Step each frame up by about 15 to 20 cm. Keep 5 to 6 cm gaps between frames. Use two hooks per frame for stability.
8. Corner wrap
Extend a gallery across a wall corner. Place an anchor frame on each wall at the same height. Fill in around both anchors with 5 to 6 cm gaps. Keep frame colors the same so the corner feels like one unit. This turns dead corners into strong features.
9. Ledge layer
Install one or two photo ledges. Lean frames on the ledge and overlap edges slightly. Largest frames at the back, smaller at the front. Keep a clean color scheme to avoid clutter. This setup is easy to refresh and leaves fewer holes in walls.
10. Shelf and frame mix
Combine a shallow shelf with wall hung frames above or beside it. Place the center of the total grouping at about 150 cm. Keep a 20 to 30 cm gap above furniture. Repeat materials such as light wood and white mats for unity. Add a small plant or a travel item on the shelf to add depth.
11. Asymmetrical cluster
Group mixed sizes in an organic cluster with even gaps. Set one imaginary rectangle and fill it with frames while keeping edges staggered. Hold 5 to 6 cm between pieces. Repeat one motif such as all black frames or all white mats to keep order.
12. Salon wall full coverage
Cover a large wall with many frames from mid height to near ceiling. Start with a straight center line at 150 cm and build up and down. Keep a consistent 4 to 5 cm gap to avoid visual noise. Mix art, photos, and small objects in shadow box frames for texture.
13. Black and white focus
Use only black and white photos. Frames can be black, white, or wood. Keep mats white for consistency. Any layout style works, but grids and rows shine with this edit. This approach reduces color clash and centers attention on faces and forms.
14. Color frame block
Pick one frame color such as soft green or navy and use it across all frames. Keep photo subjects varied. The frames do the unifying work. A grid or asymmetrical cluster both work. Use the same mat color to tie the group even more.
15. Monochrome frames with mixed mats
Use one frame finish across the wall, such as light oak. Vary mat widths to balance different image sizes. Larger mats on small photos make them feel important. Keep gaps at 5 to 6 cm. This is a calm look that suits living rooms and bedrooms.
16. Family timeline
Arrange photos by year in a straight horizontal run. Start with the earliest at left. Add new frames to the right as time goes on. Keep frame sizes and colors consistent. This layout works over a console and invites easy updates.
17. Kids art clip rail
Hang a thin rail or wire with clips. Clip drawings and small photos in a neat row. Keep the rail at 150 cm center. Add a second rail below for more display. This is renter friendly and fast to refresh. Keep clips evenly spaced for a tidy line.
18. Mirror and photo combo
Use a medium mirror as the anchor and ring it with photos. Keep 6 to 8 cm gaps. Repeat the mirror frame color in your photo frames. This adds light and makes small rooms feel larger. Hang the mirror with proper anchors and two hooks for safety.
19. Travel map focal with photo ring
Mount a map print as the center piece. Circle it with travel photos from the mapped places. Keep equal gaps at 5 to 6 cm. Add small labels inside frames, not on the wall, to keep it clean. This layout suits a hallway or office.
20. Over console linear run
Place three to five frames in a single line above a console or dresser. Leave 20 to 30 cm from the furniture top to the bottom of the frames. Keep 6 to 8 cm gaps. Align top edges for a crisp band. Match hardware finishes in the room for cohesion.
21. Around the TV balance
Balance a TV by grouping frames on both sides and above it. Keep frames outside the TV edges so the screen remains clear. Maintain 6 to 8 cm gaps and hold the top row in line. Use similar frame finishes so the TV blends into the display.
22. Entry mini grid
Use four small frames in a two by two grid near the entry. Keep the center at 150 cm. Use 4 to 5 cm gaps. Choose welcoming subjects such as landscapes or simple abstracts. This adds polish without crowding a narrow entry wall.
23. Workspace pinboard plus frames
Mount a clean pinboard and add two to three framed prints above it. Keep the board center at 150 cm if it is the main feature, or align the whole grouping as one center. Match frame and board trim color. This keeps work notes low and art high.
24. Seasonal swap zone
Create a small wall area with hanging strips only. Use lightweight frames. Set a simple two by two or row of three. Refresh prints by season without new holes. Keep 4 to 5 cm gaps so the swap is quick and consistent each time.
25. Floor to ceiling stripe
Build a vertical stripe of frames from near the floor up to near the ceiling. Keep 5 to 6 cm gaps. Use one frame color and mix sizes to add rhythm. This draws the eye up and works well beside a bookcase or a window.
Hanging and Spacing Tips
Keep gaps even
Pick a gap range and stick to it across the whole wall. Use painter tape as a spacer. For most walls, 5 to 8 cm works well. Use 3 to 5 cm for small prints. Use 8 to 10 cm for large prints.
Use two hooks per frame
Two hooks keep frames level and prevent tilt after dusting or door slams. Place hooks the same distance from the top on each side. Use a level when marking holes.
Match hardware to wall type
For drywall without studs, use wall anchors matched to frame weight. For plaster, pre drill gently and use anchors meant for plaster. For rental walls, use picture hanging strips and keep weight within product limits.
Test before holes
Lay out frames on the floor and take a photo. Make paper templates or tape rectangles to the wall. Move them until the grouping looks balanced. Mark hook points only when you are satisfied.
Lighting and Care
Control glare and sun
Avoid direct sun on prints to reduce fading. If a wall gets strong light, use matte paper or non reflective glass. Angle frames slightly down with double hooks to reduce glare.
Clean and rotate
Dust frames with a soft cloth. Clean glass with a lint free cloth and minimal cleaner. Rotate prints a few times a year to share wall time and reduce long term sun exposure on any one piece.
Budget and Sustainability
Save on frames and prints
Mix new frames with thrift finds and repaint them the same color. Reuse mats by flipping or trimming. Print in batches during sales. Use ledges or clip rails to reduce holes and make refresh cycles easier.
Plan once, update often
Choose a layout that allows new pieces without a full rehang. Columns, rows, ledges, and anchor plus accents are easy to extend. Keep spare frames in the same size and color so updates fit right in.
Conclusion
Take action with a clear plan
Pick one wall. Decide on a theme and palette. Choose two to three frame sizes and a consistent gap. Mock up with paper or tape. Hang with two hooks per frame. Keep the center at about 150 cm and protect prints from harsh light. Start with a simple idea such as a clean grid or a row of three. Add pieces over time with the same rules. A well planned photo wall grows with you and keeps your space clear, organized, and personal.
FAQ
Q: What is the best height to hang a photo wall
A: Aim to place the center of the grouping at about 150 cm from the floor. Adjust within 145 to 155 cm if your ceilings are very tall or if most viewers are much taller or shorter.
Q: How much space should I leave between frames
A: Keep consistent gaps of 5 to 8 cm for most walls. Use 3 to 5 cm for small prints and 8 to 10 cm for large prints.
Q: How can I plan a layout without making holes
A: Use paper templates or painter tape outlines, test the layout on the wall, lay everything out on the floor first, and take a photo to review before you commit.
Q: What tools do I need to hang a photo wall
A: Use a tape measure, level, pencil, painter tape, hammer, nails or hooks, wall anchors if needed, and picture hanging strips for rental walls.