We are reader supported. When you purchase through links on our site, we may earn an affiliate commission. Also, as an Amazon affiliate, we earn from qualifying purchases.
Getting organized is not about buying more stuff. It is about choosing the right tools, fitting them to your space, and setting simple habits that keep everything in place. This guide gives you 40 dependable organizing products and the exact ways to use them. You will see quick wins you can set up in a weekend, plus choices that hold up over time.
Before you add a single bin, start small, go category by category, and keep only what you use. Then match products to your needs, not the other way around. A clear plan prevents clutter from shifting spots and gives every item a reliable home.
How to choose organizing products that work
Measure first
Take length, width, and height of shelves, drawers, and floor spaces, and note the tightest points. Measure the space, define the purpose, and set a quantity limit for what the container should hold.
Choose clear or labeled opaque
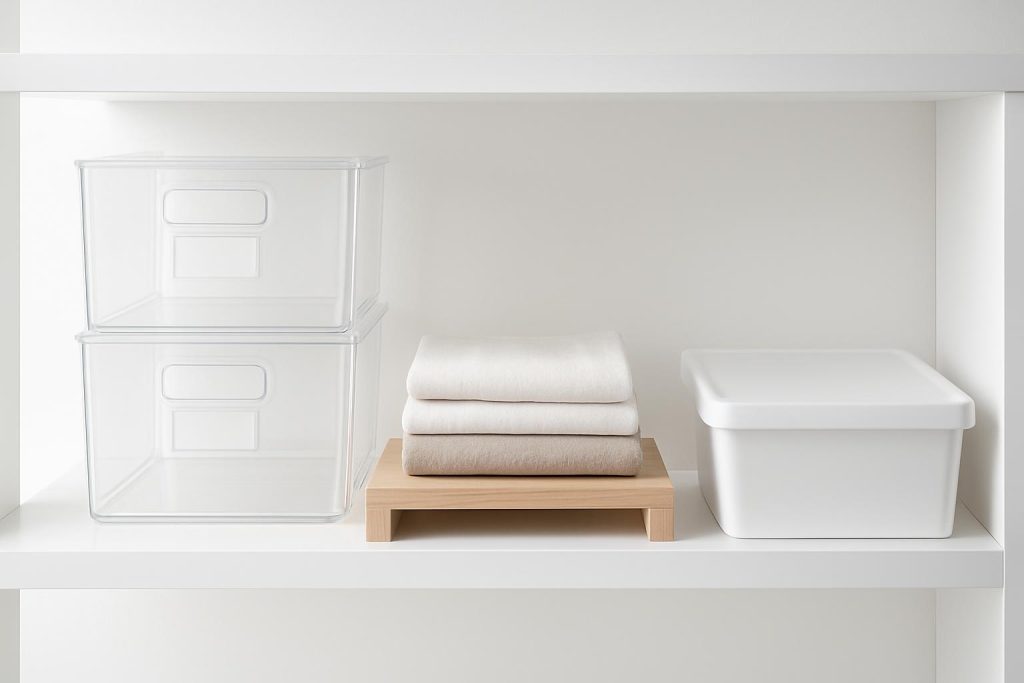
Use clear bins if you need visual cues; use opaque bins if you want a cleaner look, but add a label. Consistency matters more than brand. Match sizes so bins stack and align safely.
Go vertical and modular
Use stackable bins, shelf risers, and door backs to unlock dead air. Pick systems that expand in small increments so you can add pieces without starting over.
Label for speed
Labels make decisions automatic. Use simple category names and place labels on the side you see first. Replace masking tape labels with durable ones when the setup is final.
Plan for maintenance
Make every item a home, label it, and run a five-minute reset at the same time each day. Keep a donate bag open so outgrown items leave without delay.
40 organizing products that actually help
Closet and bedroom
Slim velvet hangers: These prevent slippage and create uniform spacing so more fits on a rod. Choose one color to reduce visual noise and count the hangers to set a clothing limit.
Cascading hooks: These hang multiple items vertically to free rod space. Use for pants, scarves, or tanks where weight is balanced.
Shelf dividers: These stand up stacks of sweaters or handbags. Choose clip-on metal or acrylic dividers that match shelf thickness and allow easy repositioning.
Hanging sweater shelves: Soft shelves hold knits, jeans, or purses without stretching hangers. Pick a reinforced model with a top hook that closes fully around the rod.
Drawer dividers: Spring-loaded or insert trays keep socks, underwear, and accessories separated. Measure drawer interior and select adjustable heights so dividers do not pop loose.
Under bed storage bins with labels: Low-profile bins hold off-season clothes or spare linens. Use latching lids to keep dust out and add a label at the handle side.
Over the door rack: Add hooks or pockets for belts, bags, or hats. Check door clearance and choose padded brackets to protect paint.
Best first buys for a small closet: Slim velvet hangers, a set of drawer dividers, and an over-the-door rack.
Kitchen and pantry
Clear stackable bins: Group snacks, baking, or breakfast items so categories slide out together. Choose bins with integrated handles and flat lids to stack safely.
Lazy Susan turntable: A spinning tray makes corners and deep shelves usable. Use non-skid bases for oils or sauces and pick 2 tiers only if vertical space allows full rotation.
Tiered shelf risers: These stadium-style steps show items in the back. Combine with labels on the front lip so you can restock fast.
Airtight canisters: Decant staples like flour, sugar, and rice to keep pests out and inventory clear. Choose square canisters to save space and label by item and purchase date.
Adjustable utensil drawer organizer: Expandable trays fit most drawers and stop utensil jumble. Group by task so cooking tools live near the stove and prep tools near the board.
Pot lid rack: A vertical rack stores lids without nesting chaos. Mount inside a cabinet door if depth allows or use a freestanding model on a shelf.
Vertical pan rack: Stand pans on edge to stop stacking and scratching. Place the heaviest pans at the bottom slots and keep similar sizes together.
Under sink tension rod: Hang spray bottles from the rod to clear shelf space. Add a shallow bin for sponges and gloves to prevent drips on the cabinet base.
Zip bag organizer: A drawer insert keeps bags by size in fixed slots. Refill only to a set level so the drawer closes smoothly.
Spice rack or drawer liner: Lay jars label-up in a drawer or use a step rack in a cabinet. Keep the same jar size for a tight grid and alphabetize within cuisines.
Add tiered shelf risers and a Lazy Susan, then group items in clear stackable bins.
Bathroom
Rustproof shower caddy: Mount a caddy that anchors firmly and drains well. Assign shelves by person or product type to prevent clutter build-up.
Adhesive hooks: Use in the shower for loofahs or beside the vanity for hair ties. Clean and dry the surface before sticking and wait a full day before loading.
Over the toilet shelving unit: Add shelves in dead vertical space. Secure to the wall so it does not tip and use lidded bins to hide backups.
Under sink stackable drawers: Drawers beat bins when plumbing blocks space. Measure the P-trap and valves, then pick narrow drawers that slide out fully.
Acrylic drawer trays: Small trays separate makeup, skincare, and dental care. Line the drawer with a non-slip mat so trays stay put.
Hair tool caddy: A heat-safe holder tames dryer, iron, and brushes. Choose one with cord wraps and mount it inside a cabinet if counter space is tight.
Toothbrush holder with cover: A covered holder keeps brushes upright and clean. Place it away from the toilet area and wipe weekly.
Apothecary jars for cottons: Clear jars make stock visible and neat. Use only two or three sizes to keep the counter calm.
Home office
Desk drawer tray set: Divide pens, clips, and sticky notes so nothing roams. Mix small and long trays in a snug layout to prevent shifting.
Cable clips and cord sleeves: Guide charging cables to the exact spot and bundle extras. Label each cord and keep only one spare of each type.
Desktop file sorter: Stand active files upright for quick access. Limit slots to what you process weekly and archive the rest in a cabinet.
Monitor riser with drawer: Raise the screen to eye level and store small tools beneath. Check weight limits and measure the footprint so it fits your desk depth.
Wall grid or pegboard: Move supplies off the desk to vertical space. Use small baskets and hooks and keep the center area open for flexibility.
Living room
Remote control caddy: Corral remotes, game controllers, and small accessories. Place it where you sit, not on a side table across the room.
Storage ottoman: Hide blankets and games while adding a seat. Choose a hinged top that stays open so hands are free while loading.
Media storage boxes: Uniform boxes hold DVDs, games, and cables. Label the short side and stand them upright on a shelf to save space.
Floating shelves: Display only a few items to reduce dust and clutter. Mount into studs or use heavy-duty anchors and leave room for airflow around electronics.
Cord concealer box: Hide a power strip and extra cable length. Ventilation slots prevent heat build-up; route cables out the rear openings.
Entryway and mudroom
Bench with cubbies: A seat with bins under it keeps shoes contained. Assign a bin per person and set a two-pair limit each.
Wall mounted coat rack: Hooks beat hangers for speed in busy zones. Mount at two heights if kids use the same space.
Boot tray: A waterproof tray protects floors from wet footwear. Add river stones or a rack insert so soles dry faster and grime settles below.
Wall mail sorter: Sort incoming paper by action, to file, and outgoing. Empty it weekly and shred junk mail on arrival.
Key hook rail with small tray: Hang keys and drop wallets or sunglasses in the tray. Mount it near the door you use daily so the habit sticks.
Setup steps for a weekend makeover
Step 1: Declutter by category
Pull out one category at a time and remove duplicates and expired items. Decide donation or trash right away so keepers are clearer.
Step 2: Map zones
Place high-use items at eye to waist height and low-use items up high or down low. Keep families of items together so restocking is obvious.
Step 3: Measure and shop your home
Measure shelves, drawers, and floor spaces, then test-fit containers you already own. Only buy what fills remaining gaps with precision.
Step 4: Contain and label
Load containers no more than 90 percent full so things slide easily. Add simple labels and face them toward the point of use.
Step 5: Practice the reset
Do a daily five-minute reset at the same time so the system holds. Review hot spots weekly and tweak containers or labels as needed.
Common mistakes to avoid
Buying before measuring
Improv bins that do not fit waste money and create new clutter. Measure first and carry notes when shopping.
Over-categorizing
Too many tiny categories slow you down. Use broad groups like Baking, Breakfast, or Cords and Chargers.
Ignoring vertical space
Empty headroom above shelves is lost storage. Add risers, stackable bins, or an extra shelf to capture it.
Skipping labels
Memory is not a system. Labels let anyone reset the home in minutes.
Containers without limits
Set a limit per bin to control volume. When the bin is full, edit before buying more.
Conclusion
The right organizing products do not add work; they remove friction. Start with accurate measurements, choose clear and modular tools, and label every zone. Roll out only a few upgrades at a time and practice a short daily reset. With these 40 products and simple habits, your home will stay tidy with less effort.
FAQ
Q: What should I do before buying any organizing products?
A: Measure the space, define the purpose, and set a quantity limit for what the container should hold.
Q: Are clear bins better than opaque bins?
A: Use clear bins if you need visual cues; use opaque bins if you want a cleaner look, but add a label.
Q: How do I keep an organized system working long term?
A: Make every item a home, label it, and run a five-minute reset at the same time each day.
Q: What are the best first buys for a small closet?
A: Slim velvet hangers, a set of drawer dividers, and an over-the-door rack.
Q: How can I increase kitchen cabinet space quickly?
A: Add tiered shelf risers and a Lazy Susan, then group items in clear stackable bins.