We are reader supported. When you purchase through links on our site, we may earn an affiliate commission. Also, as an Amazon affiliate, we earn from qualifying purchases.
Cabinet choices decide how your kitchen looks, works, and lasts. Colors set the mood. Styles define the character. Hardware finishes the picture and affects daily comfort. This guide walks you through clear choices and simple upgrades so you can plan with confidence, avoid common mistakes, and get a kitchen that fits your life.
Plan Before You Pick a Color
Measure and Map Storage
Start with a tape measure and a list. Note ceiling height, window and door locations, and appliance sizes. Mark outlets and vents. Count what you need to store. If you cook often, you likely need more drawers and pull outs than doors. If you bake, plan tall dividers for trays. If you bulk buy, add a pantry cabinet. A clear plan prevents wasted corners, odd filler pieces, and crowded work zones.
Set Budget and Timeline
Decide what is realistic. Painting and new hardware change the look fast. Refacing changes doors and drawer fronts while keeping the boxes. Full replacement gives the most freedom but takes the most time and money. If you cook daily, plan for a temporary setup and aim to finish in stages so the kitchen stays usable.
Cabinet Colors That Work
Classic Neutrals
Warm white, soft cream, and light gray feel open and easy to match. They suit most backsplashes and counters. They reflect light and help small kitchens feel larger. Greige adds warmth without turning yellow.
Bold but Livable Shades
Navy, smoky blue, forest green, and charcoal add depth. They work best with good lighting and simple door styles. Keep walls and counters lighter to balance the room. Deep colors show dust less but reveal chips more, so choose a durable paint.
Wood Tones
Natural white oak looks fresh and modern. Walnut feels rich and warm. Maple takes stain evenly for a clean look. Choose low yellow stains for a current feel. Use clear finishes to protect without changing tone too much.
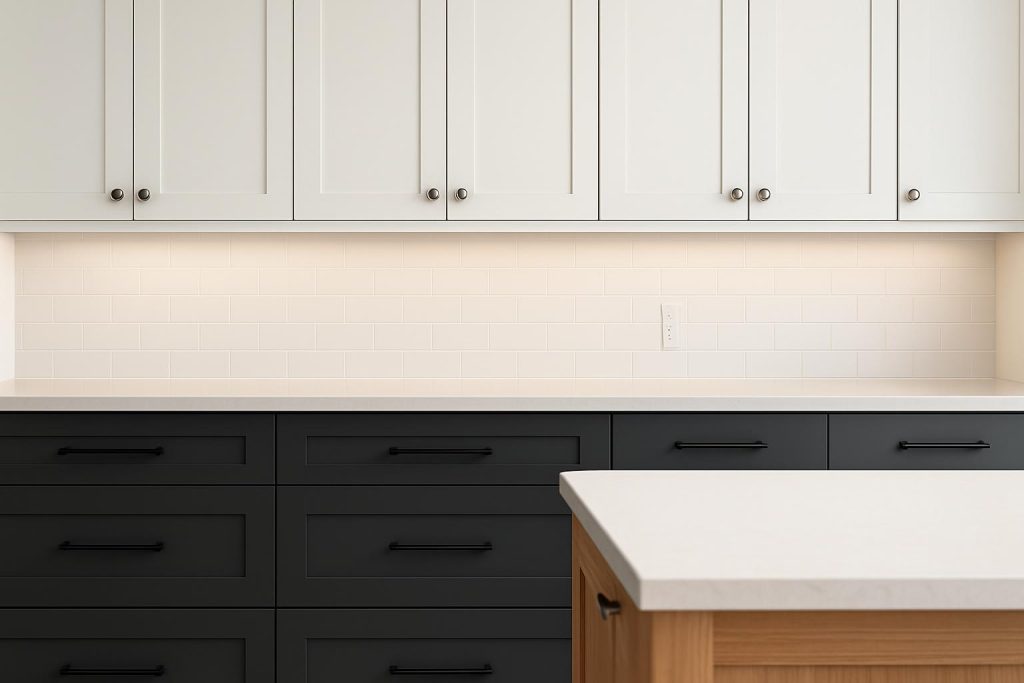
Two Tone Kitchens
Pair light uppers with darker base cabinets to ground the room and keep sightlines open. Use a neutral on top and a color or wood tone below. This breaks up long runs and adds interest without going heavy.
Island as Accent
Paint or stain the island in a contrasting color or wood. This adds personality with low risk because it is easy to change later. Ensure the island color repeats in small ways elsewhere, such as stools or a trim detail, so the space feels tied together.
Finish Sheen and Glaze
Matte hides minor flaws but can mark more easily. Satin or eggshell balances cleanability and a soft look. Semi gloss is the easiest to wipe but shows surface defects. Glazes add depth to wood but can feel dated if heavy. Keep finish choices consistent for a calm result.
Cabinet Styles You Can Trust
Shaker
Clean lines and a recessed center panel make Shaker doors versatile. They suit both modern and traditional spaces. They are easy to clean and look good painted or stained.
Slab
Flat slab fronts read modern and sleek. They work well with frameless boxes and minimal hardware. Use a durable laminate or a stable wood veneer to avoid warping.
Raised Panel and Traditional
Raised center panels and profiled edges add detail. They suit classic homes. Keep finishes simple to avoid a heavy look. Use subtle hardware to prevent visual clutter.
Beadboard and Cottage
Vertical grooves add texture and charm. These doors can collect dust, so plan regular cleaning. Use them on an island or a few doors if you want just a hint of style.
Inset vs Overlay
Inset doors sit flush inside the frame and need precise installation. They look tailored and cost more. Overlay doors sit on top of the frame. Full overlay hides most of the frame for a modern look. Partial overlay shows part of the frame and is budget friendly. Overlay is more forgiving during install and allows small adjustments over time.
Frameless vs Face Frame
Frameless boxes have no front frame. They give more interior space and tighter reveals, suiting modern designs. Face frame cabinets add a frame at the front edge, which adds strength and a classic look. Face frame can be easier to install on uneven walls.
Glass Doors and Open Shelving
Glass doors open up the space and show dishes. Use them sparingly to avoid visual overload. Frosted or ribbed glass hides some clutter. Open shelves are useful near dishwashers for plates and cups but need regular styling and dusting.
Materials and Build Quality
Box Materials
Plywood boxes offer strength, hold screws well, and resist moisture better than particle board. MDF is stable for painted surfaces and smooth doors. Thermofoil and laminate are budget friendly and wipe clean easily, but avoid high heat zones without heat shields. Metal cabinets are durable and modern but cost more and can dent.
Door and Drawer Construction
For painted doors, MDF center panels reduce movement and cracks. For stained doors, select hardwood frames with stable cores. Dovetail drawer boxes are a sign of quality, but well built doweled or screwed boxes can also last with sturdy slides.
Hinges and Slides
Soft close hinges and full extension slides improve daily use. Undermount slides hide hardware and feel smoother than side mounts. Choose hardware rated for the weight you store, especially for deep drawers with pots.
Hardware That Lifts the Whole Room
Knobs vs Pulls
Knobs are simple, budget friendly, and good for doors. Pulls are easier on hands and better for drawers and heavy doors like trash pull outs. Mixed hardware looks intentional when you use knobs on doors and pulls on drawers for consistency.
Sizes and Placement
For most drawers 12 to 24 inches wide, use pulls 5 to 8 inches long. For wide drawers, consider two pulls or one long pull. Standard knob sizes range from 1 to 1.5 inches in diameter. On doors, place knobs or the lower end of pulls 2 to 3 inches from the opening edge and 2 to 3 inches from the bottom for upper doors or from the top for base doors. On drawers shorter than 8 inches tall, center hardware vertically. On taller drawers, place pulls in the upper third for an easy grip.
Finishes That Match or Mix
Brushed nickel and chrome read clean and cool. Satin brass brings warmth. Matte black adds contrast. Oil rubbed bronze suits traditional rooms. You can mix finishes, but limit to two. Match hardware to a dominant metal such as the faucet or lighting. Repeat the secondary finish at least twice for balance.
Hinges and Latches Look
Exposed hinges suit traditional or cottage styles. Concealed hinges fit modern or transitional looks. If you love latches, keep them to a few doors you open less often, like a glass display, since they add a step to access.
How to Test Before Drilling
Tape hardware to doors and drawers to preview size and placement. Step back to view from common angles. Test how your hand fits. Make a cardboard or plastic template so holes align across the room. Drill a test board before touching a finished door.
Smart Storage Upgrades
Drawers Over Doors
Base drawers give direct access and reduce bending. Use deep drawers for pots and pans. Use shallow drawers for utensils and wraps. Choose full extension slides so items do not hide at the back.
Pull Outs and Organizers
Pull out trays in base cabinets bring items forward. Add roll outs to pantries for cans and dry goods. Use vertical dividers for sheets and cutting boards. Add a pull out near the range for oils and spices.
Corner Solutions
Lazy susans fit round pots and mixing bowls. Blind corner pull outs bring hidden space into view. If budget is tight, use a simple shelf and store rarely used items there.
Trash and Recycling
A pull out bin near the sink saves steps and keeps smells contained. Size it for your local bags. Use soft close slides to keep the bin stable.
Vertical Dividers and Spice
Tray dividers above ovens or in tall cabinets make baking gear simple to grab. Narrow spice pull outs keep labels visible and reduce duplicates.
Lighting That Makes Cabinets Work
Under Cabinet
Under cabinet lighting improves prep and shows color accurately. LED strips or bars with a warm to neutral temperature reduce shadows. Place lights near the front of the cabinet to light the counter evenly.
In Cabinet and Toe Kick
Glass door cabinets benefit from simple puck or strip lights. Toe kick lighting creates a soft night path and adds depth. Put task and accent lights on separate switches or dimmers for control.
Small Kitchen Strategies
Color and Finish Choices
Use light colors like warm white or light gray to reflect light. Choose satin or semi gloss for easy cleaning. Keep counters and backsplash simple to avoid visual noise.
Style Choices
Pick slim Shaker or slab doors for clean lines. Use a few glass doors to open the sightline. Consider fewer upper cabinets with a tall pantry if the room feels tight.
Hardware and Lighting Choices
Use slim pulls and compact knobs. Avoid oversized hardware that crowds small faces. Add bright under cabinet lighting to reduce shadows and make the room feel larger.
Care and Maintenance
Painted Cabinets
Clean with warm water and a drop of mild dish soap. Wipe with a soft cloth and dry right away. Avoid abrasive pads and harsh chemicals like bleach or ammonia. Touch up chips with matching paint after cleaning and drying.
Wood Cabinets
Dust weekly with a dry microfiber cloth. Clean spills fast to prevent stains. Use a gentle wood cleaner when needed. Avoid heavy wax buildup, which traps dirt.
Hardware and Hinges
Wipe hardware with a damp cloth and dry to prevent water spots. Tighten loose screws as needed. For soft close hinges, adjust with a screwdriver so doors align and close smoothly.
Budget Moves With Big Impact
Repaint vs Reface vs Replace
Repainting is the lowest cost path if boxes are solid. Use good prep and a durable paint system. Refacing updates door style and color while keeping boxes, saving time and waste. Replacement is best when layout, boxes, or function are not working.
Ready to Assemble and Semi Custom
Ready to assemble cabinets cut labor costs if you can build and install carefully. Semi custom lets you tweak sizes and finishes without full custom pricing. Mix stock sizes with a few modified pieces to fit tricky walls.
Swap Hardware and Add Lighting
New hardware changes the feel in an afternoon. Add under cabinet lights to refresh even older cabinets. These two upgrades can carry a kitchen while you plan larger work.
Trends vs Timeless
When to Follow a Trend
Try trends on items that are easy to change. Use a bold island color, a unique hardware finish, or a textured panel on a small zone. Keep the main run calm so updates stay simple.
Timeless Choices
Shaker doors, warm whites, light wood like white oak, and simple black or satin nickel hardware stay steady over time. Balanced lighting and a few glass doors also stay relevant.
Installation Basics for DIYers
Prep and Layout
Mark stud locations. Snap level lines for base and upper cabinet heights. Dry fit boxes and check for plumb and level. Shim walls and floors as needed before final fastening.
Hanging and Leveling
Start with corner cabinets and build outward. Screw into studs through solid cabinet backs or rails. Clamp faces together and use connector screws so seams stay tight. Recheck level as you go.
Drilling for Hardware
Use a template and a drill stop to control depth. Verify placement on each door orientation. Drill from the finish face to avoid blowout. Install hardware with hand tools to prevent over tightening.
Conclusion
Strong kitchen cabinet choices come from clear planning and simple rules. Choose a color that suits your light and space. Pick a door style that supports your home and is easy to live with. Select hardware that feels good in your hand and is sized to the cabinet. Invest in storage that saves time every day. Focus your budget where function matters most, and use lighting to make every choice look better. With these steps, you get a kitchen that works now and ages well.
FAQ
Q: What cabinet color makes a small kitchen feel larger
A: Light colors like warm white or light gray reflect light and help a small kitchen feel larger. Pair them with simple finishes and bright under cabinet lighting for the best effect.
Q: What is the difference between inset and overlay doors
A: Inset doors sit flush inside the frame and look tailored but need precise installation and cost more. Overlay doors sit on top of the frame, are more forgiving to install, and can be full overlay for a modern look or partial overlay for a budget friendly option.
Q: How do I choose between knobs and pulls
A: Use knobs on doors and pulls on drawers for a clean and consistent look. Pulls are easier to grip on heavy drawers and trash pull outs. Knobs are simple and budget friendly for lighter doors.
Q: What hardware size should I use for drawers and doors
A: For drawers 12 to 24 inches wide, choose pulls 5 to 8 inches long. Knobs of 1 to 1.5 inches in diameter suit most doors. On doors, place hardware 2 to 3 inches from the opening edge and 2 to 3 inches from the bottom on uppers or from the top on base doors.
Q: Which cabinet materials are most durable for daily use
A: Plywood boxes, hardwood frames, MDF center panels for painted doors, and full extension soft close slides offer strong daily performance. Thermofoil and laminate are easy to clean but need care near heat.