We are reader supported. When you purchase through links on our site, we may earn an affiliate commission. Also, as an Amazon affiliate, we earn from qualifying purchases.
Thinking about removing the black stainless steel coating from an appliance or fixture? Maybe it is scratched, mismatched, or you prefer the classic silver look. You can do this safely at home, but the right method depends on which type of black finish you have. This guide explains how to identify the coating, what tools to use, and the safest step-by-step methods to take the finish off while protecting the stainless steel underneath.
What Black Stainless Coating Really Is
PVD or ion-plated color
Many black stainless products use a PVD (Physical Vapor Deposition) finish. This is a very thin but hard metallic coating deposited in a vacuum. It looks uniform, resists fingerprints better than bare steel, and will not come off with regular cleaners or mild solvents. Removing PVD requires abrasion, careful sanding, or professional blasting. Chemicals will not dissolve it.
Painted or tinted clear coat over stainless
Some brands apply a dark-tinted clear coat or a paint-like layer on top of brushed stainless. These coatings can sometimes soften with certain solvents or controlled heat. They are not as hard as PVD, but still need careful testing before removal.
Vinyl or polymer film
Less common, some panels or trim pieces use a vinyl film for the black look. Films often peel with heat and a plastic scraper, leaving adhesive behind that you remove with citrus adhesive remover or rubbing alcohol. This is the easiest type to take off safely.
Before You Start: Safety, Warranty, and Expectations
Safety reminders
Wear cut-resistant gloves to avoid sharp edges, and nitrile gloves when using solvents. Use eye protection and good ventilation. Keep heat guns on low and away from electronics, door seals, and paint. Do not smoke near solvents, and keep a metal container with a lid for solvent-soaked rags to prevent fire risk.
Warranty and resale impact
Removing the coating will likely void warranties and reduce return options. If the appliance is new or leased, check your paperwork before starting. If you plan to sell later, note that original finishes are usually preferred by buyers.
Time and effort estimate
Small trim can take an hour. A full fridge door can take several hours to a day, especially if you need to wet sand and re-grain the surface. Plan enough time so you are not rushing, which can cause scratches or uneven results.
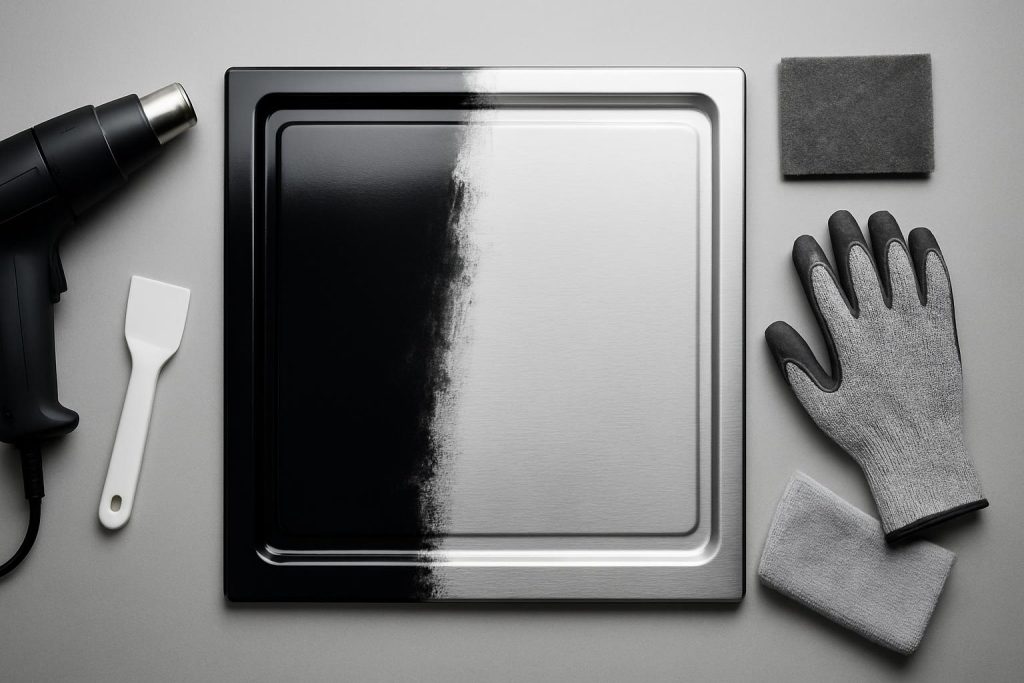
Tools and Materials
Have clean microfiber cloths for wiping and polishing. Use painter’s tape and plastic sheeting to protect nearby cabinets and floors. Keep a plastic razor scraper or old credit card for gently lifting film or softened coatings. Get a citrus-based adhesive remover or isopropyl alcohol for glue residue, and a mild degreaser for initial cleaning.
For abrasion methods, collect wet/dry sandpaper in grits 600, 800, 1000, and 1500 or 2000. A gray or maroon non-woven finishing pad designed for stainless helps you re-create the brushed look. A random-orbit sander with an interface pad is helpful for large, flat panels, but hand sanding is safer for beginners.
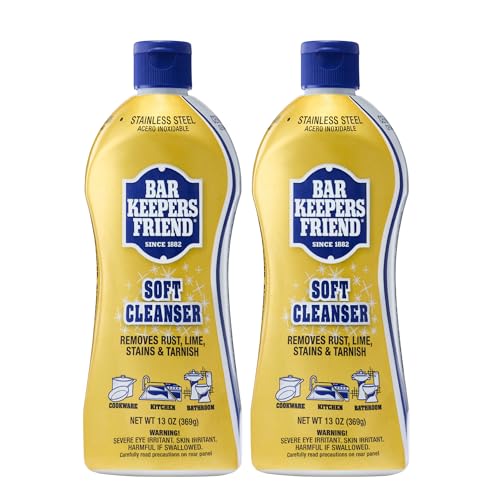
Use a heat gun with a low setting if you suspect a film coating. Keep a spray bottle of water and a small bucket for wet sanding. A stainless steel cleaner or a thin mineral oil helps the final finish. Bar Keepers Friend or another oxalic acid based cleaner can help de-stain and passivate the surface after sanding.
Prep the Workspace and Appliance
Power down and protect
Unplug the appliance or switch off the breaker if you need to remove handles or panels. Open doors and remove shelves and food so you can work without rushing. Lay down cardboard and plastic to protect floors and nearby walls. Keep pets and kids away from the area.
Clean the surface
Wash the appliance with mild dish soap and warm water to remove grease and dust. Dry completely with a microfiber cloth. Clean surfaces make testing and sanding more predictable and prevent grit from causing deep scratches.
Mask areas you will not touch
Use painter’s tape to mask logos, rubber seals, edges around glass, controls, and plastic trim. Cover these areas with tape and plastic so solvents and sanding do not damage them. Removing handles or panels can make the job cleaner and safer.
Identify the Coating Type with Small Tests
Solvent test
Choose an inconspicuous area like the bottom edge of a door. Dab a microfiber cloth with isopropyl alcohol and rub for 30 seconds. If nothing transfers to the cloth, try a small amount of citrus adhesive remover. If color softens or transfers, you likely have paint or a film, not PVD. If nothing happens with either, it is probably PVD.
Heat test
Warm a tiny area with a heat gun on low for a few seconds and try lifting an edge with a plastic razor. If you can catch a corner and pull like a sticker, it is a film. If the surface becomes tacky but does not peel cleanly, it may be a painted coating. If there is no change, it is likely PVD.
Abrasion test
Lightly stroke a gray non-woven pad in the direction of the factory grain for just a few passes. If you see shiny stainless appear quickly, the coating is thin and may be paint or clear coat. If it resists and only scuffs, it is likely PVD.
Interpret your results
If solvent or heat helps, choose the film or paint removal method. If neither affects the finish, use the abrasion method. Always test on a hidden area first to confirm how the surface reacts.
Method A: Remove Film or Paintlike Coatings
Soften adhesives with gentle chemistry
For film, apply a citrus-based adhesive remover along an edge and let it dwell for a few minutes. Keep it off rubber seals and plastic trim. For painted layers that respond to alcohol, dampen a cloth with isopropyl alcohol and rub small sections at a time. Avoid harsh paint strippers that can damage plastics and create fumes you do not want indoors.
Lift an edge and peel slowly
Use a plastic razor or old card to lift a corner. Pull the film back on itself at a low angle while warming slightly with the heat gun. This reduces adhesive left behind and helps prevent tearing. Work in manageable sections so you keep control and avoid stretching film over nearby seals or corners.
Clean leftover adhesive
Apply a small amount of citrus adhesive remover or alcohol to a cloth and wipe the residue. Let it sit briefly, then scrape with the plastic razor at a shallow angle. Reapply until the metal feels clean and smooth. Rinse with mild soap and water, then dry with a microfiber cloth.
What if residue smears or clouds
If the surface looks smeared, switch to fresh cloths and use less chemical but more dwell time. A small amount of mineral spirits can help loosen stubborn adhesive, but use it with good ventilation and keep it away from plastic trims. Finish with a soap-and-water wash to remove any film.
Method B: Carefully Strip a Tinted Clear Coat
Try mild solvents first
Some tinted clear coats will soften with isopropyl alcohol or a gentle solvent like mineral spirits. Work in small areas. Keep rubbing with a microfiber cloth and replace cloths as they load up. If you see the tint transferring, keep going slowly to avoid streaks and uneven patches.
Use controlled heat to help
Gently warming the surface with a heat gun on low can make a clear coat more workable with a plastic razor. Do not overheat and do not point heat at seals, displays, or edges for long. Combine slight heat with solvent wiping for better results.
Switch to fine abrasion if needed
If the clear coat resists solvents, use wet sanding to remove it evenly. Keep the paper wet and sand in the direction of the stainless grain, starting at 800 grit. Make light, even passes and check often. Once the tint is mostly gone, move to 1000 and then 1500 grit to refine the surface.
Blend and re-grain
After sanding, use a gray non-woven finishing pad and stroke with the grain to restore a uniform brushed look. Keep pressure consistent and work from edge to edge so you do not create curved swirls or hot spots.
Method C: Abrade a True PVD Coating
Work with the factory grain
Most stainless panels have a visible linear grain. Always sand and finish in that direction. Crossing the grain creates visible scratches that are hard to correct. Good lighting will help you see the grain as you work.
Wet sanding grit progression
Start with 600 to 800 grit wet/dry paper, lightly soaked in water with a drop of dish soap for glide. Make gentle, straight strokes along the grain. Do not press hard. Wipe often to check progress. When the black color thins and you see consistent silver, step to 1000 grit, then 1500 or 2000 to refine. Patience is key. Rushing can gouge the steel.
Edges, corners, and cutouts
Use light pressure near edges to avoid rolling them or thinning the metal. Wrap sandpaper around a soft block to keep the face flat. For tight areas, fold a small piece of paper and make short, controlled strokes with the grain. Mask adjacent plastic or rubber.
Polish and blend uniformly
After fine sanding, switch to a gray non-woven finishing pad. Make long, even strokes from one edge to the other to blend the whole panel. If the original stainless had a heavy brush, you can finish with a slightly coarser maroon pad, but test first so you do not over-texture the surface.
Keep the panel cool and clean
Wipe slurry often and mist water to cool the surface. Overheating can discolor stainless. Remove dust from the area so abrasives do not transfer to other surfaces or scratch the panel during reassembly.