We are reader supported. When you purchase through links on our site, we may earn an affiliate commission. Also, as an Amazon affiliate, we earn from qualifying purchases.
Caring for miniature rose bushes is simple when you follow a clear routine. These compact roses reward steady attention with repeat blooms and tidy growth. This guide walks you through light, water, soil, pruning, feeding, pest control, and seasonal care, so you know what to do every week of the year. Keep reading to set up a system that works and keeps your plant healthy.
Know Your Miniature Rose
What miniature really means
Miniature roses are true roses with smaller growth and flowers. Most stay between 15 and 45 centimeters tall, with tight internodes and many blooms. They are not houseplants by default. They need bright light, sharp drainage, and regular feeding just like full-size roses. Expect ongoing care rather than set-and-forget watering.
Indoor versus outdoor living
Miniature roses can grow indoors near a sunny window, but they bloom best outdoors where light is stronger. If your windows offer at least 6 hours of direct sun, indoor growth is possible. If not, move the plant outside when temperatures are mild or use a grow light. A balcony with morning sun and afternoon shade works very well. If you must keep it indoors long term, plan for supplemental light and strong airflow.
Light and Placement
How much light they need
Aim for 6 to 8 hours of direct light daily. More light equals more buds. Indoors, a south or west window is best. Outdoors, morning sun with afternoon shade prevents heat stress, especially in hot climates. If leaves pale, internodes stretch, or blooms fade quickly, increase light gradually.
Window and balcony strategies
Place the pot at the very edge of the brightest sill. Pull back curtains. Clean the glass to boost intensity. Rotate the pot a quarter turn every week for even growth. On a balcony, give the plant at least a half meter of open space around it to improve airflow. Protect from harsh wind that can dry leaves and buds.
Grow light basics
Use a full spectrum LED positioned 20 to 30 centimeters above the plant. Run it for 12 to 14 hours daily to mimic a long summer day. Keep the light stable and avoid constant moving. Combine with a small fan on low to reduce fungal risk.
Potting and Soil
Best containers and drainage
Choose a pot with large drainage holes. A 15 to 20 centimeter wide pot suits most starter plants. Terracotta breathes and prevents soggy roots, but dries faster. Plastic retains moisture longer, which helps in dry homes. Avoid decorative cachepots that trap water. Always use a saucer and empty standing water within 10 minutes of watering.
Soil mix that works
Use a light, fast-draining mix. Combine two parts high-quality potting soil, one part perlite or pumice, and one part compost or well-rotted manure. The goal is firm support with excellent drainage. If you live in a humid area, increase perlite to reduce moisture retention. If your air is very dry, add a small amount of coconut coir for even moisture.
Repotting timing and steps
Repot after purchase if the plant is rootbound or in nursery soil that dries too fast. Best timing is early spring or after a heavy bloom cycle. Water lightly the day before. Slide the plant out, loosen the outer roots, and remove about one third of old soil. Set into fresh mix at the same depth. Press gently to remove air pockets. Water thoroughly and place in bright but gentler light for a week while it adjusts.
Watering Done Right
When to water
Check the top 2 to 3 centimeters of soil with your finger. Water when this layer feels dry. Do not follow a fixed calendar because light, pot size, and climate change the needs. In warm months you may water every 2 to 3 days. In cool months, weekly or less. Watch the plant, not the date.
How to water
Water at the base until liquid runs from the drainage holes. Avoid wetting leaves late in the day to limit disease. After 10 minutes, discard water in the saucer. If the soil has dried out severely and repels water, bottom-water by placing the pot in a basin for 15 minutes, then drain well.
Humidity and airflow
Miniature roses prefer moderate humidity and moving air. Indoors, run a small fan on low nearby to prevent mildew. Avoid misting, which can trigger fungal spots. Keep foliage dry and give space around the plant so air can circulate.
Feeding for Blooms
Fertilizer types and schedule
Roses are heavy feeders. During active growth and bloom, use a balanced liquid fertilizer at half strength every 2 weeks, or a slow-release granular formula every 6 to 8 weeks as directed. Include micronutrients like iron and magnesium. In mid to late summer, switch to a bloom formula with slightly higher potassium to support flower production. Stop feeding about six weeks before expected frost to allow the plant to slow down naturally.
Signs of deficiency or excess
Pale leaves with green veins suggest iron deficiency. Add a chelated iron supplement. Small blooms and weak stems can signal low nutrients; resume a steady feeding routine. Burned brown edges and crusty soil indicate overfeeding; flush the pot with plain water twice, then pause fertilizer for two weeks. Observe new growth rather than old leaves for your progress.
Pruning and Deadheading
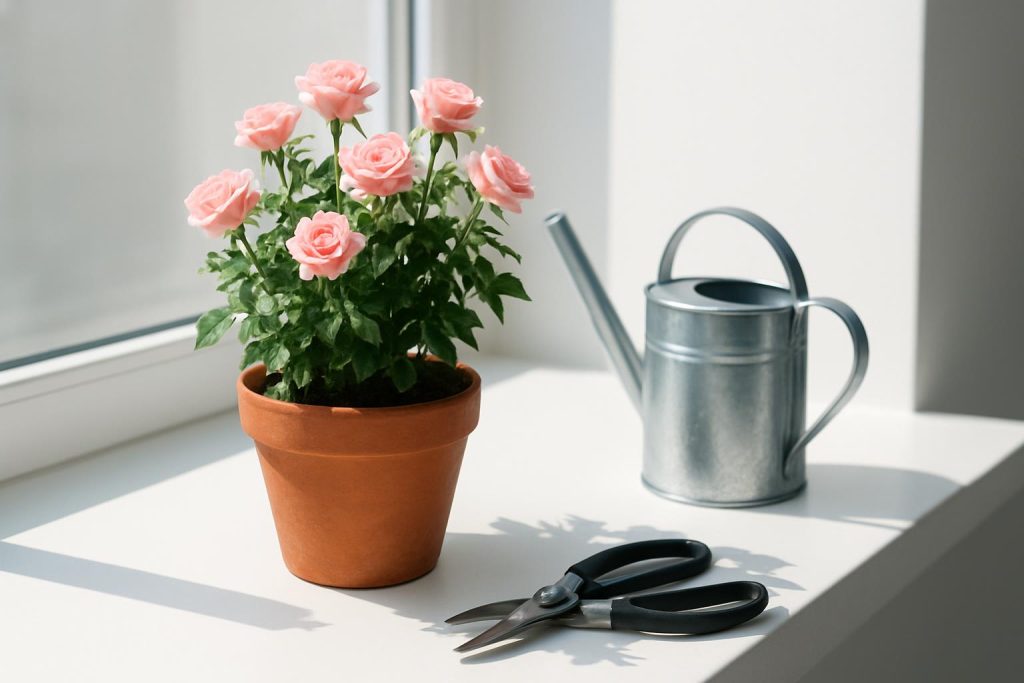
Tools and hygiene
Use sharp bypass pruners or small snips. Clean blades with 70 percent isopropyl alcohol before and after use, and between plants. This habit prevents disease spread. Keep a clean cloth and alcohol bottle in your gardening kit so sanitizing feels automatic.
Deadheading method
Remove spent blooms to push new flowers. Cut the stem back to the first strong five-leaflet leaf facing outward. Make a clean cut at a slight angle about 0.5 centimeters above the leaf node. Do not leave long stubs. Collect all clippings and toss them out; do not compost disease-prone materials.
Seasonal pruning
In late winter or very early spring, prune to shape. Remove dead, damaged, or crossing stems first. Aim for an open center with 4 to 6 strong canes on larger plants. On small minis, reduce by about one third to refresh growth. Seal large cuts if you live in a disease-prone climate. After pruning, feed lightly and water well to support new growth.
Pest and Disease Prevention
Weekly check routine
Inspect leaves top and bottom, stems, buds, and the soil surface. Look for sticky residue, webbing, stippling, distorted growth, or spots. Catching issues early allows gentle fixes. Wipe leaves with a soft, damp cloth to remove dust, which improves photosynthesis and lets you see problems sooner.
Common pests and fixes
Aphids cluster on new growth and buds. Spray them off with a strong stream of water in the morning and repeat every few days. Follow with insecticidal soap if needed. Spider mites cause fine webbing and speckled leaves, often in hot, dry rooms. Increase airflow and humidity around the plant, then use insecticidal soap or neem oil weekly for three weeks. Thrips scar petals and cause deformed buds; remove affected blooms and apply a systemic control if the issue persists. Always test any spray on a small area and avoid spraying in direct sun or heat.
Common diseases and fixes
Powdery mildew shows as white film on leaves. Improve airflow, avoid overhead watering, and remove affected leaves. Black spot creates round black lesions with yellow halos. Collect and discard fallen leaves, keep foliage dry, and apply a rose-safe fungicide as directed. Botrytis blight browns petals and buds in cool, damp weather; thin growth for airflow and remove infected blooms. The best prevention is clean tools, proper spacing, and a watering routine that keeps leaves dry.
Seasonal Care and Dormancy
Summer heat protection
Above 32 degrees Celsius, roses may pause blooming. Shade during peak afternoon sun and water early in the day. Mulch the soil surface with 2 to 3 centimeters of fine bark to keep roots cool. Do not overfeed during a heat wave. Keep airflow strong to deter pests that thrive in stress.
Winter and dormancy
Miniature roses grown outdoors in cold regions need protection. Move potted plants into an unheated but frost-free garage or porch where temperatures hold between 1 and 7 degrees Celsius. Water lightly once a month so roots do not dry out. Do not fertilize in winter. Indoor roses kept warm may not fully go dormant but will slow down. Provide as much light as possible and reduce watering frequency based on soil dryness.
Restarting growth in spring
As days lengthen, gradually reintroduce stronger light. If moving from inside to outside, harden off over 7 to 10 days. Start with morning sun for an hour or two, then add more each day. Resume normal feeding when you see new shoots. Prune lightly to set shape and remove winter dieback.
Propagation and Renewal
Taking cuttings
Choose a healthy, non-flowering stem about 8 to 10 centimeters long. Remove lower leaves, keep two leaves at the top, and dip the cut end in rooting hormone. Insert into a small pot with moist perlite and potting mix. Cover with a clear dome or bag to maintain humidity, but vent daily to prevent mold. Keep in bright, indirect light. Roots form in 3 to 5 weeks. Pot up once roots are 2 to 3 centimeters long and new growth appears.
Rejuvenating a tired plant
If blooms decline and the plant looks woody, do a staged refresh. In early spring, prune by one third, repot into fresh mix, and begin a steady feeding plan. Remove the oldest, weakest cane entirely if space is crowded. Maintain strict deadheading and watch for pests. Within a cycle or two, bloom count usually recovers.
Troubleshooting Quick Guide
Yellow leaves
Yellow leaves low on the plant can be normal aging. Yellow with soft soil suggests overwatering; let the top layer dry more and improve drainage. Yellow with dry soil suggests underwatering; water slowly and thoroughly. Yellow with green veins often means iron deficiency; apply chelated iron and ensure pH is not too high. Most roses prefer a pH near 6.0 to 6.5.
No blooms
Low light is the top cause; increase sun or add a grow light. Lack of food is next; resume balanced feeding. Failure to deadhead also slows new buds; remove spent blooms correctly. Heat stress above 32 degrees can pause flowering; provide afternoon shade. Young plants may need a few months to build energy.
Crispy edges or dropping buds
Underwatering and hot, dry air cause crispy edges. Water thoroughly and add light mulch. Bud drop can follow sudden moves, temperature shocks, or very low humidity. Keep conditions stable. Spider mites can also cause desiccation; inspect closely and treat if needed.
Simple Care Schedule You Can Keep
Daily and weekly tasks
Each morning, glance at the plant. If leaves droop or the top soil layer is dry, plan to water that day. Once a week, rotate the pot, wipe dust from leaves, and inspect for pests. Remove any spent blooms as soon as they fade. Keep tools clean and stored together so pruning and sanitizing become routine.
Monthly tasks
Feed according to the season and your chosen product. Refresh mulch if it has thinned. Check pot weight before and after watering to learn how a well-watered plant feels. This simple habit helps you gauge moisture even when you cannot check the soil easily.
Seasonal tasks
In early spring, prune to shape and repot if needed. In summer, protect from extreme heat and maintain feeding for blooms. In autumn, reduce feeding and prepare for dormancy if you garden in a cold climate. In winter, protect roots from freeze and water sparingly.
Cleanliness and Organization Matter
Sanitize and prevent spread
Always sanitize pruners before and after use. Quarantine new plants for two weeks away from your rose to prevent pest transfer. Remove fallen leaves from the soil surface, especially after rain or watering. Clean saucers and outer pots monthly to prevent algae and gnats.
Set up a simple kit
Keep a small bin with pruners, alcohol, a microfiber cloth, insecticidal soap, a watering can with a narrow spout, and a moisture meter if you use one. Having tools ready reduces delay and keeps care consistent. Consistency is what roses respond to most.
Common Myths to Ignore
Myth one: roses hate pots
Miniatures do well in containers as long as drainage, light, and feeding are correct. Many growers keep their best bloomers in pots for years with regular repotting.
Myth two: more water solves problems
Overwatering causes root rot and yellow leaves. Instead of watering more, adjust watering to soil dryness and improve light and airflow.
Myth three: indoor light is always enough
Most homes do not provide strong direct sun for 6 to 8 hours. If blooms are weak indoors, add a grow light or move the plant outside when weather allows.
Putting It All Together
Build your routine
Give strong light. Use fast-draining soil in a pot with big drainage holes. Water when the top layer of soil is dry, then drain. Feed regularly during growth. Deadhead every time a bloom fades. Keep tools clean and the plant area tidy. Check weekly for pests and treat early. Adjust care by season rather than using a fixed calendar.
Conclusion
Your path to steady blooms
Miniature rose bushes are manageable when you follow a simple system. Prioritize light, water with intention, feed on schedule, prune cleanly, and keep the plant environment clean. With these habits, your miniature rose will cycle through buds and blooms again and again. Start with one change today, such as improving light or setting a weekly inspection time. In a few weeks you will see stronger growth, cleaner leaves, and more reliable flowers. Keep the routine steady, and your miniature rose will reward you all season long.