We are reader supported. When you purchase through links on our site, we may earn an affiliate commission. Also, as an Amazon affiliate, we earn from qualifying purchases.
You want hands-on projects that feel doable, look good at home, and do not leave a mess you regret. This guide gives you 15 creative craft ideas for adults, each with clear steps, realistic time and cost, and fast cleanup moves. Start with a quick win, build confidence, and keep your supplies tidy so you can craft more and stress less.
Set Yourself Up For Success
Starter Toolkit That Works Across Many Crafts
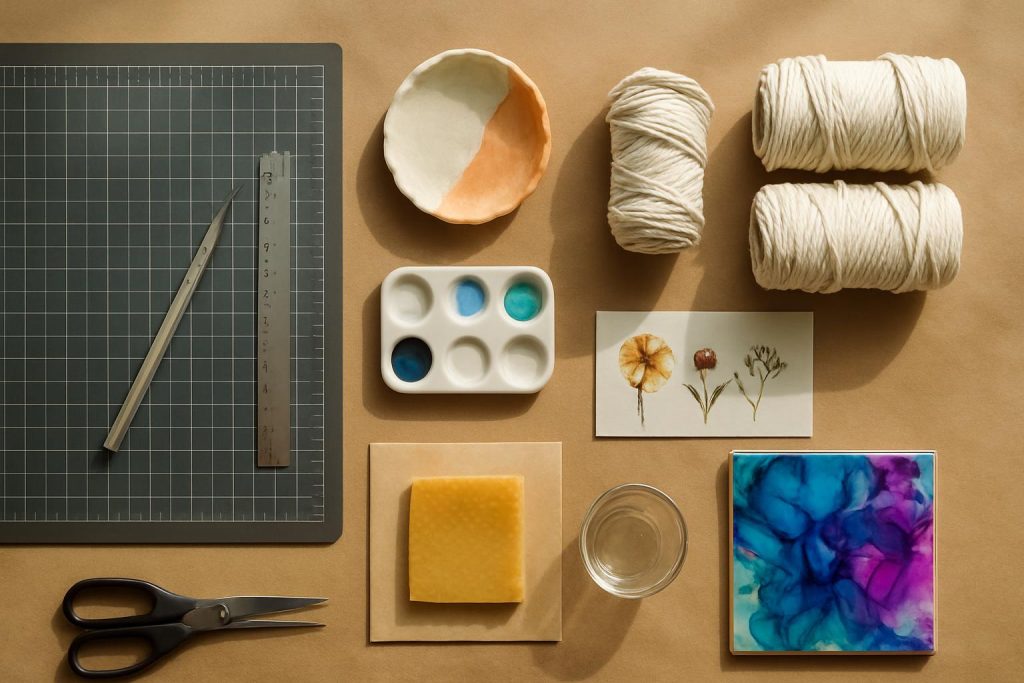
Starter toolkit: craft knife, self healing cutting mat, sharp scissors, metal ruler, pencil, washable white glue, masking tape, fine grit sandpaper, small acrylic paint set and brushes, mixing sticks and small cups, microfiber cloths, nitrile gloves, old towels, silicone mat, kraft paper roll.
Workspace And Cleanup Habits
Cover your surface with kraft paper or a silicone mat, keep a lined trash bin within reach, wipe wet spills at once with a damp microfiber cloth, let paint drips dry then peel, and wash brushes right after use with warm soapy water.
Work with good airflow near an open window or a fan, wear a dust mask when sanding concrete or wood, and keep kids and pets out until surfaces are dry.
Time, Budget, Skill Levels
Each project lists time, skill level, and cost. Use these to plan your session and avoid half finished work. Short projects fit weeknights. Longer ones suit weekends. Low cost projects are ideal for testing a new technique before you invest more.
15 Creative Craft Ideas For Adults
1. Air Dry Clay Trinket Dishes
Why try it: Fast results and a clean modern look. Great gift.
Materials: Air dry clay, small bowl for shaping, rolling pin or bottle, craft knife, sandpaper, acrylic paint, sealant.
Steps: Condition clay. Roll to even thickness. Press over the outside of a bowl to form a shallow dish. Trim edges. Let dry fully per package. Sand edges smooth. Paint rim or add a simple pattern. Seal.
Time and skill: 45 to 90 minutes active plus drying. Beginner. Low cost.
Cleanup and storage: Wipe dust with a slightly damp cloth. Store leftover clay sealed in a zip bag with a damp paper strip.
2. Soy Candle In A Thrifted Cup
Why try it: Cozy upgrade and easy to customize scents.
Materials: Soy wax flakes, cotton wick, thrifted heat safe cup, wick sticker, fragrance oil, thermometer, pouring jug.
Steps: Fix wick in center. Melt wax in a double boiler. Cool to the recommended pour temp. Add fragrance. Pour slowly. Hold wick centered while setting. Cure per wax guide.
Time and skill: 45 minutes active plus cure time. Beginner. Medium cost.
Cleanup and storage: Wipe tools warm with paper towels, then wash. Store fragrance oils upright with caps tight, away from sunlight.
3. Simple Macrame Plant Hanger
Why try it: Quick decor that clears surfaces by hanging plants.
Materials: 4 to 8 lengths of cotton cord, metal or wooden ring, tape measure, scissors, hook for hanging while you knot.
Steps: Tie cords to ring with larks head knots. Make square knots to build length. Split cords into sets and tie overhand knots to form a basket shape. Finish with a large knot underneath.
Time and skill: 60 to 90 minutes. Beginner. Low cost.
Cleanup and storage: Coil cord leftovers with small masking tape flags. Hang finished pieces to prevent tangles.
4. Alcohol Ink Tile Coasters
Why try it: Bold color on a small canvas with fast payoff.
Materials: Ceramic tiles, alcohol inks, isopropyl alcohol, dropper or straw, felt pads, clear spray sealer.
Steps: Degrease tiles. Drop inks and guide blends with alcohol. Tilt or blow gently for patterns. Dry fully. Spray seal in light coats. Add felt pads under tiles.
Time and skill: 45 minutes plus drying. Beginner. Medium cost.
Cleanup and storage: Use gloves. Wipe spills with alcohol. Store inks upright in a lidded bin.
5. Embroidered Tote Upgrade
Why try it: Turns a plain bag into a custom daily essential.
Materials: Cotton tote, embroidery needle, floss, water soluble pen, simple pattern, small hoop.
Steps: Trace a simple design. Hoop the area. Use backstitch or satin stitch to outline and fill. Secure thread ends neatly inside the tote.
Time and skill: 1 to 3 hours. Beginner friendly. Low cost.
Cleanup and storage: Wrap leftover floss around cardboard bobbins, label colors, and file in a small box.
6. Decoupage Serving Tray
Why try it: Refresh a tired tray with minimal paint skills.
Materials: Wooden tray, sandpaper, acrylic paint, decoupage glue, paper napkins or tissue, clear top coat.
Steps: Sand and paint base. Separate napkin layers and place design. Brush decoupage glue under and over paper. Smooth gently. Dry. Seal with a clear coat.
Time and skill: 2 to 3 hours including drying. Beginner. Low to medium cost.
Cleanup and storage: Wash brushes at once. Store decoupage glue sealed to prevent skinning.
7. Pressed Flower Bookmarks
Why try it: Uses garden finds and makes light, flat gifts.
Materials: Pressed flowers and leaves, cardstock, clear contact film or laminator, ribbon, hole punch.
Steps: Arrange pressed plants on cardstock strips. Cover with contact film or laminate. Trim edges. Punch a hole and add ribbon.
Time and skill: 30 to 45 minutes. Beginner. Low cost.
Cleanup and storage: Keep pressed botanicals in a labeled notebook with baking paper pages.
8. No Sew Fabric Covered Storage Box
Why try it: Organizes shelves while matching your decor.
Materials: Sturdy box, fabric, spray adhesive or double sided tape, scissors, ruler, label holder.
Steps: Cut fabric with a 2 to 3 cm allowance. Adhere sides first, then fold and secure corners neatly inside. Add a label holder.
Time and skill: 45 to 60 minutes per box. Beginner. Low to medium cost.
Cleanup and storage: Use a silicone mat when spraying adhesive. Roll fabric scraps and store by color.
9. Concrete Mini Planters
Why try it: Matte, modern planters for small succulents.
Materials: Fast setting concrete mix, disposable cups as molds, cooking spray, mixing stick, sandpaper, optional acrylic paint.
Steps: Grease molds. Mix concrete to a pourable paste. Fill outer mold, press a smaller cup to form cavity. Tap to release bubbles. Cure. Demold. Sand edges. Paint a stripe if you like.
Time and skill: 60 minutes active plus cure. Intermediate due to mixing. Low cost.
Cleanup and storage: Never pour concrete slurry down drains. Let residue harden, then dispose in trash. Wear a dust mask when sanding.
10. Beeswax Food Wraps
Why try it: Cuts plastic use and looks neat in the kitchen.
Materials: Cotton fabric squares, beeswax pellets, optional pine resin and jojoba oil blend, parchment paper, iron or oven.
Steps: Prewash fabric. Sprinkle wax evenly. Cover with parchment. Melt with an iron or in the oven until saturated. Lift and wave to cool. Check coverage and add more if needed.
Time and skill: 30 to 45 minutes. Beginner. Medium cost.
Cleanup and storage: Dedicate an old baking tray or parchment. Store wraps flat in a cool drawer.
11. Natural Room Spray
Why try it: Freshens rooms without heavy chemicals.
Materials: Spray bottle, distilled water, vodka or witch hazel, essential oils.
Steps: Mix water with a small amount of vodka or witch hazel. Add a few drops of essential oil. Shake and label. Spot test on fabrics.
Time and skill: 10 minutes. Beginner. Low cost.
Cleanup and storage: Wipe funnel and bottle threads. Store in a cool, dark place with a clear label.
12. Polymer Clay Earrings
Why try it: Lightweight, custom colors, and strong after baking.
Materials: Polymer clay, rolling pin, cutters, needle tool, baking tray, jump rings, earring findings, strong craft glue, sandpaper.
Steps: Condition clay. Roll even. Cut shapes. Add holes with a needle. Bake per brand guide. Sand edges. Assemble with jump rings and glue posts.
Time and skill: 1 to 2 hours plus baking. Intermediate. Medium cost.
Cleanup and storage: Use a dedicated tile for rolling to avoid lint. Keep clay wrapped and color separated.
13. Stenciled Tea Towels
Why try it: Useful, washable, and quick to batch for gifts.
Materials: Plain cotton towels, fabric paint, stencil, stencil brush or sponge, masking tape, cardboard insert.
Steps: Prewash towels. Insert cardboard. Tape stencil. Dab on fabric paint with a nearly dry sponge. Lift stencil. Heat set per paint directions.
Time and skill: 45 to 60 minutes plus heat set. Beginner. Low cost.
Cleanup and storage: Rinse stencil before paint dries. Keep fabric paints capped and upright.
14. Leather Key Fob
Why try it: Small piecework that feels durable and polished.
Materials: Leather strip, key fob hardware, rivet or screw post, hole punch, ruler, mallet, edge burnisher or sandpaper.
Steps: Cut to length. Round corners. Burnish or sand edges. Punch hole. Fold and set hardware with a rivet. Optional stamp for initials.
Time and skill: 30 to 45 minutes. Beginner to intermediate. Medium cost.
Cleanup and storage: Collect leather scraps in a zip bag for tags. Oil tools lightly to prevent rust.
15. Photo Transfer On Wood
Why try it: Personal wall art with a warm, rustic finish.
Materials: Laser print photo, smooth wood panel, gel medium, brush, water, soft cloth, clear sealer.
Steps: Brush gel on wood. Press photo face down. Burnish. Dry overnight. Dampen paper and rub gently to reveal the image. Seal.
Time and skill: 45 minutes active plus dry time. Intermediate. Low to medium cost.
Cleanup and storage: Wipe gel from brushes at once. Keep prints flat in a folder to avoid creases.
Clean As You Craft
Quick Rules That Save Time
Keep a damp microfiber cloth in one hand and a dry one nearby.
Rinse paint tools the moment you pause more than five minutes.
Contain small parts in a bowl so they do not roll off the table.
Line a tray for all wet items and move the whole tray when you need space.
Material Specific Tips
Water based paints and glues come off with warm soapy water if you act fast. Dried glue can often be rolled off silicone mats. Oil based products need dedicated rags and good airflow. Always read labels and store chemicals away from heat and sun.
Smart Storage For Supplies And Projects
Label And Group
Group by activity so you can grab one bin and start. Example: a candle bin, a clay bin, a sewing and embroidery bin. Add clear labels with contents and date last used so you know what to restock.
Protect Finishes
Finished pieces should cure fully before stacking or boxing. Wrap delicate items in tissue. Flat art stays safer in rigid folders or between foam boards.
Unfinished Work
For in progress pieces, use clear bins with lids, add a label with project name and date, keep small parts in zip bags, and store flat items between sheets of baking paper on a clipboard.
Use Your Walls
Install a pegboard for tools you reach for often. Hooks and small shelves keep the work surface open and reduce clutter that slows you down.
Pick Your First Project
Fast beginner wins: air dry clay trinket dishes, beeswax wraps, pressed flower bookmarks, and a natural room spray, each under an hour.
Next step projects: macrame plant hanger, stenciled tea towels, decoupage tray. These build skill without heavy gear.
Weekend builds: concrete planters, photo transfer on wood, polymer clay earrings. Plan extra time for curing and assembly.
Conclusion
You do not need a full studio to make useful, beautiful items at home. Start small, set up a clean workspace, and keep supplies sorted so crafting stays simple. Choose one idea today, follow the steps, and finish it. Every completed piece gives you skill and momentum for the next project.
FAQ
Q: What basic tools do I need to start most crafts
A: Starter toolkit: craft knife, self healing cutting mat, sharp scissors, metal ruler, pencil, washable white glue, masking tape, fine grit sandpaper, small acrylic paint set and brushes, mixing sticks and small cups, microfiber cloths, nitrile gloves, old towels, silicone mat, kraft paper roll.
Q: How do I protect my table and clean up fast
A: Cover your surface with kraft paper or a silicone mat, keep a lined trash bin within reach, wipe wet spills at once with a damp microfiber cloth, let paint drips dry then peel, and wash brushes right after use with warm soapy water.
Q: Which beginner friendly project gives quick results
A: Fast beginner wins: air dry clay trinket dishes, beeswax wraps, pressed flower bookmarks, and a natural room spray, each under an hour.
Q: How should I store unfinished projects
A: For in progress pieces, use clear bins with lids, add a label with project name and date, keep small parts in zip bags, and store flat items between sheets of baking paper on a clipboard.
Q: How can I handle fumes or dust safely at home
A: Work with good airflow near an open window or a fan, wear a dust mask when sanding concrete or wood, and keep kids and pets out until surfaces are dry.