We are reader supported. When you purchase through links on our site, we may earn an affiliate commission. Also, as an Amazon affiliate, we earn from qualifying purchases.
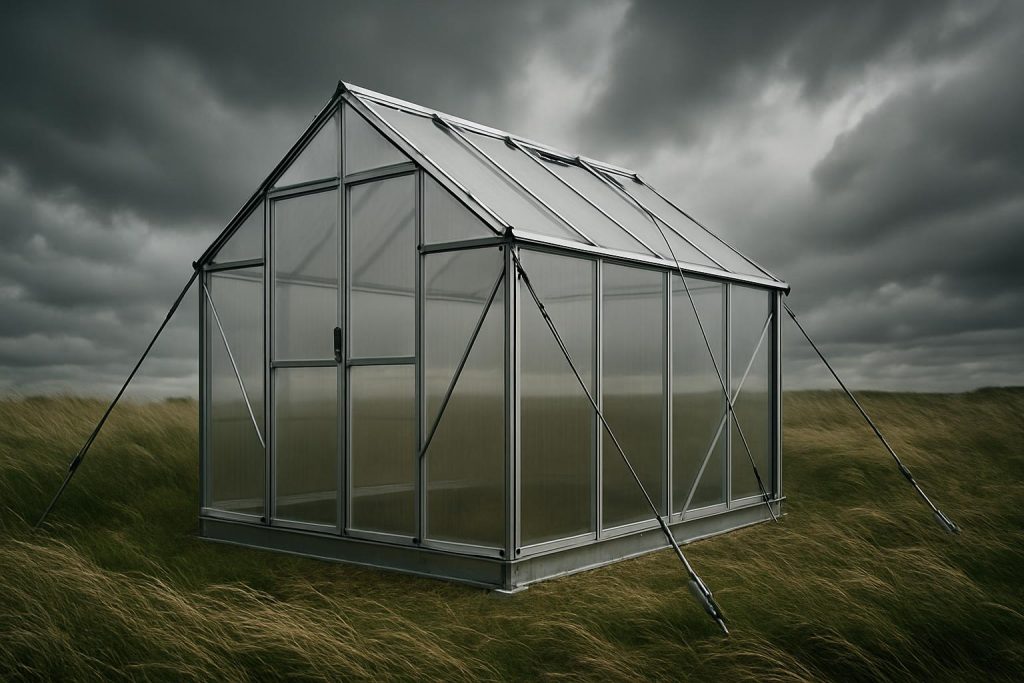
Wind can wreck a flimsy greenhouse in one afternoon. Panels pop out, frames twist, and zippers rip. If you garden in coastal zones, plains, or hilltops, you need a structure that is designed to take gusts, not just gentle breezes. This guide focuses on strong frames, secure glazing, and anchoring options that keep a greenhouse standing when weather turns rough. I will show clear criteria, four durable 2026 picks, and practical upgrades from real-world installs I have done for clients.
Here is the plan. First, understand what makes a greenhouse wind-ready. Then compare four proven models that balance strength, usability, and value. Finally, add simple reinforcements that dramatically increase survival rates during storms.
What Makes a Greenhouse Work in Wind
Frame strength and connections
Aluminum and galvanized steel frames offer the best stiffness to weight. Resin frames can work if they are thick and well braced. Look for continuous channels or bolted joints rather than thin clips. A rigid base kit that ties all walls together matters more than any single brace.
Glazing that stays put
Twin-wall polycarbonate is far more wind tolerant than single-wall panels or thin film. It flexes without shattering and insulates well. The best systems slide panels into deep aluminum channels and use locking strips, not loose spring clips.
Shape that sheds gusts
Curved profiles reduce lift. Lower ridge heights and tight-fitting doors and vents minimize rattling. Vents should lock or latch shut before storms. Large double doors need solid frames and multi-point latches.
Anchoring that is permanent
Your greenhouse is only as windproof as its foundation. Concrete footings with anchor bolts perform best. Heavy ground anchors and a timber perimeter can work when concrete is not an option. Tie the base down at corners and mid-span on long walls.
Hardware that does not loosen
Stainless or galvanized bolts and self-tapping screws beat push-fit connectors. Pre-drilled holes should align without forcing. If a kit provides extra braces and storm straps, use all of them, even if the forecast looks calm this week.
4 Best Greenhouses for Windy Areas in 2026
I selected four models that consistently perform in tough sites. I looked at frame rigidity, glazing retention, included base systems, and user-friendly assembly. I also added field notes and small tweaks that raise wind tolerance even more.
Canopia by Palram Glory 8 x 12 Polycarbonate Greenhouse
The Glory line is a heavy-duty series with thick twin-wall polycarbonate and a reinforced aluminum frame. Doors, vents, gutters, and the galvanized steel base are built for daily use. Panel edges seat into deep channels so wind cannot peel them easily. Assembly is clear, and parts are labeled well.
Why it helps: The frame is braced in every bay, and the base ties all sides together. Thick twin-wall panels flex under gusts but do not shatter. Roof vents lock closed so they do not flap during storms.
Best for: Suburban backyards with frequent winter storms, coastal gardens with salt-laden wind, and anyone who wants a near set-and-forget structure with minimal aftermarket bracing.
Setup notes: Set the supplied base on a leveled concrete slab or on four concrete piers connected by treated 4×4 runners. Use stainless concrete anchors through every base hole. Run a continuous bead of exterior-grade silicone in glazing channels during assembly. Add two ratchet storm straps over the ridge to ground anchors before your first storm season.
Potential downsides: Premium price for the size, and the heavy frame means you need two people for the roof sections. Automatic vent openers are often an extra cost.
I think: For most windy neighborhoods, this is the practical sweet spot. It is strong without being a full commercial build, and parts availability is solid.
Exaco Trading Company Riga Greenhouse
The Riga is a European-style curved greenhouse known for storm performance. The arched profile sheds wind and snow, and the twin-wall polycarbonate is thicker than most hobby units. The aluminum frame is dense and uses bolted connections throughout. Doors and vents are stout, and the kit often includes a steel base profile.
Why it helps: The curved shape minimizes lift and reduces the chance of panel blowout. Bolted joints resist racking under gusts. The entrance has a strong latch, and roof ventilation can be secured ahead of storms.
Best for: Exposed hilltops, plains with long fetch winds, and regions that see both wind and snow. Gardeners who want longevity over flash.
Setup notes: Place on a concrete footing or perimeter curb for the cleanest anchor layout. Use mechanical anchors at every frame foot. Seal panel joints during build. I add low-profile hurricane ties at eave points to link rafters to sidewalls and run two storm straps over the top to separate ground anchors.
Potential downsides: Higher cost and a more involved build than basic kits. The curved glazing means cutting custom shade cloth if you use it.
I think: If your site is truly windy, this is a tank. Clients near bluffs and open fields have had the least trouble with Riga compared to boxy shapes.
Monticello 8 x 12 Aluminum Greenhouse by Riverstone
Monticello uses thick extruded aluminum and twin-wall polycarbonate in a very rigid rectangular frame. The door frame and hinges are commercial grade, and the panel channels are deep. The modular design accepts extensions and accessories without weakening key joints.
Why it helps: The heavy-gauge aluminum posts and rafters reduce flex. Deep channels hold panels tight. With a proper base and anchors, the shell resists racking better than most hobby frames.
Best for: Permanent installations on concrete pads, serious gardeners who want USA-made rigidity, and neighborhoods that get frequent gale warnings.
Setup notes: Use a slab or a perimeter curb with embed anchors. Dry-fit every panel, then run foam glazing tape and a bead of sealant to stop rattle. I add extra self-tapping screws at mid-span on long rafters for stiffness. Install a door bolt at the floor to make a second latch point before storms.
Potential downsides: On the heavy side for DIY assembly, and the industrial look is not for everyone. Cost rises quickly with add-ons.
I think: When anchored to concrete, this model feels planted. Door hardware is a standout in wind because it closes cleanly without flexing the frame.
Rion Grand Gardener 8 x 12 Polycarbonate Greenhouse
Rion uses a heavy resin frame with internal reinforcement. The barn-style roof creates headroom while keeping sidewalls low. Panels are twin-wall polycarbonate with channel seating, and the door set is wide for carts.
Why it helps: The resin frame has a little flex, which can be forgiving in gusts. Panel retention is better than clip-only systems. The geometry reduces sail effect compared to tall, flat sidewalls.
Best for: Windy suburban lots that still need a lighter-weight kit, gardeners who prefer warmer interior temperatures from twin-wall panels, and anyone who values fast assembly.
Setup notes: Anchor the resin base to concrete or to a treated timber curb with sleeve anchors. Use all included braces. Add two ground anchors per long side and run storm straps over the ridge. Check door and vent latches after the first week of settling.
Potential downsides: Resin expands and contracts with temperature, so seasonal retightening of fasteners helps. Not as rigid as the Monticello or Riga under extreme gusts without added bracing.
I think: With a careful anchor plan and storm straps, the Grand Gardener is a strong value pick that holds up better than most budget frames.
Windproofing Upgrades I Recommend for Any Model
Small add-ons can double storm resilience. Do these during assembly, not after the first warning.
- Anchors and base
- Concrete slab with wedge anchors through every base hole
- Or concrete piers at corners and mid-wall with a treated timber curb and heavy structural screws
- Or spiral ground anchors on each corner and mid-wall tied to the base with stainless cable
- Storm straps
- At least two low-stretch ratchet straps over the ridge to independent ground anchors
- Pad contact points with scrap rubber to protect glazing
- Glazing retention
- Foam glazing tape in channels to stop rattle
- Exterior-grade silicone beads along panel edges on final fit
- Hardware and bracing
- Add self-tapping screws at key joints where pre-drilled holes allow
- Install small L-brackets in corners if the kit permits without piercing panels
- Site and orientation
- Door away from prevailing wind if possible
- Plant a living windbreak or install a slatted fence at least one greenhouse height away
Maintenance Checklist Before Storm Season
- Walk the frame and retighten all bolts and screws
- Check door and vent latches and add a secondary latch if needed
- Inspect panels for gaps and reseal edges
- Test storm straps and anchor tension
- Clear gutters and verify downspouts are secure
- Remove loose items inside that could strike panels
Conclusion
Wind-proofing a greenhouse starts with a rigid frame, secure twin-wall glazing, and a real anchor plan. The four models above cover different budgets and sites, but they share the same strengths that matter in gusts. Pick the frame that fits your exposure, then add storm straps, sealing, and permanent anchors on day one. I think this approach saves money, time, and plants over the long run. Build it once, brace it right, and you will not dread the next wind advisory.
FAQ
Q: Which greenhouse shape handles wind best?
A: Curved profiles and lower ridge heights shed gusts better than tall flat walls, and tight-fitting doors and vents reduce rattling.
Q: Which of these greenhouses is best for very windy sites?
A: The Riga and Monticello are top choices for exposed locations, and the Glory line is a strong pick for most windy neighborhoods when anchored well.
Q: What upgrades should I add to any greenhouse for wind?
A: Use permanent anchors, add storm straps over the ridge, seal panels with foam tape and silicone, add extra self-tapping screws where allowed, and orient the door away from prevailing wind.
Q: Are tunnel greenhouses a good idea for windy areas?
A: Panel greenhouses with twin-wall polycarbonate generally perform better, and tunnel styles only work in wind with heavy anchoring and reinforcement.
Q: How should I anchor a greenhouse on a windy site?
A: The best options are a concrete slab with wedge anchors, or concrete piers with a timber curb and structural screws, or spiral ground anchors tied to the base at corners and mid-walls.