We are reader supported. When you purchase through links on our site, we may earn an affiliate commission. Also, as an Amazon affiliate, we earn from qualifying purchases.
Living in a studio can feel tight only when the layout works against you. With a clear plan, the same square footage can support sleep, work, cooking, relaxing, and storage without stress. This guide gives you ten practical ways to organize any studio, plus simple planning steps, layout examples, and upkeep habits. Each idea is beginner friendly. The goal is to help you set up a home that looks calm, functions well, and stays easy to clean.
Start with a quick layout plan
Measure and map zones
Measure the full room, windows, door swings, radiator or heater positions, outlets, and ceiling height. Sketch a simple floor plan on paper. Divide the space into five zones you need most: sleep, lounge, work, cook, and store. You will not build walls. You will define these zones with furniture, lighting, and rugs.
Choose a main wall and a flow line
Pick one main wall to anchor the largest piece, usually the bed or the sofa. Decide on a clear path from the entry to the window. Keep that path open to improve light and airflow. Place furniture so it supports, not blocks, this route.
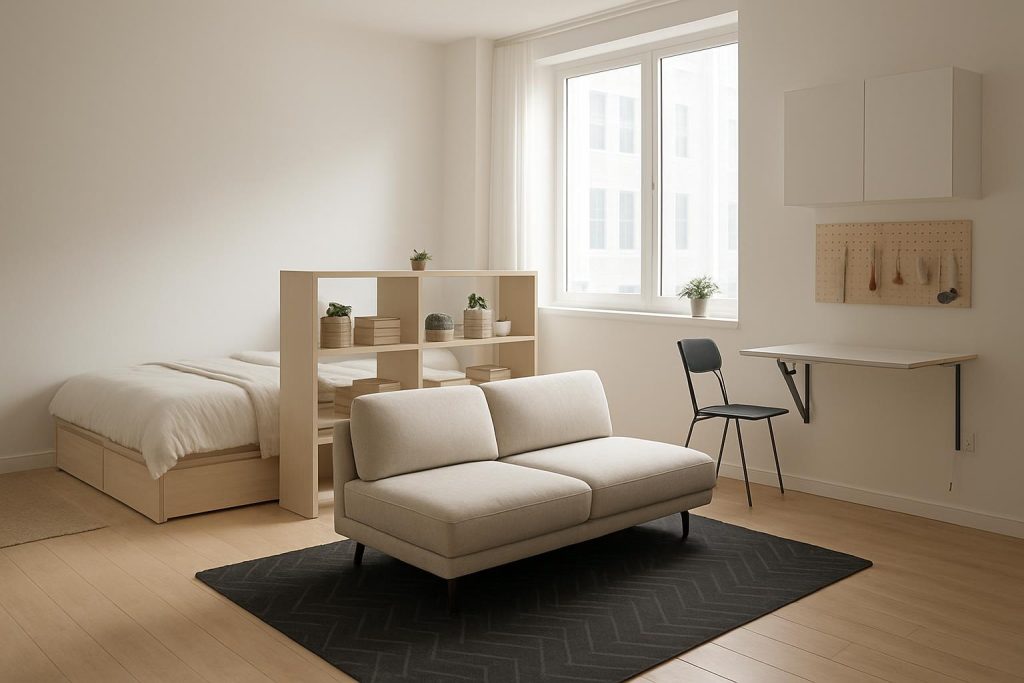
1. Define zones without walls
Rugs and lighting
Use area rugs to signal different functions. One rug under the sofa sets the lounge. A small, flat weave rug by the bed creates the sleep zone. Place a floor lamp or pendant to mark a reading corner or desk. Light tells your eye where one activity ends and the next begins.
Low dividers and open shelving
Position a low bookcase or open shelving unit as a gentle divider between bed and sofa. It adds storage and keeps sight lines open. Keep divider height around waist to chest level so daylight still reaches deep into the room. Store heavier items on lower shelves for stability.
2. Build a multipurpose bed zone
Storage bed or platform with drawers
A storage bed gives you the largest hidden space in the studio. Use drawers for off season clothing, spare bedding, and bulk items. Choose shallow organizers inside each drawer so items do not pile up. Keep a folding step stool nearby if the bed is high.
Murphy bed or daybed options
If you host often or need open floor space by day, consider a wall bed or a daybed with trundle. A Murphy bed clears the center of the room for workouts or projects. A daybed can read as a sofa during the day, which helps the space feel like a living room first.
3. Make the sofa work double duty
Sleeper sofa versus modular
A sleeper sofa adds a guest bed. A modular sofa lets you reconfigure for movie night, work sessions, or overnight guests. Choose tight back cushions to save depth. Legs that raise the sofa off the floor create an airy look and make cleaning easier.
Floating layout with a rug
Do not push everything against the wall by default. Try floating the sofa on a rug with the back facing the bed divider. This sets a lounge zone and hides bed clutter from view. Keep at least 75 to 90 centimeters of walkway around the grouping.
4. Use vertical storage to free floor space
Wall cabinets and pegboards
Shallow wall cabinets above the sofa or desk hold books, tools, and craft supplies without crowding. A pegboard over the desk or kitchen rail keeps gear visible and reachable. Arrange hooks and shelves by task so you do not overfill any one area.
Over door and ceiling racks
Use over door racks for shoes, cleaning supplies, or accessories. In the kitchen or entry, mount a ceiling rack or shelf for rarely used items like extra paper goods or luggage. Always secure into studs or use proper anchors for safety.
5. Create a compact kitchen workflow
Rolling island or drop leaf table
A slim rolling cart or drop leaf table gives you prep space when you need it and tucks away later. Park it parallel to your counter to create a simple galley flow. Store knives, cutting boards, oils, and salt on the cart so cooking stays mobile and fast.
Magnetic and rail systems
Use a magnetic strip for knives and a rail with hooks for ladles, towels, and mitts. Mount a narrow shelf for spices near the stove but outside the heat plume. Keep only daily cookware out. Store the rest in a lidded bin inside the cabinet to cut visual noise.
6. Dial in a desk that disappears
Fold down desk or wall mounted shelf
Install a fold down desk or a shallow wall shelf at desk height. Add a slim drawer for pens and chargers. Hang a folding chair on a hook when you need floor space. This keeps the work zone ready without taking over the room.
Cable control and power strip placement
Mount a surge strip under the desk and run cables along the backside with adhesive clips. Label each plug. Hide a small bin under the desk for files and a headset. Clear cables reduce tangle, dust, and stress.
7. Entry that contains clutter
Slim console, hooks, and shoe storage
Set up a narrow console or wall shelf at the entry for keys and mail. Mount two rows of hooks for coats and bags. Add a closed shoe cabinet or a lidded trunk bench. Contain everything that tends to pile up at the door.
Drop zone habits
Decide on one hook for daily bag, one tray for keys, and one bin for mail. Empty pockets over the tray. Sort mail every two days. These small moves prevent clutter from spreading into the living area.
8. Bathroom space you can actually use
Over toilet shelves and corner caddies
Use an over toilet shelf unit for towels, extra paper, and toiletries. Add clear bins so items stay grouped. A corner caddy in the shower holds soap and razor without blocking elbows. Keep only the current bottle of each product out.
Towel bars on doors
Install back of door hooks or a towel bar for bath towels and a second bar for hand towels. If you rent, use removable adhesive bars with weight ratings that match your towels. Label bins under the sink by task like dental, hair, first aid.
9. Light, color, and mirrors for visual space
Curtain tricks and mirror placement
Hang curtains high and wide so windows look larger and let in more light. Use a full length mirror near a window to bounce daylight deeper into the room. Keep mirror angles simple to avoid visual clutter.
Color palette scope
Limit the palette to one light base color plus one or two accent tones. Use closed storage in the base color to reduce visual noise. Add texture with rugs and throws instead of many colors. The room will feel calmer and larger.
10. Storage systems that scale
Clear bins, labels, and inventory
Use clear, stackable bins with simple labels for categories like tools, linens, and hobby. Store rarely used bins up high and daily bins at eye level. Keep an index card inside the top bin of each stack listing what is in the stack. Update the card when you swap items.
One in, one out rule and reset routine
When a new item comes in, one item leaves. Set a weekly 15 minute edit to move out duplicates and expired goods. Add a daily five minute reset to clear surfaces, return items to bins, fold the throw, wash dishes, and empty small trash. Small, steady habits keep the studio organized.
Sample layouts for common footprints
Long and narrow
Anchor the sofa on the long wall midway into the room with a rug. Place a low divider or shelf behind it to hide the bed at the far end. Keep the work zone near the window for best light. Use a rolling cart for a flexible kitchen prep surface near the entry side.
Square box
Float the sofa in the center on a rug with the back to the bed zone. Use two identical lamps on either side to frame the lounge. Tuck the desk on a side wall with a fold down surface. Add tall storage in one corner to save floor area for movement.
L shape or alcove
Place the bed in the short leg or alcove to create instant separation. Use curtains on a ceiling track if you want privacy. Put the desk near the window and the sofa across from it. Add a narrow console along the main wall to host dining when the leaf is up.
Maintenance habits that keep it working
Daily five minute reset
Every night, run a simple loop. Clear counters. Put dishes in the sink or wash and dry them. Return remote, book, and devices to a set spot. Fold the throw and plump cushions. Empty desk trash. This keeps tomorrow easy.
Weekly deep tidy
Once a week, reset each zone. Vacuum under the sofa and bed. Wipe the desk shelf and charge cables. Edit the entry tray and mail bin. Check the bathroom bins and refill only what you use. Donate or recycle one item you did not use this month.
Budget tips and small upgrades
What to buy first
Buy the pieces that carry the most load first. Start with a sofa you can sleep on or a quality mattress solution. Add a table that can work as dining and desk. Bring in closed storage to hide visual noise. Measure twice before ordering anything.
Renter safe hardware and simple hacks
Use tension rods, adhesive hooks, and freestanding shelves to avoid drilling when needed. Add felt pads under furniture so you can slide and test layouts. Swap harsh overhead bulbs for warm LED lamps to make every zone feel calm.
Conclusion
A studio works best when every zone is clear, pathways stay open, and storage rises up the walls instead of across the floor. Start with a plan, divide space with light and low dividers, and choose furniture that does more than one job. Keep the palette tight and the surfaces simple. Finish with daily and weekly habits that hold the system in place. With these ten ways, you can set up a studio that is easy to live in, easy to clean, and ready to adapt when your needs change.
FAQ
Q: How do I start planning a studio layout
A: Measure the room, sketch zones for sleep, lounge, work, cook, and store, choose one main wall to anchor the largest piece, and draw a clear path from the door to the window so furniture does not block flow.
Q: What furniture should I buy first for a studio
A: Start with a sofa you can sleep on or a quality mattress solution, a table that can work as dining and desk, and closed storage to hide visual noise. Measure twice before ordering.
Q: How can I separate areas without building walls
A: Use rugs to define zones, pendant or floor lamps to mark areas, low bookcases or open shelving as dividers, and curtain panels on ceiling tracks where needed.
Q: How do I fit a workspace without losing floor space
A: Install a wall mounted fold down desk or a shallow shelf at desk height, park a folding chair on a hook, and manage cables with clips and a single surge strip under the surface.
Q: What daily habit keeps a studio organized
A: Do a five minute reset each night. Clear surfaces, return items to bins, fold the throw, wash dishes, and empty small trash.