We are reader supported. When you purchase through links on our site, we may earn an affiliate commission. Also, as an Amazon affiliate, we earn from qualifying purchases.
Most laundry rooms feel crowded because they try to do too much with too little space. The fix is not more square footage. The fix is a clear workflow, smart storage, and simple habits. Use these 30 ideas to cut clutter, speed up laundry day, and keep the room tidy without effort.
Declutter and Layout Foundations
1. Do a 15-minute clear-off
Set a timer and clear the tops of machines, counters, and the floor. Toss trash, gather items that belong elsewhere, and group laundry supplies together. Fast decluttering creates instant space for better layout choices.
2. Map a simple workflow
Place hampers near the entry, machines in the middle, and a folding or hanging zone by the exit. This reduces backtracking and makes each step obvious. Keep walking paths open and cords tucked away.
3. Keep only essentials within reach
Store detergent, stain remover, dryer sheets or wool balls, and a measuring scoop or pump near the machine. Move extras and bulk refills to a higher shelf or a nearby closet. Fewer items in reach equals faster decisions and less mess.
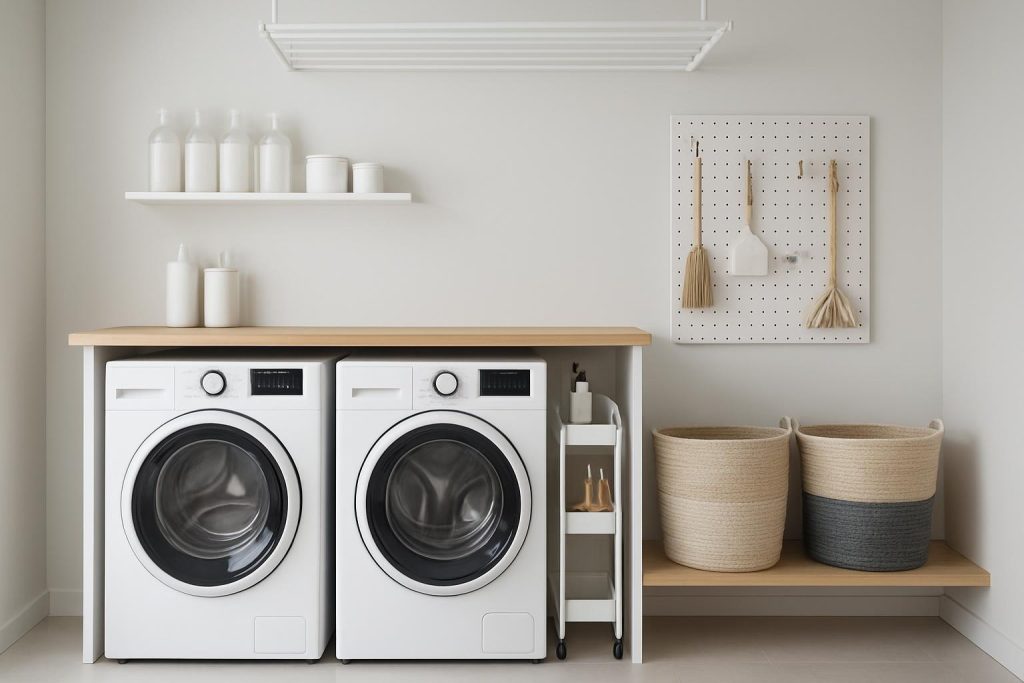
4. Add a slim rolling cart
Slide a narrow cart between machines or beside a cabinet to hold bottles, brushes, and rags. Label each tier by task such as wash, treat, dry. The cart keeps tools mobile and countertop space clear.
Sorting Systems that Save Time
5. Set up a three-bin pre-sort
Use three hampers or bins labeled lights, darks, towels. Family members sort as they drop items. This prevents sorting piles on the floor and shortens wash day.
6. Label every bin clearly
Use simple words or icons that match your categories. Place labels at eye level on the front of each bin. Clear labels reduce mistakes and stop the room from slipping back into chaos.
7. Add a delicates bag station
Hang mesh bags on a hook or keep them in a small basket by the washer. Place socks, lingerie, and small items in the bags before wash. This prevents lost pieces and saves time on matching.
8. Use color-coded baskets by person
Assign a distinct basket color or pattern to each family member. When clean, fold or hang into the right basket and pass it off. This ends pile mixing and speeds up put-away.
Smart Storage Upgrades
9. Install wall cabinets or shelves
Use upper space for detergents, refills, and backup cleaning tools. Place heavier items at shoulder height and lighter items higher. Keep one shelf spare for temporary overflow to prevent countertop clutter.
10. Build an over-the-machine bridge shelf
Span a board or ready-made shelf across the washer and dryer, leaving room for hoses and vents. This turns dead space into useful storage for everyday items or a small folding zone. Secure it to avoid vibration issues.
11. Use pedestal drawers if possible
Washer or dryer pedestals with drawers hide bulk supplies and cleaning rags. Group items by task in shallow bins inside the drawers. This keeps heavy bottles low and easy to reach.
12. Mount a magnetic strip for small tools
Attach a magnetic strip to hold scissors, lint brush, sewing needles in cases, and a small screwdriver. Keep it away from the machine front to avoid accidental knocks. Tools stay visible and off surfaces.
Use Vertical and Dead Space
13. Add a pegboard for flexible storage
Mount a pegboard and use hooks, shelves, and cups for brushes, clothespins, and tape. Adjust the layout as your needs change. Pegboard makes every inch count without permanent holes for each tool.
14. Use the back of the door
Hang a door rack or pocket organizer for dryer sheets, delicates bags, and stain sticks. Keep the lightest items at the top and secure the rack to avoid swinging. The door becomes a hidden storage wall.
15. Install a ceiling-mounted drying rack
Use a pulley rack or fixed bars to dry shirts and linens overhead. This frees floors and counters, improves airflow around damp items, and keeps walkways clear. Ensure secure anchoring into ceiling joists.
16. Turn corners into storage
Add floating corner shelves or a tension pole with baskets. Store lightweight items like clothespins, lint rollers, and spare hangers. This captures space that is often wasted.
Folding, Treating, and Prep Zones
17. Create a flip-down folding station
Mount a fold-out table or use a wall-mounted desk panel. Fold it down only when needed to maintain walkway space. Keep a soft measuring tape and a small bin for loose buttons nearby.
18. Build a stain treatment caddy
Use a handled caddy for stain remover, enzyme spray, oxygen booster, a soft brush, cotton swabs, and a small towel. Grab it for quick pre-treatment and return it to the same spot after use. Prep stays controlled and fast.
19. Install a wall-mounted ironing board
Use a fold-out or slide-out model to save floor space. Keep an iron or steamer on a heat-safe shelf nearby. A dedicated spot reduces wrinkled piles waiting for a better time.
20. Add lint and trash control
Mount a small bin on the wall or side of a cabinet for lint and dryer sheets. Empty it weekly during your reset. Keep a second bin for plastic wrap from new clothes and tags to prevent mix-ins with clean laundry.
Drying and Hanging Solutions
21. Use a retractable clothesline
Install a retractable line between two walls or to a hook. Extend only when needed and wind it back to keep the room open. Air drying extends fabric life and reduces energy use.
22. Mount a hanging rod under a shelf
Place a rod close to the folding zone to hang shirts right from the dryer. Keep a stack of hangers nearby and return extras to a basket. This prevents wrinkling and future ironing.
23. Use clip hangers for small items
Hang socks, hats, and delicates with clips to speed up drying. Assign a spot on the rod or on a separate small rack. Keeping small items together avoids lost pieces.
24. Add mesh drying shelves
Use stackable mesh shelves for sweaters and sportswear that need flat drying. Place them against a wall or inside a tall cabinet. Air circulates, items keep their shape, and the floor stays dry.
Small Space and Apartment Tactics
25. Stack the washer and dryer
Stack units to open floor area for carts or a small table. Install a shallow shelf above or beside for daily supplies. Verify venting and weight support before stacking.
26. Choose collapsible tools
Use fold-flat hampers, a slim step stool, and a collapsible drying rack. Store them behind a door or upright beside the machines. Compact tools keep the room clear when not in use.
27. Add a portable work surface
Use a removable countertop board or an over-sink cover if your laundry area shares a sink. Bring it out for folding or treating and store it vertically. A temporary surface keeps workflow smooth without permanent fixtures.
Labeling, Scheduling, and Habits
28. Build a simple label system
Label shelves, bins, and drawers by function such as wash, dry, treat, fold. Use water-resistant labels for longevity. Clear labels turn the space into a self-explaining system that anyone can follow.
29. Post a weekly reset checklist
Write a short checklist and tape it inside a cabinet door or on the wall. Include restock supplies, empty lint bin, wipe machines, check drying rack, clear floor. A weekly reset preserves order without a big clean.
30. Do a five-minute daily tidy
Each day, clear the top of machines, return tools to their spots, and start or finish one load. Put away clean baskets before bed. This tiny habit keeps the room ready for the next batch.
Extra Tips for Safety and Care
Vent and lint best practices
Clean the dryer lint filter with each load and empty the lint bin weekly. Check the vent hose for kinks and excessive lint build-up during your weekly reset. Good airflow reduces drying time and improves safety.
Moisture and odor control
Allow space behind machines for ventilation. Open the washer door between loads to air out the drum if your model allows it. Keep a small towel handy to wipe gaskets and spills after wash sessions.
Lighting and visibility
Add bright, neutral lighting so stains and labels are easy to see. Use motion sensor night lights for late loads. Good light prevents mistakes and helps the room stay inviting.
Productivity Tweaks That Add Up
Standardize containers
Use matching clear containers or same-style bottles for detergent and boosters. Add dosing scoops and labels to match. Standard containers store tighter and reduce visual clutter.
Create a returns bin
Keep a small bin for pocket finds such as coins, receipts, and keys. Empty it weekly. This keeps surfaces clean and important items from vanishing.
Batch similar tasks
Pre-treat stains in one session, then run back-to-back loads by fabric type. Fold or hang one batch before starting another. Batching reduces switching costs and mess.
Putting It All Together
Start with the fast wins. Clear surfaces, label three sort bins, and set up a simple folding or hanging spot. Add vertical storage next, like a pegboard or bridge shelf. Install a retractable line or hanging rod for wet items. Build a stain caddy and a wall bin for lint. Finish with a weekly reset checklist and a five-minute daily tidy.
The result is a laundry room that works on autopilot. Each item has a clear home. Each step in the process has a zone. You spend less time hunting for tools and more time getting loads done. Use these 30 ideas to tune the space, then revisit the layout after a week of use. Keep what helps, remove what does not, and protect the open space you have created.
FAQ
What is the fastest way to make a laundry room feel organized today
Do a 15-minute clear-off, group supplies, label three sort bins, and set a small lint and trash station. This opens space and creates a quick workflow without a full remodel.
How should I sort laundry to save time
Use a three-bin pre-sort for lights, darks, and towels. Add a delicates bag station and color-coded baskets by person. Labels keep everyone consistent and speed up wash day.
How can I add storage in a small laundry space
Use vertical options like wall cabinets, a pegboard, and a back-of-door organizer. Add a bridge shelf over machines and a slim rolling cart. Store extras high and daily tools within reach.
What is a practical folding and drying setup in tight quarters
Use a flip-down folding station, a rod under a shelf for hangers, and a retractable clothesline. Add mesh drying shelves for flat-dry items. Keep hangers and a stain caddy nearby to reduce steps.
What routine keeps the laundry room tidy long term
Post a weekly reset checklist and do a five-minute daily tidy. Empty the lint bin, wipe machines, restock supplies, and clear surfaces. Small, consistent actions hold the system together.