We are reader supported. When you purchase through links on our site, we may earn an affiliate commission. Also, as an Amazon affiliate, we earn from qualifying purchases.
Edging gives your garden a clean line, keeps mulch in place, and cuts down on weeding. You can do it on a tight budget with simple tools and smart material choices. This guide shows how to plan, pick low-cost materials, and build tidy borders that last. You will see clear steps, practical tips, and mistakes to avoid.
Why Edging Matters On A Budget
Good edging defines beds and lawns and reduces maintenance. It creates a barrier that slows grass creep and holds soil. It makes mowing and trimming faster. You can get these benefits without expensive kits. Focus on function, simple designs, and correct installation.
Planning Before You Buy Or Build
Measure, Mark, And Set A Line
Walk your yard and mark bed edges with string and stakes or a garden hose. Measure all runs so you know the exact length. Note slopes, tree roots, irrigation heads, and downspouts. Keep curves gentle. Sharp curves raise cost and time.
Choose Functions First
Decide what the edge must do. Stop grass spread. Hold mulch. Allow mower wheels to ride. Handle foot traffic. Drain after rain. Your function list guides material and depth choices.
Tools You Need
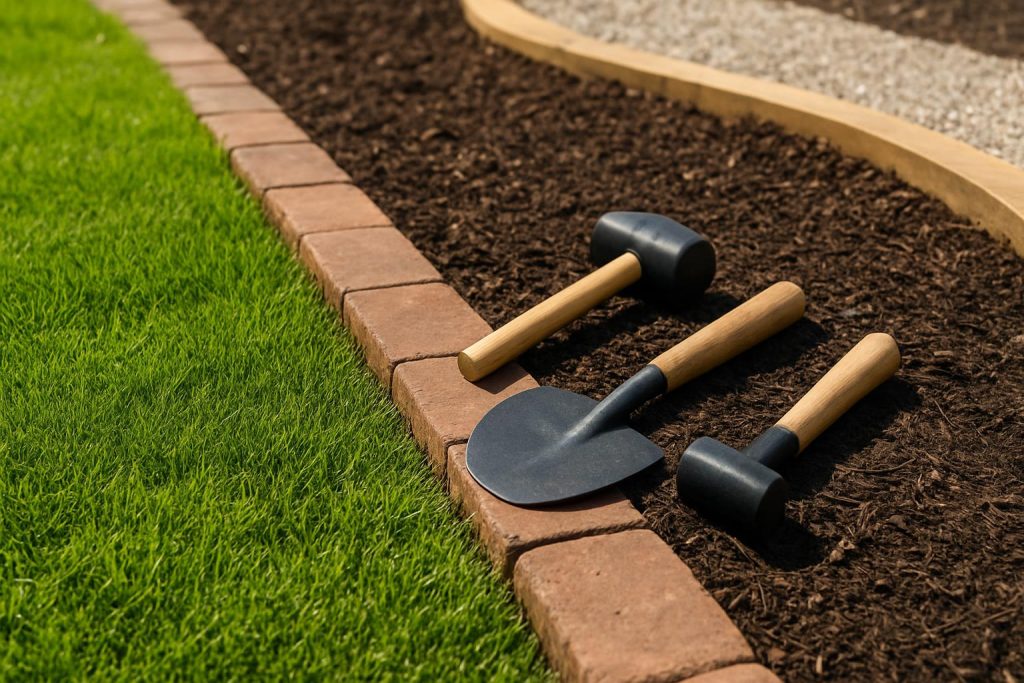
You need a spade or half-moon edger, a hand tamper, a rubber mallet, a level, a string line with stakes, a measuring tape, a utility knife, pruning shears, a wheelbarrow, landscape fabric, and work gloves.
Cheap Edging Materials That Last
Recycled Bricks And Pavers
Reclaimed bricks or leftover pavers are durable and often cheap. Set them flat and flush with the lawn to create a mowing strip. This reduces trimming time. Use a compacted base so bricks do not shift. Avoid glazed bricks if you want traction when wet.
Pressure-Treated Wood And Stakes
Timber edging is fast and friendly for straight runs. Use pressure-treated wood rated for ground contact. Stake the boards on the lawn side. Pre-drill to prevent splits. Add drainage gaps under boards on flat, wet sites. Keep the top edge level to avoid trip points.
Flexible Plastic Or Rubber Edging
Plastic or rubber edging bends to match curves and costs little per foot. Choose a thicker gauge so it holds shape. Anchor with stakes on the bed side. Set the top below soil to hide it. Backfill and compact to avoid heave.
Metal Landscape Edging On A Budget
Thin steel or aluminum strips make crisp lines. Prices vary, but you can find economy lines and offcuts. Metal works best for straight or gentle curves. Wear gloves when handling raw edges. Seal cuts with rust-resistant paint if you use steel.
Stone Scavenged Or Bought By The Bag
Fieldstone, small boulders, or bagged edging stones create a natural border. Use stones with flat faces for dry stacking. Keep the first course half-buried for stability. Avoid unstable towers. One or two courses are enough for most beds.
Logs, Branches, And Natural Trim
Short log rounds or straight branches make rustic borders at very low cost. Peel bark if possible to slow rot. Pin logs with rebar or wooden stakes. Expect periodic replacement. Use in low-traffic areas.
Gravel Strips As Low-Cost Edge
A narrow gravel strip between lawn and bed is quick and tidy. Excavate a shallow trench, lay landscape fabric, and fill with compacted gravel. The strip drains well and catches stray grass. It also gives mower wheels a stable track.
DIY Methods Step By Step
Shovel-Cut Edge Method
The cheapest method is a shovel-cut edge. It costs little and needs only time and a sharp spade. Mark a smooth curve or straight line. Cut a V-shaped trench along the line, 4 to 6 inches deep, with the vertical face on the lawn side. Remove sod from the bed side to expose soil. Backfill and slope the bed soil down to the trench. Mulch to the edge. Recut the edge twice a year for a crisp look.
Brick Mowing Strip
Dig 4 to 6 inches so bricks sit on a compacted base and finish flush with the lawn. Excavate the trench the width of your bricks plus 1 inch. Add 2 to 3 inches of compactable base such as crushed stone or coarse sand. Compact with a hand tamper. Set a string line for level. Lay bricks on the base with tight joints. Tap each brick with a mallet. Check level across and along the run. Sweep sand into joints and mist with water. Adjust soil so the brick tops are even with the grass.
Simple Timber Border
Use 2×4, 4×4, or landscape timbers rated for ground contact. Scrape the soil flat along the run. Set boards on a compacted bed of soil or base. Drive stakes on the lawn side every 3 to 4 feet. Screw or nail timbers to stakes. Stagger joints if you run multiple boards. Leave small gaps at long runs for expansion. Add a shallow gravel layer under timbers in wet areas.
Plastic Edging Install
Cut a trench along your line 6 inches deep or as required by the product. Place the edging with the top just below soil grade. Cut a trench deep enough so the top sits 0.5 to 1 inch below soil, use stakes every 2 to 3 feet and at all corners, and backfill and compact in thin layers on both sides. Shape gentle curves. Avoid kinks that cause heave. Trim excess length with a utility knife. Mulch to the top of the edge and rake smooth.
Dry-Stacked Stone Curve
Dig a shallow trench 4 inches deep and as wide as your stones. Add 2 inches of compacted gravel. Set the first course halfway into the ground. Place stones with their widest faces down. Stagger seams. For a second course, overlap joints and lean stones slightly toward the bed. Backfill and compact soil behind the wall to support it. Keep the overall height low to avoid tipping.
Keep Costs Down: Sourcing And Tips
Where To Find Cheap Or Free Materials
Check local reuse centers, construction salvage stores, and online marketplaces. Watch for curbside giveaways during yard cleanups. Ask landscape suppliers for broken packs and odd lots. Visit municipal recycling centers for free wood chips to pair with your edge. Talk to tree services for log rounds or branches.
Save On Fill And Base Materials
Use local crushed stone or screenings instead of bagged sand. Buy by the cubic yard if you have space for delivery. Reuse clean on-site soil for backfill. Keep excavated sod for lawn patching or composting. Plan runs to minimize cuts and waste.
Reuse And Maintain
Salvage bricks or pavers from old paths. Flip stained pieces to the clean side. Straighten edges each spring rather than rebuilding. Small maintenance saves money and time.
Design Ideas That Look Clean And High-End
Straight Lines Vs Curves
Straight lines feel modern and are easier to build. Curves soften tight spaces and guide the eye. Keep curves broad and even. Match the curves of nearby paths and beds.
Color And Contrast
Use dark edging against light gravel for contrast. Choose brick tones that match your home. Keep two or three materials in the yard to avoid visual clutter. Repeat one edging material across different beds for unity.
Height And Scale
Low edges look neat and are safer. Set bricks and metal flush with the lawn. Limit stone walls to one or two courses. Tall borders draw attention and need more support.
Tie Into Paths And Beds
Continue the same edging along paths for a connected look. End edges at hard features like steps or patios instead of in open lawn. Add a mowing strip beside fences to cut trimming time.
Common Mistakes To Avoid
Do not skip a compacted base under bricks or stone. Do not set edges proud of the lawn unless you want a barrier. Do not use untreated wood in contact with soil. Do not force tight curves with rigid materials. Do not forget drainage under solid timbers on wet sites. Do not leave the top of plastic edging above soil where sun can warp it. Do not set metal edges without checking for irrigation lines.
Seasonal Care And Maintenance
Spring Checks
Walk your edges after freeze-thaw cycles. Tap down raised bricks with a mallet. Reset any stones that have shifted. Top up mulch to bed edges. Trim grass that has crept over lines.
Summer Edging Upkeep
Use a string trimmer to keep edges crisp. Pull weeds from gravel strips before they root deep. Sweep sand back into brick joints as needed. Water lightly after adding sand to help it settle.
Fall And Winter Prep
Clear leaves from edges so moisture does not pool. Add a small soil ramp on the bed side of stone stacks to support them. Check stakes on timber and plastic runs. Mark edges near driveways before snow work.
Quick Cost Guide
Shovel-cut edge costs almost nothing beyond tools. Reclaimed brick or paver edging averages 1 to 3 per foot when sourced secondhand. New pavers may run 3 to 6 per foot. Plastic or rubber edging often costs 1 to 2 per foot. Budget metal edging ranges from 3 to 5 per foot. Pressure-treated timber runs 2 to 4 per foot. Scavenged stone ranges from free to 4 per foot. Gravel strips cost about 0.50 to 1.50 per foot depending on local prices. Prices vary by region and supply.
Conclusion
Clean, durable garden edges do not need a big budget. Start with a plan that matches your yard and your time. Pick one material and method and keep the design simple. Install with proper depth, base, and anchors. Maintain edges a few times a season. The result is a tidy, easy-care garden that looks finished and stays that way.
FAQ
Q: What is the cheapest garden edging method?
A: The cheapest method is a shovel-cut edge. It costs little and needs only time and a sharp spade.
Q: How deep should I dig for brick edging?
A: Dig 4 to 6 inches so bricks sit on a compacted base and finish flush with the lawn.
Q: What tools do I need for DIY garden edging?
A: You need a spade or half-moon edger, a hand tamper, a rubber mallet, a level, a string line with stakes, a measuring tape, a utility knife, pruning shears, a wheelbarrow, landscape fabric, and work gloves.
Q: How do I keep plastic edging from popping up?
A: Cut a trench deep enough so the top sits 0.5 to 1 inch below soil, use stakes every 2 to 3 feet and at all corners, and backfill and compact in thin layers on both sides.
Q: How do I stop grass from creeping into beds?
A: Recut a shovel-cut edge twice a year, keep 2 to 3 inches of mulch in beds, or add a brick mowing strip set flush with the lawn.