We are reader supported. When you purchase through links on our site, we may earn an affiliate commission. Also, as an Amazon affiliate, we earn from qualifying purchases.
Thinking about how to frame your hot tub so it looks great, stays safe, and is easy to maintain. The right surround turns a tub into a calm, functional zone. The wrong one traps moisture, creates clutter, and adds work. This guide breaks down clear ideas you can use right away, with simple steps and smart options for every space and budget.
Introduction
A hot tub surround does more than look nice. It shapes how you move, store, drain, and clean. It also affects heat loss, privacy, and safety. You want materials that resist water, a layout that supports access, and details that prevent slips and clutter. Start simple, then layer privacy, storage, and lighting as needed. Use the ideas below to plan and build a surround that feels calm and stays low maintenance.
Plan First, Build Once
Measure and Clearances
Measure the tub shell, the cover swing, and the path to the service panel. Plan at least 18 to 24 inches of clear space on the service side for access. Leave 6 to 12 inches of breathing room along other sides so water can drip and air can move. Check the cover lifter arc so it does not hit walls or screens.
Access and Service
Place hinges, a removable panel, or a lift-up bench where the service panel lives. Do not bury pump bays behind fixed stone or concrete. If you add built-ins, make the service side open in minutes using clips or hidden fasteners.
Weight and Structural Support
A filled hot tub is heavy. Confirm your deck or slab can support the load. Use footings to stable ground. For decks, size joists and beams per span charts and the load of water plus people. Do not rely on pavers or thin tiles alone under the tub footprint. Surround features like benches and screens also add weight.
Drainage and Splash Management
Water needs a place to go. Pitch surfaces 1 to 2 percent away from the tub so splash does not pool. Add a gravel trench, a strip drain, or a gap under the deck edge. Keep soil and mulch back so they do not wash into the area. Use easy-to-clean borders where water lands most.
Slip Safety and Steps
Choose non-slip textures. Add a sturdy handhold near steps. Keep step heights consistent and treads deep. Use rounded edges to protect feet. Add low-glare lighting so you see edges at night.
Materials That Work Near Water
Pressure-Treated Wood
Affordable and easy to cut. Seal it after install and again each year. Use hidden fasteners on surfaces you touch with bare skin to avoid snags. Ventilate the framing so it dries between uses.
Composite Decking
Low maintenance and stable. Choose textured or grooved boards for grip. Allow expansion gaps. Rinse after heavy use to prevent film and slip.
Concrete and Pavers
Durable and simple to clean. Light broom finish or textured pavers add grip. Seal to resist stains. Add a small pitch away from the tub. Use a perimeter expansion gap around the tub base if you pour a pad nearby.
Natural Stone
Elegant and long lasting. Choose stones with texture. Seal against water and chemicals. Avoid slick polished finishes near steps.
Porcelain Tile
Choose exterior-rated tiles with slip resistance. Use epoxy grout or a high-performance grout to resist chemicals. Ensure a stable slab or cement board base.
Metal Accents
Use powder-coated aluminum or stainless steel for railings and trim. Avoid uncoated steel near splash zones. Rinse salt or chemical spray after use.
Layout Ideas You Can Copy
Simple Platform Deck
A flat deck pad that surrounds two or three sides. Leave 6 to 12 inches of reveal from the tub edge so water drips free. Add one wide step and a handhold. Good for small yards and fast builds.
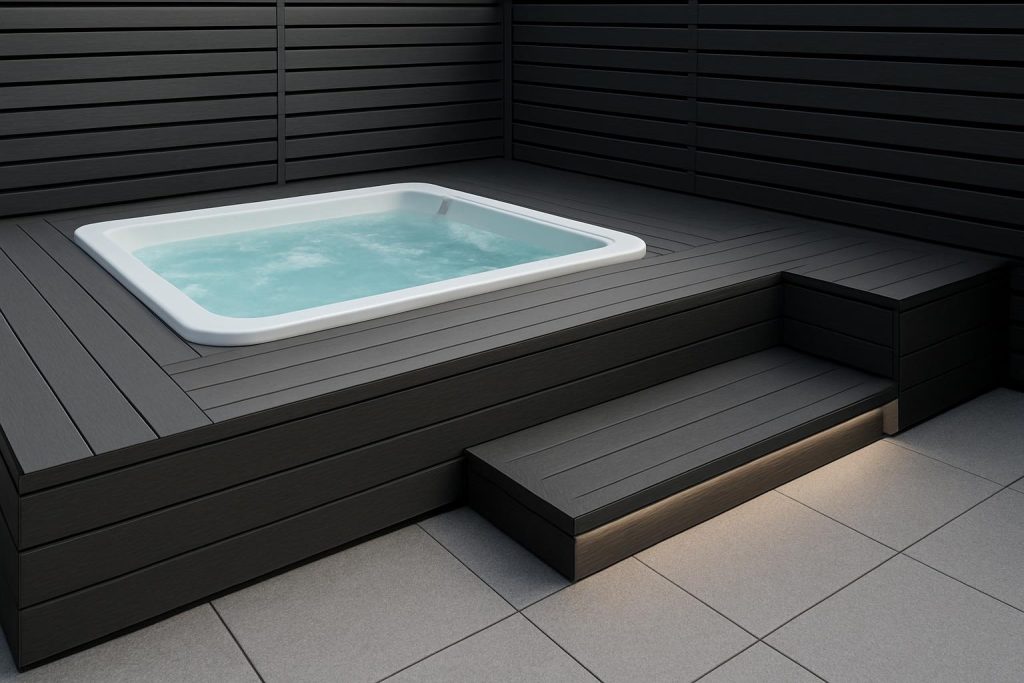
Sunken Deck Surround
The tub rim sits flush with deck boards for a clean line. Add a 12 to 18 inch bench zone beside the tub so you can sit and swing in. Keep a removable hatch to the service panel. Use non-slip boards at the rim.
Raised Bench Perimeter
Build a bench frame around one or two sides. Use it as a cool-off spot and as cover storage. Add lift-up lids with gas struts. Line the inside with a waterproof bin so towels stay dry.
Courtyard With Privacy Wall
Create an L-shaped surround with a slatted wall and planters. The wall breaks wind and sightlines while letting air pass. Add a pergola beam for string lighting. Keep the service side open.
Compact Corner Nook
At a fence corner, stack functions. A narrow platform, a slim bench, and a vertical rack for towels. Use fold-down hooks when not in use. Choose light colors to brighten tight spots.
Freestanding Island Pad
Place the tub on a concrete or paver pad, then ring it with deck tiles or modular platforms. Easy to remove or reconfigure. Good for renters or future changes.
Privacy Without Trapping Moisture
Slatted Screens
Use horizontal slats with 10 to 15 millimeter gaps to keep airflow. Stagger heights for style and wind control. Stain or seal for longer life.
Planter Walls
Build deep planters that double as screens. Choose plants that handle steam and splash. Add drip trays and a gravel base for drainage.
Pergola and Canopy
A simple pergola frames the zone and holds lighting and a shade sail. Leave space above the tub for steam to escape. Use mildew-resistant fabric.
Frosted Panels
Polycarbonate or tempered glass panels add privacy without bulk. Mount with gapped brackets so air moves. Rinse panels to prevent film.
Built-in Storage That Stays Dry
Towel Cubbies and Hooks
Add wall hooks near the entry step. Use covered cubbies on the dry side of the deck. Line cubbies with removable plastic bins for easy cleaning.
Step Drawers
Turn a wide step into a drawer for test strips and small tools. Use marine-grade slides. Add a rubber gasket to limit splash.
Chemical Locker
Store chemicals in a vented, lockable box away from steam. Keep it off the floor. Separate liquids and powders. Post a simple checklist inside the lid.
Cover Storage
If not using a lifter, add a slim rack to hold the cover upright. Keep at least 12 inches of clearance to avoid rubbing and mold.
Lighting That Helps, Not Glares
Low-Voltage Step Lights
Install LEDs on risers to show step edges. Aim down to avoid glare in eyes. Warm white looks calm.
Rope or Strip Lighting
Run low-voltage rope under bench lips. Diffuse it so you do not see bright dots. Put it on a timer.
Motion Path Lights
Guide the path from house to tub with solar or low-voltage stakes. Avoid bright floodlights that reflect on water.
Power, Venting, and Safety
GFCI and Conduit Routes
Use a dedicated circuit with GFCI protection. Run conduit where it will not be stepped on. Keep outlets and junctions accessible and dry.
Venting for Equipment Bays
If the surround encloses the equipment side, add vents high and low. Heat needs to escape. Do not block fans or intakes.
Non-Slip Surfaces
Use textured finishes, non-slip sealers, or grip tape on steps and common paths. Test with wet bare feet before finalizing.
Cleaning and Maintenance Plan
Weekly Quick Care
Rinse decking and step treads to clear film. Wipe railings and handles. Empty towel bins. Check that drains and gaps are clear.
Monthly Deep Clean
Scrub non-slip surfaces with a soft brush and a mild cleaner. Reseal grout lines if needed. Wash privacy panels to remove spray residue. Inspect fasteners and tighten anything loose.
Seasonal Sealing
In spring and fall, clean and reseal wood and stone. Check caulk and weather seals. Look for algae or mold near shaded edges and treat early.
Storm and Winter Prep
Secure screens and remove loose decor. Coil cords and protect plugs. Clear snow with a plastic shovel to protect finishes. Keep a dry mat by the house entry to catch drips.
Budget and DIY Levels
Under 500 Updates
Deck tiles around a pad, solar path lights, hooks and towel rack, a small bench, and a rubber mat at the step. Add a vented storage tote for chemicals and test strips.
500 to 2000 Projects
A small platform deck with one step, a slatted privacy screen, low-voltage step lights, and a basic cover rack. Composite top boards reduce maintenance.
2000 and Up Projects
A sunken surround, built-in benches with dry storage, custom planters, a pergola with dimmable lighting, and composite or stone finishes. Add a drain line and a high-grade sealer.
Small Yards and Rental-Friendly Options
Portable Deck Tiles
Click-together tiles go over concrete or pavers. Leave gaps at edges for drainage. Lift and rinse them every few months.
Modular Screens
Freestanding slatted panels on weighted bases add privacy without anchors. Arrange in an L or a zigzag for stability.
Fold-Flat Benches
Use hinged benches that store against a wall when not needed. Keep the service side open and clear.
Step-by-Step Build Example
Tools and Materials
Measure tape, level, circular saw, drill, exterior screws, joist hangers, composite or treated boards, concrete deck blocks or footings, non-slip strips, exterior-grade sealer, low-voltage step lights, and gravel for drainage.
Build Steps
1. Mark the layout with stakes and string. Confirm clearances and cover swing.
2. Set footings or deck blocks on compacted gravel. Check level.
3. Frame the platform with treated lumber. Allow a 6 to 12 inch reveal from the tub edge.
4. Add joists 12 to 16 inches on center for a solid feel. Leave vents or gaps for airflow.
5. Install decking with consistent spacing. Use hidden fasteners on top surfaces.
6. Build a wide step and add non-slip strips on the nosing. Install a simple handhold post.
7. Add a slatted privacy panel on the far side. Keep the service panel side open or hinged.
8. Run low-voltage step lights and a timer. Hide wiring in conduit and clips.
9. Seal exposed wood. Rinse and test. Walk it wet to confirm grip.
Design Tips That Save Time Later
Keep Air Moving
Use gaps, vents, and breathable panels. Trapped moisture breeds mildew and odor.
Choose Easy-Clean Surfaces
Smoother textures on horizontal surfaces clean faster. Add texture only where you need grip. Avoid deep grooves that hold grime.
Make Service Simple
Every surround component near the service panel should lift, hinge, or slide off with a few screws. Label hidden fasteners.
Plan Storage Where You Step
Hooks at hand height, a bin for clean towels, and a bin for used ones. Keep chemicals high and locked, away from steam.
Conclusion
A strong hot tub surround is clear in function and calm in look. It drains, breathes, and gives safe footing. It stores what you use and hides what you do not. Pick materials that match your maintenance comfort. Start with a stable platform, add privacy and lighting, and finish with smart storage. Build it once, then enjoy it with simple weekly care.
FAQ
Q: How much clearance do I need around my hot tub for service and use
A: Plan 18 to 24 inches of clear space on the service side and 6 to 12 inches along other sides. Check the cover lifter swing so it does not hit walls or screens.
Q: What materials are best for a low-maintenance hot tub surround
A: Composite decking, concrete or textured pavers, and exterior-rated porcelain tile are low maintenance. Use textured finishes for grip and seal porous materials.
Q: How do I prevent slips on steps and deck surfaces
A: Choose non-slip textures, add grip strips on step nosings, keep step heights consistent, and install low-glare step lighting so edges are easy to see at night.
Q: How should I handle drainage and splash around the tub
A: Pitch surfaces 1 to 2 percent away from the tub, add a gravel trench or strip drain, and keep gaps clear so water moves off fast. Avoid trapping water against walls.
Q: What are simple budget upgrades under 500
A: Add deck tiles, solar path lights, hooks and a towel rack, a small bench, a rubber mat at the step, and a vented storage tote for chemicals and test strips.