We are reader supported. When you purchase through links on our site, we may earn an affiliate commission. Also, as an Amazon affiliate, we earn from qualifying purchases.
Oven bacon is simple, fast, and consistent. You get even browning, less mess, and a big batch without standing at the stove. Follow the steps below to master crisp strips every time, then customize for thickness, pan type, and your oven. Keep this guide handy and you will never guess on time or temperature again.
Why Bake Bacon in the Oven
It frees you from the stovetop. No turning over a hot skillet. No uneven hot spots. The oven gives steady heat that cooks each strip the same way, edge to edge.
Cleanup is easier. Line a rimmed sheet with parchment or foil and you can toss the liner when done. Your counters stay cleaner since the rim controls splatter.
It scales well. One pan handles a family breakfast. Two pans handle a crowd. You can also par cook for meal prep without babysitting a pan.
Results are predictable. Once you know your oven and pan, you can set a timer and hit your target doneness every time.
Tools and Ingredients
Use a heavy rimmed sheet pan. The rim keeps fat contained and the heavy metal spreads heat evenly. A dark sheet browns a bit faster; a light sheet browns a bit slower.
Line the pan with parchment for easy release and cleanup. Foil also works and helps with pouring off fat. Parchment reduces sticking and smoke better than a bare pan.
An optional wire rack lifts the bacon for extra airflow. You get a drier, very crisp texture. Without a rack you get crisp edges with a slightly chewier center. Both methods work well.
Grab tongs for safe handling and a plate lined with paper towels for draining.
Pick your bacon style. Thin cut cooks fastest and turns snappy crisp. Regular cut is a good default for balanced crisp and chew. Thick cut needs more time and gives a meaty bite.
Oven Temperature and Rack Placement
Preheat to 400°F 204°C for most pans and most bacon. This temperature gives steady rendering and even browning without boiling the fat too hard.
Place the oven rack in the center position. This keeps heat even from top and bottom and prevents the edges from scorching before the middles are ready.
If your oven runs hot or you want a bit less splatter, 375°F 190°C is a safe choice. Add a couple of minutes to the timeline and you will still get crisp results.
Step by Step: Crispy Oven Bacon
Step 1 Preheat and line the pan
Heat the oven to 400°F 204°C with the rack in the center. Line a rimmed sheet with parchment or heavy duty foil. If using a wire rack, place it on the lined sheet and lightly oil it to reduce sticking.
Step 2 Arrange the bacon
Lay strips in a single layer. Do not overlap. A tiny gap between strips helps air flow. If using a rack, place strips flat and straight so they cook evenly. If cooking two pans, put both in the middle third of the oven and rotate halfway through.
Step 3 Bake to render and brown
Slide the pan into the oven. Do not open the door for the first 10 minutes. This keeps the heat stable and helps the fat render cleanly. Expect a gentle sizzle by minute 8 to 10.
Step 4 Watch for the finish window
Start checking at minute 10 to 12. Look for deep golden color and smaller bubbles around the edges. Thin cut may be done by minute 10 to 14. Regular cut often lands at minute 14 to 18. Thick cut usually needs minute 18 to 24. Pull when the color is slightly lighter than your goal because carryover crisping continues on the towel.
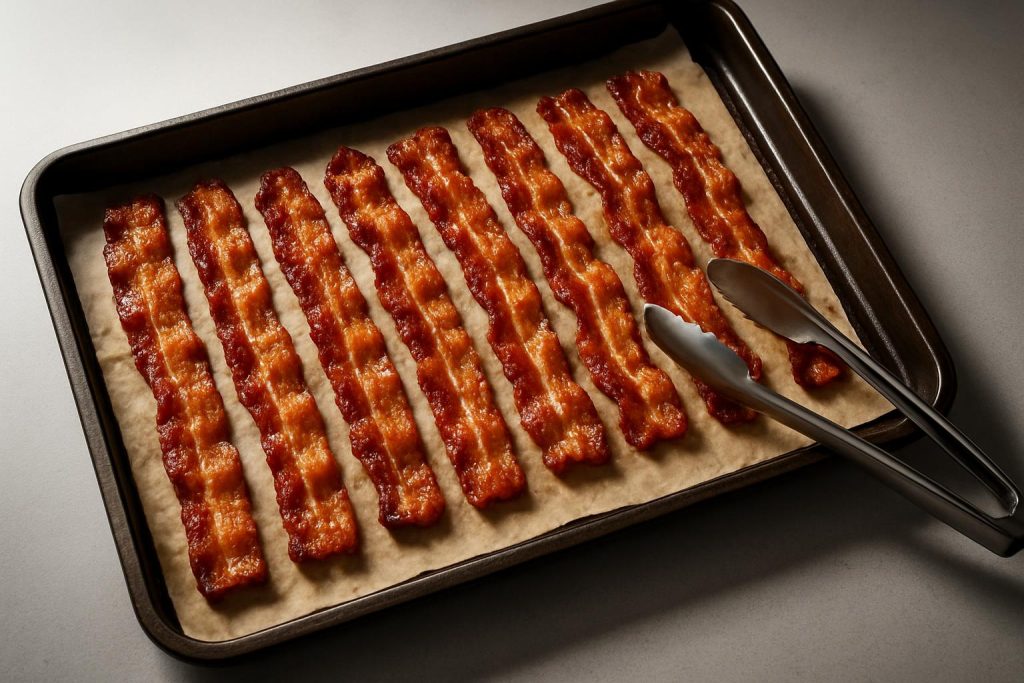
Step 5 Drain and rest
Use tongs to move bacon to a paper towel lined plate. Blot gently. Let it rest for 2 to 3 minutes. This last step locks in crispness and removes excess surface fat.
Timing Guide You Can Trust
Thin cut plan on 10 to 14 minutes. It browns fast and can jump from perfect to too dark in a short window, so check early.
Regular cut plan on 14 to 18 minutes. This is the most forgiving range and suits most brands.
Thick cut plan on 18 to 24 minutes. Thick slices release more fat and need time for water to evaporate. Expect more carryover crisping on the towel.
Start checking at minute 10 to 12 because every oven and pan is a little different. Dark pans cook faster. Rack cooking can shave off a minute or two of active browning at the end because airflow is better. Sugared glazes brown faster and can darken quickly near the finish.
With or Without a Wire Rack
On a rack you get the driest, most shatter crisp texture. Air circulation pulls moisture from both sides. Fat drips below so the strips do not stew in the rendered fat. Cleanup is the tradeoff since racks need a soak and scrub.
On parchment without a rack you get crisp edges with a slightly chewier center. The strips cook in their own fat, which boosts flavor. Cleanup is easier. For many kitchens, this is the best balance of texture and convenience.
Do You Need to Flip
No flip is needed. The oven circulates heat and browns both sides. If you want the absolute most even color, flip at minute 12 for regular cut and return to the oven for a few minutes. It is optional.
Avoid Smoke and Splatter
Use a rimmed sheet lined with parchment. The rim contains fat and the parchment reduces popping and scorching on the metal.
Keep strips in a single layer without overlap. Overlap traps moisture and causes uneven browning and more popping.
Bake on the center rack at 400°F 204°C. If your oven smokes, reduce to 375°F 190°C and add 2 to 4 minutes. Turn on the hood vent. Make sure the oven floor is clean before you start.
Avoid the broiler for batch bacon. Broiling pushes fat to smoke point and splatter risk rises fast. Steady bake heat is the goal.
Flavor Upgrades That Work
Freshly cracked black pepper sticks well to the surface. Sprinkle it on before the pan goes in for a classic savory finish.
For a sweet finish, brush a light coat of maple syrup on the strips in the last 3 to 5 minutes. The late brush prevents scorching while giving a glossy finish.
For gentle heat, dust with a pinch of chili powder or cayenne at the start. The spice blooms in the fat and gives a clean kick.
Cooking for a Crowd
Use two pans on the center and lower center racks. Rotate and swap positions halfway through. Leave a small gap between pans for airflow. Expect the batch to run on the longer end of the timing window.
To hold bacon for serving, set the oven to 200°F 93°C. Place cooked strips on a clean rack set over a sheet and hold for up to 20 minutes. This keeps crispness without overcooking.
For meal prep, bake to just shy of your ideal color, cool, and refrigerate in an airtight container for up to 4 days. Reheat on a sheet at 350°F 177°C for 5 to 7 minutes until hot and crisp again.
Cleanup and Saving Bacon Fat
Let the pan cool until warm, then pour fat into a heat safe container. Line a small sieve with a coffee filter if you want a cleaner strain. Label the jar. Refrigerate for cooking later.
Do not pour bacon fat down the drain. Fat can harden in pipes and cause clogs. Instead, strain and save, or let it solidify on the lined pan and discard the liner in the trash.
To clean a wire rack, soak it in hot soapy water for 10 minutes, then scrub. For stubborn spots, sprinkle a little baking soda on a damp sponge and rub gently.
Troubleshooting and Fixes
Bacon curls or buckles. Make sure strips are flat and not overlapping. Use parchment to help them release cleanly. A quick press with tongs after minute 8 can relax a curl.
Greasy texture. Add a rack for more airflow. Bake a minute or two longer, then drain well on paper towels and rest for 2 to 3 minutes.
Uneven browning. Rotate the pan at minute 10 to 12. If using two pans, swap rack positions halfway. Keep strips the same thickness on each pan for consistent timing.
Too dark before fully crisp. Lower the oven to 375°F 190°C and extend time by a few minutes. Use a light colored pan or a rack to reduce hot contact points.
Simple Workflow You Can Repeat
Line a rimmed sheet. Heat to 400°F 204°C. Lay out strips without overlap. Bake and check at minute 10 to 12. Pull at your color. Drain and rest. Adjust time by thickness next time if needed. This loop locks in your oven sweet spot fast.
Conclusion
Oven bacon is the easiest path to consistent crisp. Set the temperature, place the pan on the center rack, and trust the timing windows. Use a rack for ultra crisp or parchment for easy cleanup and rich flavor. Keep strips flat, avoid overlap, and start checking early. With this method you will get reliable results, less mess, and a workflow that scales from one pan to a crowd.
FAQ
What temperature should I use to bake bacon in the oven
Preheat to 400°F 204°C and bake on the center rack. If your oven runs hot or you want a bit less splatter, 375°F 190°C also works and may take 2 to 4 minutes longer.
How long does bacon take in the oven
For thin cut plan on 10 to 14 minutes. For regular cut plan on 14 to 18 minutes. For thick cut plan on 18 to 24 minutes. Start checking at minute 10 to 12 because every oven and pan is a little different.
Do I need to flip bacon in the oven
No. The heat circulates and browns both sides. For extra even color you can flip at minute 12, but it is optional.
How do I prevent smoke and splatter
Use a rimmed sheet lined with parchment, place the pan on the center rack, do not overlap strips, and bake at 400°F 204°C. If your oven smokes, reduce to 375°F 190°C, turn on the hood vent, and make sure the oven floor is clean.
Can I cook bacon without a wire rack
Yes. Arrange the strips on parchment on a rimmed sheet. Baking directly on the parchment gives crisp edges and a slightly chewier center because the bacon cooks in its own fat.