We are reader supported. When you purchase through links on our site, we may earn an affiliate commission. Also, as an Amazon affiliate, we earn from qualifying purchases.
IKEA Besta is a solid base for a custom media center. It is clean, modular, and easy to adapt. With a few smart hacks, you can make it look built in, hide cables, keep devices cool, and match your style. This guide walks you through planning, parts, layouts, installation, finishing touches, and common mistakes. You will see what to buy, how to build, and how to get a polished finish without guesswork.
Plan with function first
Measure the room and screen
Note the wall width, ceiling height, baseboards, outlets, vents, and any doors that swing near the setup. Mark the centerline for the TV. Check the viewing distance and confirm a comfortable screen height from your main seat. Decide if the unit will float on the wall or sit on the floor.
List devices and storage needs
Count your devices. Think game consoles, streaming boxes, soundbar or receiver, modem and router, record player, and remotes. Decide what must be visible and what can be hidden. Add space for charging, game controllers, and media. Plan airflow for anything that heats up.
Choose Besta sizes and configuration
Pick low frames for a long console, or combine extra frames for a wide wall. Add doors for a clean front, drawers for small items, and open shelves for speakers or decor. Plan adjustable shelves so you can change later as devices rotate in and out.
Core components to buy
Besta frames and storage
Get enough frames to span the width you want. Add interior shelves, hinges for doors, and drawer runners if you want drawers. Buy matching doors or choose a mix of door styles for a layered look. Check that you have the right number of shelves and soft close parts.
Rails, legs, or a plinth
If you want a floating effect, buy suspension rails that match Besta. If you want it floor standing, choose sturdy legs or build a simple plinth to support the frames and hide floor gaps. Confirm your floor is level. If not, use adjustable legs or shims.
Tops, panels, and trim
Decide on a top. You can use a wood slab, laminate countertop, or a painted MDF top cut to size. Consider side panels to make a clean end. Add simple trim to close gaps at the wall or floor for a built in feel.
Hardware and accessories
Pick handles or push latches. Get cable grommets, cord sleeves, adhesive cable clips, and a power strip with surge protection. For airflow, plan vent grills and small USB fans if you have a hot receiver. Have paint, primer, sandpaper, and wood filler ready if you will finish any panels.
Three proven layouts
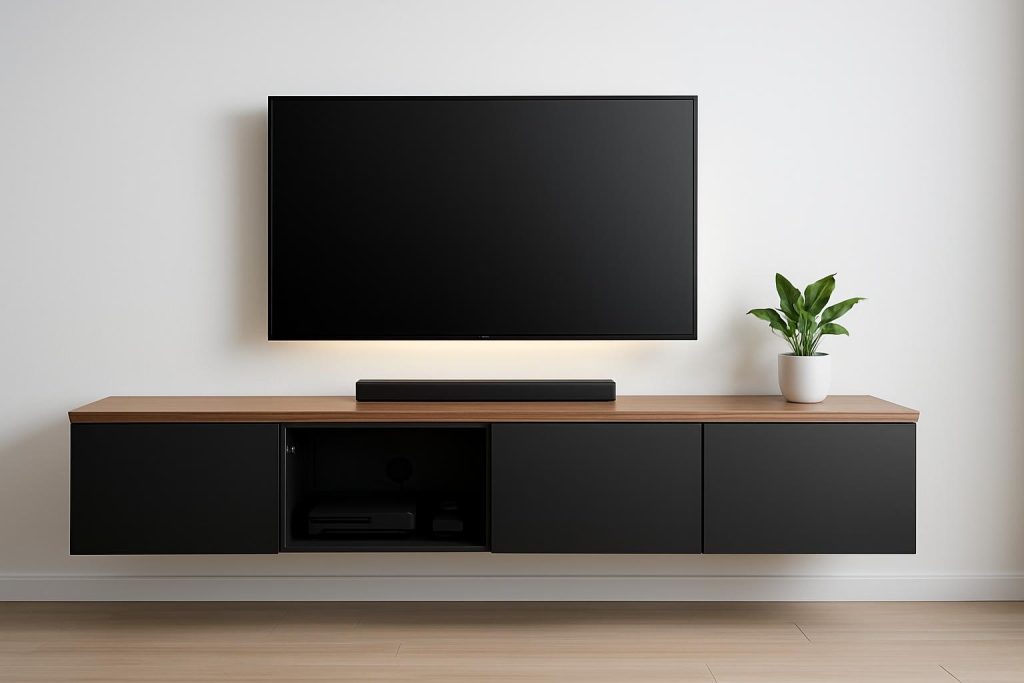
Floating low console
Use two or more low frames in a row. Mount a continuous top across them. This keeps floors clear and makes cleaning easy. It also draws the eye to the screen. This layout works well in small rooms and can span different wall widths by combining frames.
Built in wall to wall
Run Besta frames across the wall and finish with side panels and trim. Add a plinth under the frames to get the exact height you want. Close the top with a continuous slab. Use filler strips at the sides to close gaps. This creates a custom look without custom costs.
Corner friendly setup
Place a main frame under the TV and a second frame at a right angle to hold devices. Keep the corner open at the back for airflow and cable slack. Use a single top cut with a corner notch for a clean wrap. This layout saves space and adds storage.
Step by step build for a floating console
Find studs and set the rail
Mark studs on the wall. Set the suspension rail height based on the finished top line and desired door clearance above the floor. Use a level. Secure the rail into studs where possible and use proper anchors where you cannot. Follow manufacturer instructions for spacing and weight limits.
Hang and align frames
Assemble frames on the floor. Lift them onto the rail and lock them in. Join frames together through the side panels so the front faces are flush. Check for level and even gaps. Add temporary supports under the frames while you adjust doors and drawers.
Cut backs for cables and vents
Before closing the backs, mark where cables will pass. Cut a wide opening at the center back behind the TV and smaller slots behind hot devices. Add grommets for a clean edge. If you expect heat, add a vent grill low on one side and high on the other to promote airflow.
Install top and fronts
Dry fit the top. Scribe or sand any tight spots. Secure the top from inside the frames or with brackets at the back. Install doors and drawers. Adjust hinges so gaps are even. Add handles or set the push latches.
Step by step build for a built in
Set the plinth or base
Build a simple base from straight boards. Depth should match or be slightly less than the frames. Shim the base level. Secure it to the wall at studs. Place frames on the base and join them together.
Add side panels and fillers
Use panels on each end to create a thick side look. Fill any wall gaps with narrow strips. Scribe them to the wall for a tight fit. Prime and paint fillers to match. This removes shadow lines and gives a seamless face.
Finish with a continuous top
Use a single top across all frames. Align the front edge in a straight line. Secure from inside. Caulk small gaps at the wall. Paint or oil the top as needed. Let finishes cure before heavy use.
Step by step build for a corner layout
Plan the corner joint
Place the main frame centered on the TV. Place the side frame at 90 degrees. Leave a small gap at the corner back for wires. If using a single top, mark the overlap and cut a notch so the top wraps both frames cleanly.
Route cables through the corner
Cut a pass through in the touching sides of the frames near the back. Add a grommet to protect cables. Keep cords long enough to slide devices out for service.
Secure and finish
Join frames with brackets inside where they meet. Add the top and fronts. Adjust doors so the corner lines are even. Place decor to balance the L shape.
Ventilation that protects your gear
Plan passive airflow
Hot air rises. Place intake vents low and exhaust vents high inside the cabinets. Leave a gap behind the unit or cut slots in the back panels. Keep at least a hand width of open space behind receivers and game consoles.
Add active airflow when needed
Use quiet 5 volt USB fans to move air across hot devices. Power them from the TV or a USB charger. Set fans to pull air out near the top back to avoid dust buildup on the front.
Cable management that stays tidy
Centralize power
Mount a surge protected power strip inside a central bay. Keep low voltage and power cords separated as they run. Label cords at both ends so you can swap devices without guesswork.
Use guides and slack zones
Stick cable clips along the inside top or back of frames. Add a channel behind the TV down into the cabinet. Leave a slack loop behind each device so you can slide it out. Close pass through holes with grommets for a finished look.
Mounting and weight support
Floating install tips
Use the correct suspension rail and hardware. Secure into studs when possible. Respect weight limits for the rail and wall anchors. Spread heavy items across frames, not all in one bay. Do not overload doors with heavy items.
Floor standing stability
Use level adjustable legs or a solid plinth. Attach frames together. Anchor the unit to the wall with safety straps to prevent tipping. Add felt pads under legs to protect floors.
Large TV considerations
If wall mounting the TV, secure the TV bracket into studs. If placing the TV on the top, confirm the top is well supported at the center. Avoid long spans without support under a heavy screen. Add a center support leg inside a bay if needed.
Finishes that elevate the look
Paint for a custom match
Use adhesion primer on any raw trim or panels. Apply thin coats of paint in a satin or matte finish. Sand lightly between coats. Color match walls or choose a contrast to frame the screen.
Wood tops that warm the room
Use oak, walnut, or ash slabs, or a wood veneer countertop. Ease sharp edges with sandpaper. Finish with hardwax oil or water based polyurethane for durability. Recoat as needed to maintain luster.
Hardware and toe kicks
Choose slim metal pulls or go handleless with push latches. Add a matching toe kick on a plinth to hide gaps and dust. Keep hardware consistent across doors and drawers for a calm look.
Smart lighting for depth
LED strips inside cabinets
Stick warm white LED strips under shelves to light devices. Hide wires along the cabinet frame. Use a dimmer to avoid glare. Place motion sensors if you want lights only when doors open.
Backlighting behind the TV
Mount an LED strip behind the screen to reduce eye strain and add depth. Keep the brightness modest. Match the color temperature to room lighting for a cohesive look.
Sound and device access
Speaker and soundbar placement
Use an open bay or an acoustically transparent fabric panel for a center speaker or soundbar. Keep speakers flush with the front edge to avoid muffled sound. Leave space around speaker ports.
Doors, drawers, and remotes
Receivers run hot, so place them in ventilated bays. For consoles, drawers keep controllers tidy, while doors hide clutter. If remote signals need help, use an infrared repeater or choose doors with mesh or openings.
Safety and durability
Anchoring and children
Anchor the unit to the wall to prevent tipping. Use child safety locks on doors or drawers if needed. Hide power strips behind doors to keep small hands away.
Cleaning and care
Dust weekly to protect vents. Wipe with a damp cloth and mild soap. Avoid abrasive pads. Check hinge screws and shelf pins every few months and tighten if needed.
Budget and timeline
Cost ranges
A simple two frame console with doors and a basic top is budget friendly. Adding side panels, a solid wood top, lighting, and trim increases cost. Expect to spend more on custom tops and quality hardware, and less if you use standard components.
Weekend build plan
Day one, assemble frames, set rails or base, and test fit. Cut backs for cables and vents. Day two, install fronts, apply finishing touches, mount the top, and manage cables. Add lighting last. Take your time on alignment for a clean result.
Common mistakes to avoid
Blocking airflow
Do not pack hot devices in closed bays without vents. Keep intake low and exhaust high. Use fans if you feel heat on the door fronts.
Skipping wall anchors
Even floor standing units should be anchored. Weight shifts when doors swing and drawers pull out. Anchors prevent wobble and tipping.
Poor cable planning
Cut pass through holes before final assembly. Label cords. Leave slack. Keep power and signal runs separate to reduce interference and clutter.
Uneven fronts and gaps
Take time with hinge and drawer adjustments. Step back and check lines under room lighting. Small tweaks make a big difference.
Conclusion
IKEA Besta can become a stylish and practical media center with smart planning and a few upgrades. Choose a layout that fits your room, keep devices cool, hide cables, and refine the finish with a quality top and clean hardware. Anchor the unit, add lighting, and keep fronts aligned. With these steps, you get a custom look, reliable function, and a setup that can evolve as your gear changes.
FAQ
Q: How do I keep devices from overheating inside Besta cabinets?
A: Cut vents low and high in the back panels, leave space behind devices, and add quiet USB fans to exhaust warm air near the top back.
Q: What is the best way to hide cables in a Besta media center?
A: Centralize power in one bay, route cords through grommeted pass through holes, use adhesive clips as guides, and leave a slack loop behind each device.
Q: Can I mount a Besta media center so it floats off the floor?
A: Yes, use the correct suspension rail, secure it into studs where possible, follow weight limits, and join frames together before installing the top and fronts.
Q: How can I make a Besta setup look built in?
A: Run frames wall to wall, place them on a level plinth, add side panels and filler strips, finish with a continuous top, and caulk small gaps at the wall.
Q: What layout works in a corner room?
A: Use one frame under the TV and a second at a right angle, keep a cable pass through at the corner back, and use a single top notched to wrap both frames.