We are reader supported. When you purchase through links on our site, we may earn an affiliate commission. Also, as an Amazon affiliate, we earn from qualifying purchases.
DIY yard art can change a plain garden into a lively and personal space. You do not need advanced skills or big budgets. Start small, reuse what you have, and focus on simple builds that hold up outdoors. This guide gives clear steps, material lists, weatherproofing basics, and display tips. Follow one project today and add more over time.
Set Your Plan Before You Build
Map Your Space
Walk your yard at different times of day. Note sun, shade, wind paths, and wet spots. Mark where you want a focal point at the end of a path or near seating. Leave clear walking zones to avoid clutter.
Pick a Simple Style and Palette
Choose one style to keep the yard calm. Options include modern clean lines, rustic with wood and metal, or playful color pops. Limit colors to two or three main hues with one accent. Repeat these colors across pieces for unity.
Start With One Zone
Pick a small area to test your ideas, such as the porch, a corner bed, or a fence panel. Add one focal piece and two smaller support pieces. Adjust heights so the eye steps from low to medium to tall.
Tools and Materials That Make Builds Easy
Basic Tools
Gather a drill with bits, sandpaper in medium and fine grits, outdoor wood screws, wire cutters, pliers, utility knife, measuring tape, level, and clamps. A jigsaw helps with wood shapes but is optional if you choose no-cut builds.
Paints, Primers, and Sealers
Use exterior primer suited to your surface such as wood, metal, plastic, or masonry. Choose outdoor acrylic paint or spray paint labeled for exterior use. Finish with a clear UV-protective sealer in matte or gloss. For concrete, use a masonry sealer. For metal, use a rust-inhibiting primer and paint.
Fasteners and Hanging
Use galvanized or stainless screws outdoors. For hanging, use outdoor wire, chain, or heavy-duty zip ties. For fence mounting, use exterior-grade hooks or brackets.
Safety and Setup
Work on a stable surface. Wear eye protection, mask when sanding or spraying, and gloves when handling metal or cement. Lay drop cloths to protect paving.
Weatherproofing That Lasts
Prep the Surface
Clean with soap and water. Remove rust with a wire brush. Sand glossy surfaces until dull for better adhesion. Let dry fully.
Prime, Paint, and Seal
Apply primer as the label directs. Let it cure. Add two thin paint coats. Seal with a clear topcoat. For high sun areas, use a sealer with UV blockers. Reapply sealer each year or when color fades.
Choose Durable Materials
Use pressure-treated wood, cedar, or redwood for posts. For metal, choose aluminum or galvanized steel. For outdoor glue, pick polyurethane or construction adhesive rated for exterior use.
Upcycling Ideas That Save Money
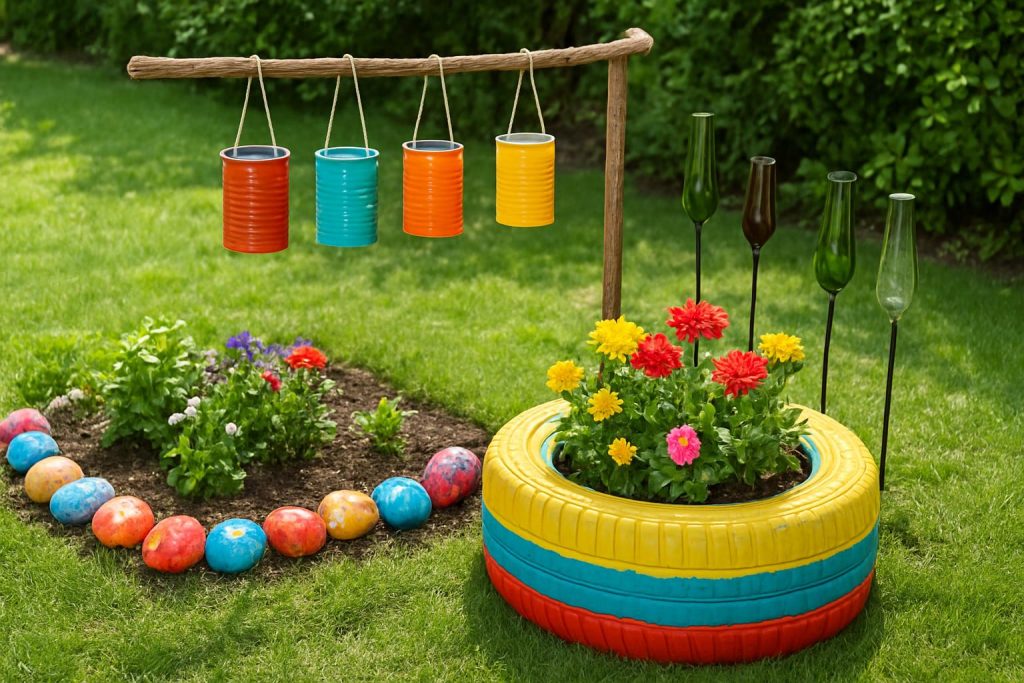
Tin Can Lanterns
Materials: empty cans, nail or small drill bit, wire, exterior spray paint, tea lights or solar tea lights.
Steps: Soak off labels. Fill cans with water and freeze so the metal does not dent while drilling. Tap holes in patterns. Thaw, dry, and paint. Add a wire handle. Place solar tea lights inside. Hang along a fence or a tree branch.
Glass Bottle Edging or Bottle Tree
Materials: clean glass bottles, metal rods or rebar, rubber caps optional.
Steps for edging: Push rods at a slight angle along a bed edge. Place bottles over rods with necks down. Steps for a bottle tree: Set one sturdy trunk rod and weld or attach short arms, then slide bottles onto arms. Place in a sunny spot for color pop.
Tire Planters
Materials: old tire, exterior paint, drill, landscape fabric, potting mix, plants.
Steps: Wash and dry the tire. Drill drainage holes. Paint in two thin coats. Line the bottom with fabric. Fill with potting mix and plant. Place on pavers to prevent staining the soil.
Broken Dish Mosaic Stepping Stone
Materials: stepping stone mold or a plastic tray, concrete mix, broken ceramic pieces, outdoor tile adhesive optional, masonry sealer.
Steps: Mix concrete to a thick batter. Pour into the mold. Press ceramic pieces flush with the surface in a simple pattern. Let cure fully. Seal. Place on compacted sand for level support.
Natural Material Projects
Pebble Mosaic Tray or Paver
Materials: shallow tray or paver mold, concrete or mortar, smooth pebbles.
Steps: Pour mix into the tray. Set pebbles in rows or simple curves. Tap to level. Wipe off film. Cure and place flat on compacted base.
Branch Trellis or Obelisk
Materials: straight branches, outdoor screws or garden wire, pruning saw.
Steps: Cut branches to size. Build a square or triangular frame. Add crosspieces with screws or wire ties. Push legs into the soil at least 15 cm. Use for peas, beans, or flowers.
Stacked Stone Birdbath
Materials: flat stones, exterior construction adhesive, shallow glazed dish or metal bowl.
Steps: Stack stones with adhesive between layers. Check with a level. Secure the shallow dish on top. Fill with water and refresh often.
Wood and Metal Yard Stakes
Plywood Silhouette Stakes
Materials: exterior plywood, jigsaw, sandpaper, primer, outdoor paint, sealer, metal stakes, screws.
Steps: Draw a simple silhouette such as leaves or geometric shapes. Cut, sand edges, and prime. Paint both sides and seal. Screw to metal stakes. Push into soil at varied heights.
House Number Sign From Scrap Wood
Materials: scrap board, exterior stain or paint, metal numbers, screws, clear sealer.
Steps: Sand the board. Stain or paint and let dry. Attach numbers. Seal. Mount on a post or fence with outdoor screws.
Concrete and Hypertufa Projects
Leaf Cast Birdbath
Materials: large leaf such as rhubarb, sand mound, concrete mix, release agent such as cooking oil, masonry sealer.
Steps: Mound damp sand. Oil the leaf underside. Place leaf vein side up over sand. Trowel concrete over it to about 2 cm thick. Shape edges. Cure, flip, peel leaf, and seal. Set on a short base.
Hypertufa Planters
Materials: peat moss, perlite, Portland cement, water, mold, plastic sheet, gloves and mask.
Steps: Mix 1 part cement, 1.5 parts peat, 1.5 parts perlite. Add water to a clay-like feel. Press into a mold. Add drainage holes. Wrap in plastic and cure slowly. Unmold and brush to texture. Cure two more weeks. Seal if desired.
Painted Projects That Stand Out
Rock Painting for Borders
Materials: smooth rocks, outdoor acrylics, brushes, clear sealer.
Steps: Wash and dry rocks. Paint simple patterns or plant labels. Seal. Use along paths or inside pots.
Stenciled Stepping Stones
Materials: plain pavers, stencil, outdoor paint, sponge, sealer.
Steps: Clean pavers. Tape stencil in place. Dab thin paint layers. Lift stencil and let dry. Seal for durability.
Fence Mural Panels
Materials: thin exterior plywood or metal panels, primer, outdoor paint, screws.
Steps: Prime panels. Paint bold shapes and lines. Seal. Screw panels to fence rails so the wood can breathe behind.
Add Light for Evening Impact
Solar Jar Path Markers
Materials: clear jars, solar puck lights or lids, gravel or glass beads.
Steps: Place a light in each jar. Add a little gravel for weight. Set along paths or steps. Bring inside during severe cold if needed.
Glow Paint Accents
Use outdoor glow-in-the-dark paint on rock edges or small symbols on steps. Keep accents small so they guide without glare.
Safety With Lights
Use only solar or low-voltage systems outdoors unless you have a licensed electrician. Keep lights above flood zones.
Add Motion and Sound
CD or Disk Wind Spinners
Materials: old disks, fishing line or wire, swivel hook, beads optional.
Steps: Tie line through the center hole. Add a swivel to prevent tangles. Hang where wind can reach. The reflective surface adds movement.
Can or Key Chimes
Materials: clean cans or old keys, driftwood or dowel, wire, drill.
Steps: Drill small holes in each piece. Tie at varied lengths to a wood hanger. Keep strings short enough to avoid damage in high wind.
Kid Friendly Yard Art
Handprint Stepping Stones
Materials: stepping stone mix, shallow mold, outdoor paint for names.
Steps: Pour mix in the mold. Press handprints. Let set. Add names with paint. Seal. Place on level sand.
Bug Hotel
Materials: small wooden crate, bamboo cuts, pine cones, drilled wood blocks, garden wire.
Steps: Pack the crate with dry natural materials. Secure with wire. Mount in a dry spot near plants. Avoid pesticide use nearby.
Seasonal Swaps Without Rebuilding
Modular Bases
Build sturdy bases such as a post, a tray stand, or a hanging branch. Swap toppers by season such as lanterns, wreaths, or planters. Store off-season pieces in labeled bins.
Quick Seasonal Touches
Spring: pastel rocks and flower stakes. Summer: bright bottle art. Fall: warm tones and leaf motifs. Winter: evergreen bundles and metal silhouettes with weatherproof bows.
Layout Tips That Make Art Look Intentional
Group in Odd Numbers
Use groups of three or five pieces. Vary heights for depth. Keep a consistent gap between pieces in a group.
Use Sightlines
Place a focal piece where you naturally look from the door, window, or seating. Align a path or edging to point at it.
Leave Space
Keep open ground or low plant areas around art. Empty space makes each piece read clearly.
Budget and Sourcing
Find Materials Close to Home
Check your shed, recycle bin, and local buy nothing groups. Look for free pallets, old tools, and scrap metal. Visit thrift stores for frames, trays, and bottles.
Spend Where It Counts
Buy quality primer, exterior paint, and sealer. A good finish extends life and saves time later.
Maintenance That Protects Your Work
Regular Care
Dust or hose off pieces once a month. Tighten screws twice a season. Check for rust or peeling and touch up fast.
Seasonal Protection
Reapply clear sealer each year on painted surfaces. Store delicate items during storms or deep freezes. Elevate wood art on pavers to reduce ground moisture.
Common Mistakes to Avoid
Do not skip primer on slick surfaces. Do not place art where sprinklers hit daily. Do not mix too many colors in a small area. Do not block vents, gates, or mower paths. Do not overload hangers without checking weight limits.
Quick Start Projects You Can Finish Today
Project 1: Stenciled Paver
Prime the paver if needed. Use one stencil and one color. Seal after drying. Place at the start of a path.
Project 2: Tin Can Lantern
Drill patterns, paint, and hang three cans in a cluster with solar tea lights.
Project 3: Painted Rock Markers
Paint names of herbs or simple shapes. Seal and place at plant bases.
Advanced Builds When You Are Ready
Geometric Wood Wall Panel
Cut cedar strips. Form a simple grid or chevron on a backing board. Stain in two tones. Seal. Mount with spacers on a fence.
Metal Rod Sculpture
Bend aluminum rod into loops with a hand bender. Attach to a ground spike. Place in a windy, open area. Sand and clear coat to reduce oxidation.
Bring It All Together
Plan first, prep surfaces well, and keep designs simple. Repeat colors and shapes to unify the yard. Start with one small area and a few durable pieces. Maintain with quick cleaning and yearly sealing. As your skill grows, add more layers and seasonal swaps. Your garden will gain color, light, and personality that fits your space and routine.
FAQ
Q: What paint should I use for outdoor yard art
A: Use exterior primer matched to the surface, outdoor acrylic or exterior spray paint, and finish with a clear UV protective sealer.
Q: How do I weatherproof DIY yard art
A: Clean and sand the surface, apply the right primer, paint in two thin coats, and seal with a UV protective topcoat, reapplying yearly as needed.
Q: How can I add light to yard art without wiring
A: Use solar jar lights or solar tea lights in lanterns and place them along paths or near seating.
Q: What are quick 1 day yard art projects for beginners
A: Try a stenciled paver, a tin can lantern cluster with solar tea lights, or painted rock markers.
Q: How do I plan the layout of yard art in a small garden
A: Start with one zone, group pieces in odd numbers, vary heights, use sightlines from doors or seating, and leave open space around each piece.