We are reader supported. When you purchase through links on our site, we may earn an affiliate commission. Also, as an Amazon affiliate, we earn from qualifying purchases.
Building an outdoor grill station makes backyard cooking easier, faster, and more enjoyable. You get a defined prep zone, safe clearances, and storage that keeps tools ready. You also gain a social hub for family and friends. This guide gives you 15 clear ideas you can adapt to your space and budget, plus planning, safety, and maintenance tips so you can start and finish with confidence.
Plan It Right From Day One
Measure, Map, and Test Your Flow
Start with a simple site plan. Mark the grill, prep, serve, and seating zones with painter tape or cardboard. Leave 36 inches minimum for walkways. Keep hot and prep areas separate so raw and cooked items never cross. Place the grill downwind of the main seating area if your yard has a dominant wind. Test the layout by pretending to cook a full meal. If you bump into edges or cross paths often, adjust before you build.
Pick Your Fuel and Match the Design
Choose the grill type first, then design around it. Gas is fast and convenient. Charcoal gives classic flavor and handles high heat. Pellet grills automate temperature control and smoke. Kamado cookers hold steady heat and offer sear to low-and-slow flexibility. Each model needs a different cutout, airflow, and heat clearance. Measure your exact unit and download the manufacturer specs. Leave extra space for lid swing, venting, and tool access.
Safety Clearances and Codes
Keep the grill at least 10 feet from walls, rails, and overhangs unless the manufacturer allows closer placement. Use a noncombustible surface under and behind the grill. Add a fire extinguisher within easy reach. If you plan gas lines, electrical outlets, or a sink, verify local codes and consider hiring licensed pros. Build a sturdy, level base that handles weight and heat. A paver patio or concrete slab prevents movement and grease stains.
15 Outdoor Grill Station Ideas for Your Backyard
1. Mobile Grill Cart With Fold-Out Wings
Ideal for small patios or renters. Use a sturdy cart with locking casters, stainless or powder-coated top, and two fold-out side shelves for prep. Add S-hooks on a rail for tools and a narrow bottom shelf for a bin or fuel. Store the cart under a cover when not in use. This setup moves easily to chase shade and avoids permanent work.
2. Compact L-Shaped Corner Station
Turn an unused corner into a tidy cooking bay. Build a short L-shaped counter in weatherproof composite or sealed hardwood with a vented cutout for your grill. One leg handles prep, the other stores tools and a small cooler. This layout keeps everything within reach while opening the main patio for seating. Add a small backsplash to protect fencing.
3. Modular Cinder Block Island
Cinder blocks stack fast, resist heat, and cost less than many frames. Dry-stack the base, check for level, then cap with concrete pavers or a poured concrete top. Leave gaps or install vents for airflow. Slide your grill into a measured bay and add a simple door for tank or bin storage. Seal the top to prevent staining and water intrusion.
4. Cedar and Stainless Combo Station
Pair a cedar-clad frame with stainless counters for clean looks and easy care. Use cedar for doors and panels with stainless hinges and handles. Top with a stainless work surface that wipes down fast. Keep the grill cutout lined with cement board for heat safety. This mix holds up in wet climates with basic maintenance and light sanding each season.
5. Brick Surround With Arched Opening
Build a classic brick surround with an arched face. Use firebrick or add a heat-resistant liner around the grill zone. The mass holds heat steady and looks solid. Integrate a small chimney cap or vent slots for airflow. Add a natural stone or concrete counter on each side for staging pans and trays. This design anchors a patio and reads high-end without complex carpentry.
6. Pergola-Topped Grilling Bay
Add a pergola for shade, structure, and lighting options. Keep the grill clear of overhead beams per manufacturer guidance and use a noncombustible backsplash. Mount dimmable LED strips along the pergola rafters and a task light over the prep zone. A pergola defines the station visually and sets anchor points for hooks, hanging shelves, and privacy screens.
7. Galvanized Stock Tank Base With Butcher Block
Repurpose a shallow stock tank as a base. Cut a stable wood top or use composite boards and seal all edges. Place the grill on a heat mat or metal tray with a safe gap to the wood. The tank stores fuel, covers, or bins below. Add swivel casters to the base for mobility. This is a fast build with a distinctive look and minimal tools.
8. Rolling BBQ Bar With Built-In Cooler
Turn a rolling bar cart into a dual-use station. One side hosts the grill and prep surface; the other side holds an insulated drop-in cooler for drinks and marinating. Install a rail for towels and a magnetic strip for knives. This setup powers a small gathering and frees your main table. Always check weight ratings before placing a heavy grill.
9. Built-In Kamado Nook
Create a snug, vented cradle for a kamado cooker. Frame with steel or masonry, line with cement board, and top with stone or concrete. Add sliding trays for charcoal and tools. Ensure side ventilation and space around the dome for heat expansion and lid travel. A side shelf with a heat-resistant surface simplifies hot stone and grate handling.
10. Split-Level Prep and Serve Counter
Use two heights to separate cooking from serving. A standard 36-inch cook surface sits by the grill; a 42-inch bar behind it holds plates and drinks. Guests can gather without crowding the hot zone. This layout improves ergonomics and keeps raw ingredients away from finished food. If space allows, add a narrow trash chute between levels.
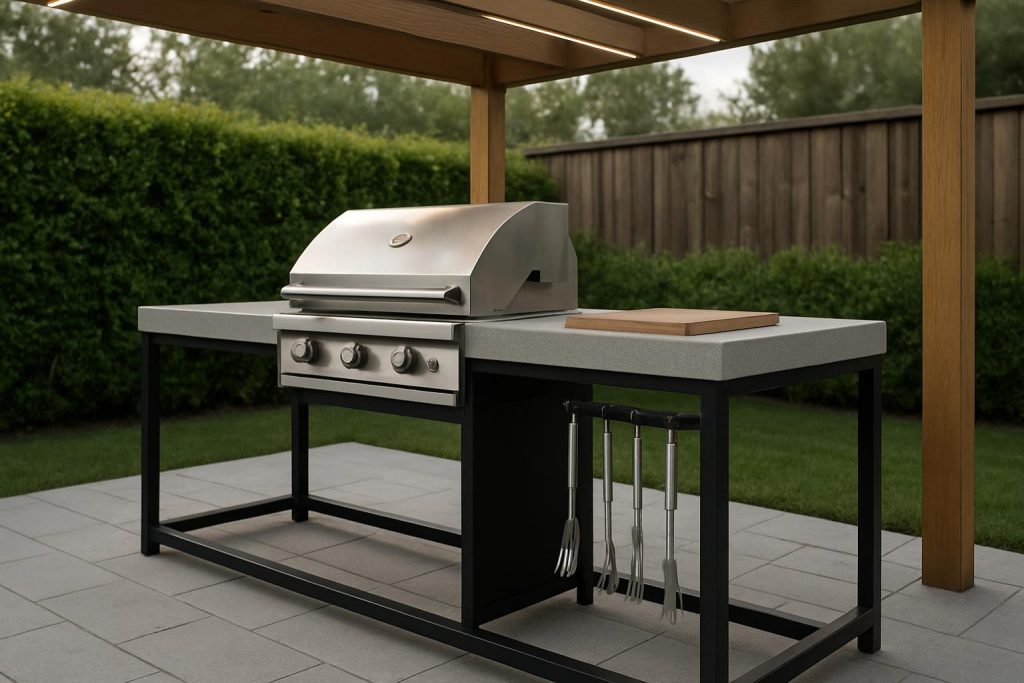
11. Steel Frame With Poured Concrete Top
Weld or bolt a steel tube frame and pour a reinforced concrete counter. Seal the surface with a food-safe outdoor sealer. Concrete handles heat, wind, and spills, and the frame resists rot. Include a cutout for a drop-in grill or mount a freestanding grill flush with the edge. Plan conduit paths in the frame for optional lighting or an outlet.
12. Wall-Mounted Fold-Down Station
For very small patios, mount a fold-down table against a masonry wall. Use stainless hinges and a support bracket. The grill sits on a separate rolling base that tucks under when not in use. Store a slim tool rack on the wall and a collapsible bin below. This design preserves floor space while giving you real prep area when open.
13. Grill Station With Portable Sink
Add a compact sink using a portable camp sink or a hose-fed faucet with a greywater container. Mount it in a side cabinet with a quick-connect hose fitting. Use the sink for handwashing, produce rinsing, and light cleanup. Keep the system simple so you do not need permanent plumbing. Always dispose of greywater per local rules.
14. Fire Pit Plus Swing Grate Hybrid
If you like live fire cooking, pair a wood-burning pit with a swing or adjustable grate and keep a gas or charcoal grill nearby for consistency. Place the pit downwind and away from structures. Add a side table for prep and a covered bin for split wood. This hybrid station offers smoky flavor and a backup when wind or time is not ideal.
15. All-Weather Station With Shutters
Build a compact cabinet with louvered shutters that close when not in use. Inside, mount the grill on a pull-out tray and store tools in sealed bins. Top with a stone or porcelain slab that handles heat and rain. When closed, the station looks tidy and protected. When open, shutters block wind and add privacy around the cook zone.
Smart Add-Ons That Make Cooking Easier
Storage That Works Hard
Plan a place for everything. Use magnetic strips for knives, hooks for tools, and a narrow drawer for thermometers and lighters. Add a sealed bin for pellets or charcoal and a drip-proof tray for oils and sauces. Keep raw and cooked trays separate and color coded. A small vertical rack for sheet pans saves counter space.
Lighting and Power Without Clutter
Use warm LED task lights over the grill and prep area, plus a low-glare ambient light for the whole zone. Run outdoor-rated extension cords only when needed, or install a GFCI outlet in a code-compliant box with in-use cover. Route cords along posts or under counters to prevent trips. Label switches so guests do not fumble in the dark.
Weather Protection and Ventilation
Shield your station with a pergola, shade sail, or free-standing umbrella placed clear of the heat zone. Avoid solid roofs over grills unless the manufacturer approves and you add rated ventilation. Use a breathable cover on the grill after it cools. Elevate wood components on feet or pads so water drains and air circulates.
Budget and Timeline Tips
Budget Tiers
Entry: mobile cart, basic hooks, and a cover. Expect minimal tools and a weekend of setup. Mid-range: modular block island with a stone or concrete top, some lighting, and organized storage. Premium: steel or masonry frame, built-in grill, hardwired lighting, and a bar-height counter. Spend where it matters most for you, such as counter space or durable tops.
Weekend Build Sequence
Day 1: finalize layout, set base, and confirm level. Preassemble frames or stack blocks. Day 2: install counters, mount the grill, and add storage, hooks, and lights. Seal surfaces after 24 hours of cure if required. Do a dry run cook with water and utensils to confirm spacing, reach, and lighting before hosting a group.
Maintenance and Longevity
Seasonal Care
Clean grates after each cook. Empty grease traps and ash pans before storage. In fall, deep clean the grill, check hoses and gaskets, touch up sealant on wood and concrete, and apply a fresh coat if needed. In winter, cover the grill, store tools indoors, and elevate covers so water does not pool. Clear snow from counters to reduce freeze damage.
Keep Surfaces and Metals Fresh
Wipe stainless with a nonabrasive cleaner and go with the grain. Reseal wood and concrete as the manufacturer recommends. Tighten hardware twice a season. Inspect casters and replace worn ones before they fail. Keep a spare thermometer probe and lighter in a labeled bag so you never hunt for basics.
Conclusion
An outdoor grill station does not need to be complex to work well. Start with a clear plan, build with safe materials, and choose one of the 15 layouts that fits your space and cooking style. Add focused storage, lighting, and weather protection. Maintain it with simple routines. The result is a clean, efficient station that supports weeknight dinners and weekend gatherings with less stress and more consistency.
FAQ
Q: What is the best layout for a small backyard grill station
A: Use a compact L-shaped corner or a wall-mounted fold-down station with a mobile cart. Keep 36 inches for walkways, separate prep from hot zones, and test your flow with a mock cook before building.
Q: Which materials handle weather best in an outdoor grill station
A: Use masonry, steel frames, stainless counters, and sealed concrete for heat and moisture resistance. Cedar or composite works for doors and panels if kept off the ground and maintained with sealant.
Q: How can I add lighting and power safely to a grill station
A: Install warm LED task lights over prep areas and a low-glare ambient light. Use GFCI outlets in rated boxes with in-use covers, route cords cleanly, and keep fixtures clear of heat and grease zones.
Q: What is a realistic budget range for building a grill station
A: Entry setups use a mobile cart and basic accessories. Mid-range uses modular blocks and a stone or concrete top. Premium builds use steel or masonry frames, built-in grills, hardwired lighting, and a bar counter.
Q: How do I protect my grill station through winter
A: Deep clean the grill, check hoses and gaskets, reseal wood and concrete, cover the grill after it cools, store tools indoors, and clear snow from counters to reduce freeze damage.