We are reader supported. When you purchase through links on our site, we may earn an affiliate commission. Also, as an Amazon affiliate, we earn from qualifying purchases.
You can organize every pair of shoes you own without buying a single thing. You already have enough boxes, hangers, bags, and shelves to build a tidy, easy system. The steps below are simple, fast, and friendly to small spaces. Start with the quick wins, then build a setup that fits your home and your habits.
Before You Start: The Goal And The Ground Rules
The goal is clear storage that keeps daily pairs easy to grab and puts all other pairs out of the way but still findable. You will use only what you already own. You will reduce visual clutter, keep floors clear, and protect shoes from damage.
Ground rules help you move fast. Work with one small area at a time. Group first, then store. Keep daily shoes by the door or closest zone. Store occasional shoes higher, deeper, or under the bed. Label anything you cannot see. Do not chase perfect. Aim for done today.
Step 1: Quick Audit And Gather
Set a 20 minute timer. Pull every shoe from the entry, closet floor, under the bed, and car. Match pairs. If a mate is missing, set the single aside in a visible spot and hunt for it once at the end. Wipe light dirt with a damp cloth. Stuff wet shoes with newspaper to dry. Sprinkle a pinch of baking soda inside if smell is strong, then tap it out later. This resets everything fast with items you already have.
Decide what to let go. Anything torn, painful, or not worn in a year can leave. If you keep it for a task, label it as a task pair so it does not mix with daily shoes. Freeing space is the best organizer you will ever use.
Step 2: Sort By How You Live
Sort by frequency first. Daily rotation, weekly rotation, and occasional or seasonal. Daily pairs deserve front row access near the door or lowest shelf position. Weekly pairs can live in the closet. Occasional and seasonal can go higher or deeper.
Within each frequency group, sort by type. Sneakers, flats, heels, boots, sandals, specialty. This makes sizing storage easier and helps you see duplicates. Sort by owner if you share space. Give each person a defined zone to prevent mixing.
Step 3: Assign Zones You Already Have
Entryway Basics
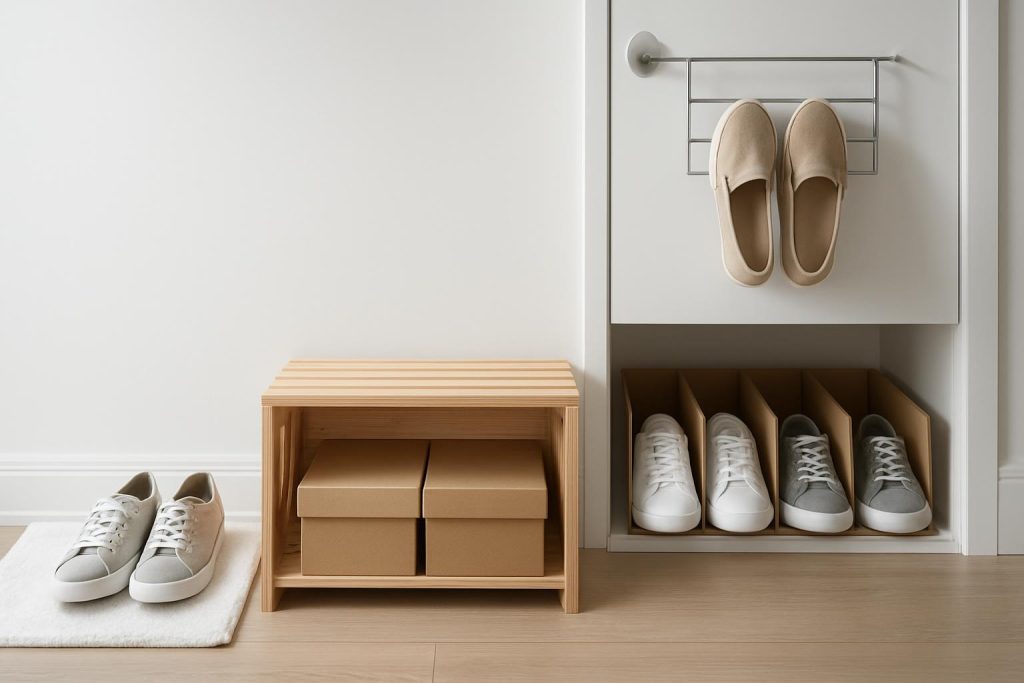
Use a washable mat or an old towel as a landing strip. Limit this spot to the daily pairs only. If the pile grows, return extras to the closet during your nightly reset. A low shelf, a wooden crate, or two stacked sturdy boxes can act as a mini shoe bench. If you have an old tray, use it for wet weather days to contain water and dirt.
Closet Floor And Lower Shelves
Closet floors are prime shoe space. Line up sneakers and flats heel to toe to save depth. Place least used pairs at the back. If you have shelf space, put weekly pairs on the lowest shelf for easy reach. Line a shelf with an old piece of cardboard so heels do not poke through wire racks. Keep one empty spot as a parking space for the pair you wore today. This makes tomorrow morning smooth.
Under The Bed
Slide shoes into existing shoeboxes or shallow cardboard boxes. Group by type. Label the short sides so you can read them while crouched. If dust is a concern, wrap pairs in old pillowcases or cloth bags before boxing. Keep a pull tab by taping a folded ribbon or duct tape to the front of a box you open often.
Behind The Door
If you already own an over door hook or a lightweight rack, claim it for flip flops, slippers, or canvas shoes. If not, hang a pants hanger with clamps and clip pairs by the heels. This uses vertical space that is often wasted. Test the door closes well before committing.
High Shelves And Hard To Reach Spots
Place occasional and seasonal pairs here. Use original shoeboxes if you kept them. Label clearly. If boxes are mismatched, stack the sturdiest at the bottom. Store boots upright to prevent creasing. Stuff them with rolled towels, old magazines, or thick socks to hold their shape.
Step 4: DIY Holders From What You Already Own
Use The Shoeboxes You Already Have
Original shoeboxes are perfect. Wipe them, remove loose paper, and label the short side with type and owner. For clear viewing, cut a small finger notch on the front edge for easy pulling. If two small pairs fit in one box, place one pair toe forward, one heel forward to fit snugly.
Make Dividers With Cardboard
Cut panels from shipping boxes to create simple C shaped dividers on a shelf. Slide one panel between pairs so they stand. This prevents domino falls and gives each pair a slot. For a rack effect, place two panels parallel and add shorter cross pieces to form cubbies sized for flats or sandals.
Turn Cereal Boxes Into Vertical Slots
Cut the top off a cereal box at a diagonal to create a magazine file shape. Place flats or sandals upright. Line a row of these on a shelf for a neat look. Tape two boxes together for adult sneakers if you need more width. This keeps pairs visible and tight.
Repurpose Hangers And Clips
Use pants hangers with clips to hang boots by pull tabs or heels. Use binder clips on a standard hanger to hold flip flops by the straps. Hang light pairs only so you do not warp the hanger. This is ideal for a closet rod section that sits empty.
Tray And Ramp From Boxes
Cut the side off a shallow box to create a front opening tray for the entryway. Place a second box lid under the back edge to tilt it slightly. The ramp effect layers pairs so you can see the back row. This is a quick way to pretend you have a tiered rack using only boxes.
Keep Boots Upright With What You Own
Roll towels, old yoga mats, or thick magazines and slip them into shafts. This prevents creases and saves space. If you have paper tubes from wrapping paper, cut them to height and use as inserts. Store tall boots standing at the back of the closet or under the bed along a wall.
Dust Covers Without Buying Bags
Use pillowcases, drawstring gift bags, or old T shirts as covers. Slip one cover over each pair of heels or delicate shoes. For quick labels, write on a strip of paper and tape it to the fabric near the opening. Covers keep light and dust off without new supplies.
Step 5: Label Fast With What You Have
Write labels on masking tape, painter tape, or cut strips of paper taped on. Include owner, type, and season if helpful. If you cannot label, mark boxes with a bold letter code like S for sneakers, H for heels, B for boots. Place labels on the side you see when stored. The goal is to identify a pair in under five seconds.
Step 6: Build A Simple Layout That Fits
Small Studio Or Tiny Closet
Keep two daily pairs by the door on a towel. Put all other pairs under the bed in labeled boxes. Hang slippers on a hanger by the closet rod. Rotate seasonally so the current season lives in the first row under the bed. This keeps the floor clear and the routine simple.
Busy Family Entry
Give each person one box or crate by the door for daily pairs. Everything else goes to that person’s closet or under bed box. Label each box with a name. Do a nightly 2 minute return to zone so the entry stays clear for mornings.
Sneaker Heavy Setup
Use shelf dividers made from cardboard panels to create fixed slots. Store pairs heel to toe to shorten the depth. Set a limit per shelf that matches your space. If new pairs arrive, an old pair moves to the upper or under bed zone or leaves. Keep cleaning wipes nearby for quick maintenance.
Heels And Delicates
Keep heels on a shelf lined with cardboard or a folded towel so tips do not slip into wire gaps. Use dust covers made from pillowcases to prevent scuffs. Store tallest heels at the back, shorter in front for visibility. Do not stack heel to heel, it stresses straps.
Boot Season Storage
Stand boots upright with towel inserts. Place off season boots on a high shelf in pillowcases. Label each case with size and style. Keep one pair of rain boots near the entry during wet months so they are always within reach.
Step 7: Easy Habits That Keep It Organized
Daily 2 Minute Reset
Each night, return stray pairs to their zones. Shake out the mat or towel by the door. Tap baking soda from any shoes you treated. This keeps chaos from building.
Weekly Quick Sweep
On laundry day, wipe the closet floor, realign pairs, and spot clean shoes with a damp cloth. Check for singles and reunite them. Move out of season pairs up or under the bed as the weather changes.
Simple Limits And Swap Rule
Set a limit per person for the entry. When a new pair shows up in that zone, an old pair goes back to the closet. If a new pair comes into the home, choose an old pair to donate or recycle if possible. Limits keep your system stable.
Troubleshooting Common Problems
Tiny Entry With No Furniture
Use a sturdy box lid as a landing tray for two pairs. Mount nothing. Store everything else under the bed or in the closet. Reset nightly. This avoids tripping hazards and still gives you a spot for wet shoes.
Wet And Muddy Conditions
Line the entry tray with a trash bag or old baking sheet. Stuff wet shoes with newspaper and place near airflow, not on a heater. Rotate two pairs during storms so one pair can dry fully while the other is in use.
Strong Odors
Sprinkle a small amount of baking soda inside, leave overnight, then tap out outdoors. For canvas shoes, tuck a dry tea bag in each shoe for a day. Let shoes air out in a bright, not direct sun spot to avoid fading.
Delicate Materials
For suede, brush with a dry soft cloth only. For leather, wipe with a slightly damp cloth and dry fully before storing. Keep delicates in fabric covers and away from heaters or windows.
Shared Spaces And Mixed Sizes
Assign a shelf or a box per person. Use bold initials on labels. Set a family rule that daily pairs live in the entry only if that person uses them tomorrow. Everything else returns to personal zones.
Quick Projects You Can Finish Today
10 Minute Entry Reset
Clear the floor, lay down a towel or tray, and place two daily pairs per person. Move the rest to the closet or under bed. Shake the towel and put it back.
30 Minute Closet Floor Upgrade
Cut cardboard dividers, slot them on the floor shelf, and line up sneakers and flats. Label the front edge of each slot. Add a small open space for the pair in use.
60 Minute Whole Home Shoe Sweep
Gather all shoes, match pairs, wipe, sort by frequency, and assign zones. Box seasonal pairs and label. Create one behind door hanger for light shoes if you have the hardware. Finish with a photo of the final layout for reference.
Care Basics So Shoes Last Longer
Clean Before You Store
Remove loose dirt with a dry brush or cloth. Wipe with a damp cloth and let shoes air dry. Stuff toes with paper if shape needs support. Keep silica gel packets from packages and drop one into stored boxes if you have them. Avoid sealing wet shoes in any container.
Protect High Wear Spots
Place thin cardboard or a cloth liner on wire shelves to prevent scuffs. Use towel inserts for boots. Keep a small cloth near the entry for quick wipe downs after rain. Simple care reduces odor and extends life.
Frequently Missed Tricks That Make A Big Difference
Face Pairs Opposite Directions
Heel to toe storage shortens depth and prevents tipping. It also lets you count pairs at a glance.
Use Vertical Layers
Two stacked boxes can act as a shelf when a real shelf is missing. Put stable, heavy boxes on the bottom, lighter on top. Do not stack above a safe height so nothing falls.
Pre Pack Sets For Activities
Bundle sport shoes with their socks in a cloth bag or pillowcase. Store the set in the weekly zone so you can grab and go.
Keep Momentum With Simple Checkpoints
Monthly Review
Scan for pairs not worn all month. Move them to the high shelf or decide to let them go. Adjust labels if your routine changed.
Season Switch
When the weather shifts, rotate sandals and boots. Wash the entry towel, refresh baking soda, and reset the tray. Small resets keep the system fresh and clean.
Conclusion
Organizing shoes without buying anything is about smart zones, simple DIY supports, and steady habits. You grouped by how you live, claimed the space you already have, built holders from boxes and hangers, and set clear labels. Keep the daily reset, do a weekly sweep, and rotate by season. Your floor stays clear, mornings run smoother, and every pair has a defined home. Start with the entry today and finish the closet this week. Your shoes are ready for a system that lasts.