We are reader supported. When you purchase through links on our site, we may earn an affiliate commission. Also, as an Amazon affiliate, we earn from qualifying purchases.
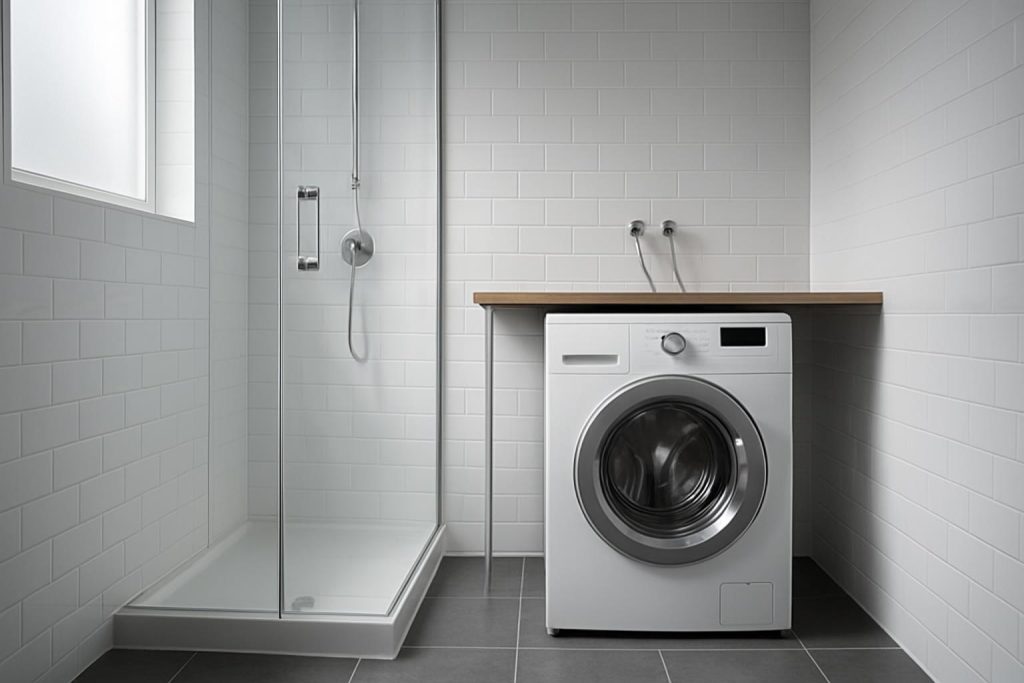
Putting a washing machine in the bathroom can save space and make laundry easier. It can also create safety and moisture problems if you do it wrong. The short answer is yes, you can keep a washing machine in the bathroom, but only if you meet safety rules, follow local codes, and set up the space to manage water, electricity, and humidity. This guide shows what to check, what to change, and how to install it the right way.
Quick Answer
Most regions allow a washing machine in the bathroom if it is placed outside splash zones, has the right electrical protection, and drains correctly. Some places restrict or discourage it. Always confirm your local code and landlord rules before you begin. If you cannot meet the electrical and drainage requirements, choose another location.
What the Rules Usually Require
United States
You can place a washer in a bathroom if you give it a dedicated 20 amp laundry circuit and GFCI protection. The receptacle must not be inside the tub or shower area. The laundry circuit cannot serve other outlets. The bathroom receptacle circuit cannot power the washer. Many homes need a new circuit run to the bathroom to make this legal and safe. Use a licensed electrician to install and label the dedicated laundry receptacle and breaker with GFCI protection.
United Kingdom and Ireland
Bathrooms have strict zones. Zone 0 is inside the bath or shower. Zone 1 is above the bath or shower up to 2.25 m. Zone 2 is the area 0.6 m around zone 1. Sockets are not allowed in these zones. Most washing machines are not allowed in bathroom zones unless they are outside all zones and hardwired via a fused connection unit with RCD protection. In many homes the bathroom is too small to meet these clearances, so the washer is placed in the kitchen or utility. Always ask a qualified electrician if your bathroom size and layout meet the wiring rules.
European Union and many other regions
Common rules require RCD protection, correct IP rating for equipment in splash zones, and placement outside the tub or shower area. Sockets are often not allowed near the bath. If the machine is outside zones and the circuit is protected, it is usually allowed. A hardwired connection is preferred where sockets in bathrooms are restricted.
Renters and building rules
Leases, strata, or HOA rules may forbid adding new plumbing or electrical lines. You may need approval. Some buildings require leak pans and flood sensors. Get written permission before you install anything.
Safety Basics You Must Get Right
Electrical safety
Provide a dedicated circuit sized for the machine. In North America this is typically a 120 V 20 amp circuit for the washer. In the UK and EU, follow local ring or radial rules and fuse ratings. Protect the circuit with GFCI or RCD. This reduces shock risk in a wet room. Never use extension cords, power strips, or adapters. Keep the receptacle or fused spur outside splash zones. Place an accessible isolation switch or breaker so you can cut power quickly.
Route the power cord so it cannot be dripped on or pinched. Keep the back of the machine 4 to 6 inches off the wall to avoid crushing the cord and hoses. If you have a combi washer dryer, confirm the circuit rating and ventilation needs before connecting.
Water and drainage
Use a proper standpipe with a P trap and vent where local code requires it. In the US, a 2 inch diameter standpipe and trap is standard, with the standpipe top 18 to 30 inches above the trap. Do not shove the drain hose into a floor drain or a shower drain. That can cause siphoning, sewer gas, or backups.
If you cannot install a standpipe, drain into a laundry sink with an air gap. In some regions you can connect to a sink trap with a washing machine spigot designed for this purpose. Check local rules. Secure the drain hose to prevent it from popping out during spin.
Install a metal or plastic drain pan under the machine if allowed. Connect the pan to a floor drain if one exists. Use braided stainless steel supply hoses with new rubber washers. Add a flood stop valve or an automatic shutoff valve. Make sure you can reach the hot and cold shutoff valves without moving the machine.
Ventilation and humidity
Bathrooms trap moisture. Washers add more humidity. A strong exhaust fan reduces mold and peeling paint. Choose a fan sized for the room and run it during and 20 minutes after each wash. A humidity sensor switch helps manage this automatically. Keep the bathroom door slightly open during wash cycles if safe to do so. If space allows, use a small dehumidifier after loads, especially in winter.
Floor load and vibration
Washer weight plus water and laundry can exceed 300 pounds. Old floors may bounce and amplify vibration. Place the machine on a level, solid floor. Use anti-vibration pads and adjust the leveling feet so the machine does not rock. Avoid placing it over weak sections of wood floors. On upper floors, keep it near a load bearing wall. If the floor flexes, add a plywood platform that spans joists or consult a contractor about reinforcement.
Choosing the Right Machine
Front load vs top load
Front loaders fit better under counters and allow a countertop over them. They use less water and clean well. Their door seal needs care to prevent odor. Top loaders need more vertical clearance and are harder to place under shelves. In small bathrooms, a compact front loader is often the best fit.
Washer only vs washer dryer combo
If venting a dryer is not possible, a ventless heat pump dryer or a washer dryer combo can work. A combo saves space but dries slower. Heat pump units use less energy and add less heat and humidity to the room. Confirm the required clearances and condensate management for any dryer function.
Size and noise
Measure twice. Leave at least 1 inch on each side and 4 to 6 inches at the back. Check door swing and access to the detergent drawer and filter. Choose models with lower noise ratings and balanced spin systems if you live in an apartment. A lower maximum spin speed can reduce vibration in tight spaces.
Moisture resistance
Choose a machine with a stainless steel drum and quality door seal. Check that the control panel is well sealed. Some models have improved corrosion protection for damp rooms. This helps in bathrooms with frequent steam.
Layout and Clearances
Bathroom zones and safe placement
Keep the machine outside the bath and shower footprint. Maintain at least 60 cm from the edge of the tub or shower where regional rules require it. Avoid direct spray from the shower head. Do not place it under a fixed shower or next to open wet areas. If your bathroom is too small to avoid splash zones, do not install the machine there.
Receptacle or spur location
Place the electrical outlet or fused spur where you can reach it but where it will not be splashed. Mount it on a dry wall, away from hand shower reach. Use GFCI or RCD protection as required. Keep cords tidy and off the floor.
Plumbing access
Install shutoffs at waist height if possible. Mark hot and cold clearly. Use a Y valve only when approved and do not overload a single tap. Check all joints for leaks. Make space to remove and clean the drain filter on the front of the machine. This prevents blockages and odors.
Storage and safety
Store detergents on a high shelf or in a closed cabinet. Keep them dry and away from children and pets. Use a small caddy for pods and stain removers. Place a mat in front of the machine to catch drips when loading. Keep a towel nearby to wipe spills.
Step by Step Installation Plan
1. Confirm rules and power
Check local regulations. If you need a new circuit, book an electrician. Confirm GFCI or RCD protection and breaker size. Plan the outlet or fused spur location outside splash zones.
2. Plan drainage
Decide between a standpipe or a laundry sink connection. Confirm pipe sizes and venting. If you need a standpipe, schedule a plumber. Where allowed, position a drain pan and route it to a floor drain.
3. Measure the space
Measure width, depth, height, and door clearance. Leave space for hoses and vibration. Check the path from the entry door to the bathroom for delivery. Remove obstacles and protect floors.
4. Prepare the floor and wall
Level the floor. If the bathroom has a weak or uneven surface, add a stable platform. Seal any wall penetrations with silicone to reduce moisture ingress. Mount water hammer arrestors if your pipes bang when taps close.
5. Position and connect
Place the machine, leaving the rear clearance. Attach braided hoses with new washers. Open the valves and check for drips. Connect the drain hose to the standpipe or sink with the correct hook and clamp. Plug in or connect to the fused spur.
6. Level and test
Adjust each foot so the machine does not rock. Run a rinse and spin cycle while watching the hoses and drain. Check for vibration and walk. Relevel until stable. Inspect the pan and floor for any signs of leaks.
7. Final tidy up
Secure cords and hoses so they do not rub on sharp edges. Place anti-vibration pads if needed. Set up a small shelf or bin for detergents. Label the shutoff valves.
Moisture and Mold Prevention Routine
Wipe the door seal after the last load of the day. Leave the door and detergent drawer ajar for air flow. Run a monthly tub clean cycle with a cleaner recommended by the manufacturer. Vacuum the drain filter area and remove lint as directed in the manual. Run the bathroom fan during washing and for 20 minutes after. Keep a hygrometer in the room and aim for humidity under 60 percent.
Common Problems and Fixes
Musty smell
Wipe the gasket, clean the filter, and run a hot maintenance cycle. Use less detergent and avoid constant cold washes. Improve ventilation and keep the door open between loads.
Water on the floor
Check hose connections and replace washers. Inspect the drain hose hook height and the standpipe for blockages. Make sure the pan is not overflowing and the floor drain is clear. Add a leak detector alarm to catch issues early.
Tripped breaker
Confirm the washer is on a dedicated circuit with GFCI or RCD. Look for overloaded circuits or extension cords. Have an electrician test the outlet and breaker if trips repeat.
Excessive vibration
Relevel the machine and add anti-vibration pads. Reduce spin speed for heavy loads. Move the machine so it sits across joists or near a structural wall. Check that all shipping bolts were removed at delivery.
When to Call a Pro
Hire an electrician if you need a new circuit, a fused spur, or GFCI or RCD upgrades. Hire a plumber for a new standpipe, venting, or any drain changes behind walls. Call a contractor if the floor is not level or seems weak. Professional help is cheaper than dealing with a flood or an insurance claim.
Cost and Budget Tips
Expect electrical work to cost more if your panel is full or far from the bathroom. Plumbing costs vary by access and distance to existing drains. Save money by choosing a compact machine that fits without moving walls, by using braided hoses with manual shutoffs, and by adding a leak alarm. Avoid cutting corners on GFCI or RCD protection or on drain sizing.
Smart Upgrades That Make Bathroom Laundry Better
Add a humidity sensing fan to prevent mold. Install an auto shutoff valve that closes when a leak is detected. Use a slim rolling cart between the toilet and machine for detergents and tools. Place a magnetic parts tray on the side of the machine for coins and screws. Label a small bin for lint and hair to keep drains clear.
Pros and Cons at a Glance
The benefits include space savings, easy access to water, and a short carry distance for clothes. The downsides include higher moisture, stricter electrical rules, drainage challenges, and noise in a small room. If you can meet the safety rules and control humidity, the bathroom can be a practical spot.
Conclusion
You can keep a washing machine in the bathroom if you plan the electrical supply, drainage, and ventilation with care. Keep it out of splash zones. Use a dedicated protected circuit. Install a proper standpipe or approved sink connection. Control humidity with a fan and regular cleaning. Stabilize the floor and level the machine to cut vibration. When in doubt, hire licensed pros for the parts you cannot do safely. With the right setup, bathroom laundry can be safe, tidy, and reliable for the long term.